
 AI
AI
Application: https://grc.legale.io
Audience: compliance administrators, contributors, and employees
Last updated: August 20, 2026
This manual explains how to use the GRC platform step by step: signing in, managing frameworks and controls, uploading evidence, handling tasks and policies, connecting external systems, and reviewing the audit trail.
Getting started
Signing in
- Open https://grc.legale.io in a modern browser (Chrome, Edge, Firefox).
- Enter your username and password and select Log in. Tick Remember me to stay signed in on that device.
- If configured by your administrator, you can also sign in with Google or Microsoft using the buttons under the login form.
Forgot your password
- On the login page, select Forgot your password?
- Enter your account email and submit. If the address exists, you will receive an email with a reset link.
- Follow the link, set a new password, and sign in again.
Language and theme
- Use the language selector in the top bar to switch between English, Español, and Português. The choice is remembered on your device.
- Use the moon/sun icon in the top bar to switch between light and dark theme.
Signing out
Open the account menu (your initial, top-right corner) and select Sign out.
Finding your way around
- The left sidebar groups modules: Compliance, Risk, Governance, Trust, and Connections. You only see the modules your role allows.
- Every module has a search box in the top bar (“Search this module…”) that filters the current list.
- The Run monitoring button in the top bar re-evaluates monitors and alerts.
Roles and permissions
Access is controlled per module by your administrator. In general:
| Role type | What you can do |
|---|---|
| Administrator / writer | Full create, edit, and delete rights in the modules granted to you |
| Read-only (auditor) | View permitted modules; all action buttons are hidden and blocked |
| Employee | Limited view; mainly tasks assigned to you and policies to acknowledge |
| Customer (portal) | Only the external Customer Portal, not the internal application |
If a section described in this manual is not visible to you, your role does not include it — contact your administrator (see Users and access management).
Dashboard
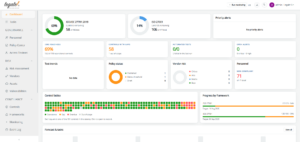
The dashboard is your compliance overview.
- Stat cards — controls in scope, operational controls, controls with gaps, and controls declared automated.
- Control lattice — one square per control in your catalog. Colors:
- Green — Operational
- Orange — Gap (needs remediation)
- Red — Overdue: the control is in scope but has not been verified in more than 90 days (even if it was operational). Re-verify it to clear the red state.
- Grey — Out of scope
Hover a square to see the control code and name; click it to open the control.
- Progress by framework — readiness bar per framework with its target date.
- Upcoming tasks — the next open tasks by due date.
Frameworks
Where: Compliance → Frameworks (/marcos/)
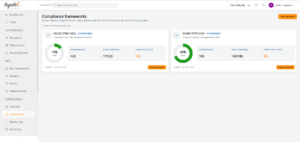
A framework is a compliance standard you work against (for example ISO/IEC 27001:2022). Each framework shows its requirements and how your controls cover them.
Add a framework
- Go to Frameworks and select Add framework.
- Choose an option from the catalog — for example ISO/IEC 27001:2022, ISO/IEC 27701, SOC 2, or HIPAA — or choose Custom to define your own (name, short name, description).
- Optionally set a target date (your certification or readiness deadline).
- Save. Catalog frameworks are created with their full requirements list — ISO 27001 arrives with all 123 requirements: 30 management-clause requirements (Clauses 4–10, the ISMS) and 93 Annex A controls.
Note: Frameworks already added disappear from the catalog list, so they cannot be added twice. Custom frameworks start with no requirements.
Work with a framework
Open a framework to see:
- Stat cards — total requirements, in scope, ready, and readiness percentage.
- Section navigator (left side) — jump between ISMS clauses (Context, Leadership, Planning, Support, Operation, Performance evaluation, Improvement) and Annex A themes (Organizational, People, Physical, Technological). You can also filter by readiness (Ready / Not ready).
- Scope tabs — All requirements / In scope / Out of scope.
- Search — find requirements by code or title.
- Requirements table — each row shows the requirement code and title, the mapped controls (colored pills linking to each control), a scope toggle (mark a requirement out of scope if it does not apply — this is your Statement of Applicability decision), and its readiness (Ready when at least one mapped, in-scope control is operational).
Export the Statement of Applicability (SoA)
On the framework page, use the SoA export to download a CSV of all requirements with scope, mapped controls, and readiness — the document your auditor will ask for.
Controls
Where: Compliance → Controls (/controles/)
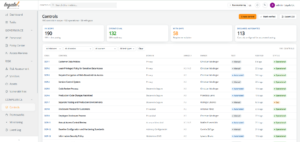
Controls are the safeguards your organization operates (for example “Least-Privileged Policy for Sensitive Data Access”). Each control is mapped to framework requirements and backed by evidence.
Browse controls
- Filter by status, domain, owner, or test type; search by code or name.
- Export CSV downloads the current list.
- Mark verified (administrators) stamps today’s date as the verification date on all operational controls — use it after a periodic review. Controls not verified for more than 90 days show as Overdue (red) on the dashboard.
Create a control
- Select Create control. A catalog picker opens with standard controls that are not yet in your organization.
- Search by code or name (for example “DCF-10” or “encryption”).
- Either:
- Pick a catalog control — the form opens pre-filled with its code, name, domain, and description. The code cannot be changed (catalog codes are fixed).
- Choose Other — add a custom control from scratch — a blank form opens; you define the code and all fields yourself.
- Complete the form:
- Control code / name / description — what the control is.
- Domain — internal category used for filtering (e.g. “Access and Identity”).
- Frameworks — tick the frameworks this control belongs to.
- Requirements — after ticking a framework, its requirements appear grouped below; tick every requirement this control addresses (a control can map to many, e.g. A.5.15, A.5.16, A.8.2).
- Owner, Status, Scope, Test type — who runs it, whether it is Operational or a Gap, whether it counts for readiness, and whether verification is manual or automated.
- Save. The control appears in the list and on the framework pages of every requirement you mapped.
Manage an existing control
Open a control to see its full record: domain, mapped requirements, owner, test type, scope, last verification date, plus its monitoring tests, documentation and evidence, mitigated risks, associated policies, and tasks.
- Edit control — change any field, including requirement mappings.
- Mark as gap / Mark as operational — flip the status when its condition changes; this also updates the verification date.
- Create task — generate a remediation task linked to this control (see Tasks).
- Delete — administrators only. A confirmation page lists the consequences (its monitoring tests, evidence, and tasks are deleted; linked policies and access reviews keep their records but lose the mapping). This cannot be undone.
Documents and evidence
Where: on each control under Documentation and evidence, or Compliance → Evidence Library (/evidencia/)
Evidence proves a control operates: policies, screenshots, reports, exports.
Add a document to a control
- Open the control and select Add document.
- Fill in:
- Name — descriptive title (e.g. “Least Privilege Policy for Customer Data Access”).
- Owner — the person responsible for keeping the document current.
- Creation date — when the document was produced.
- Renewal date (optional) — when this version was last renewed.
- Expiry date — when the document stops being valid. The platform sends reminders 30 days and 7 days before expiry, and flags the evidence when expired.
- File — the document itself.
- Select Upload document.
File rules: maximum 20 MB; allowed formats: PDF, DOC/DOCX, XLS/XLSX, CSV, TXT, PNG, JPG/JPEG.
Keep evidence current
- Renew — upload a new version when the document is updated or re-issued. The old version is preserved in the history chain (auditors can see the succession); the new version becomes current.
- Edit — correct metadata (name, dates, owner) without replacing the file.
- Download — retrieve the stored file at any time.
Evidence Library
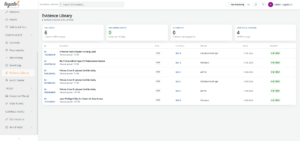
The Evidence Library lists every document across all controls with its status (current, expiring, expired), so you can review upcoming renewals in one place instead of control by control.
Tasks
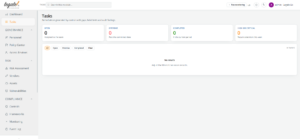
Where: Tasks (/tareas/)
Tasks track remediation and recurring work.
- Create from a control: open the control and select Create task. The task gets a code (T-001, T-002…), a 14-day due date, high priority, and is assigned to the control’s owner. Adjust as needed.
- Complete a task: tick it in the task list. Completed tasks can be reopened.
- Overdue tasks are highlighted and counted in the red badge in the sidebar/top bar.
Monitoring
Where: Compliance → Monitoring (/monitoreo/)
Monitoring lists the recurring checks associated with controls. Selecting Run monitoring (top bar) re-evaluates checks and refreshes alerts.
Note: Current scope: monitors are registered and tracked manually today. Automated checks driven by Connections (e.g. Azure) are on the roadmap; as they ship, results in this module will update from real data instead of manual verification.
Policy Center
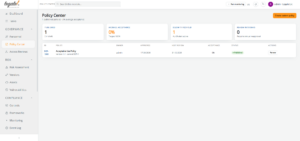
Where: Governance → Policy Center (/politicas/)
Policies are your governing documents (Acceptable Use, Access Control, etc.) with versions and acknowledgement tracking.
For policy owners (administrators)
- Create a policy — select New policy, fill in the name, version, owner, and content/reference. It starts as a draft.
- Publish — when approved, publish the policy. Published policies are visible to employees for acknowledgement.
- Renew — when the policy is reviewed (with or without changes), renew it to refresh its review date and, if needed, bump the version.
- Track the acceptance percentage on each policy — it reflects how many employees have acknowledged the current version.
For employees
- Open My Policies (shown in your menu when you have pending policies).
- Read each published policy and select Accept. Your acknowledgement is recorded with your name and date — this is audit evidence.
Personnel and Access Reviews
- Personnel (Governance → Personnel,
/personal/) — the register of people in scope for compliance: role, status, and per-person security attributes (MFA enabled, disk encryption, endpoint protection). Keep it current when people join or leave; it feeds the compliance statistics. - Access Reviews (Governance → Access Reviews,
/revisiones/) — periodic campaigns reviewing who has access to what, with review dates and status. Detailed per-account review items will expand as the Azure account sync feature ships (see Connections).
Risk, Vendors, Assets, Vulnerabilities
The Risk group contains four registers:
- Risk Assessment — the risk register: identified risks with likelihood, impact, treatment, and linked controls that mitigate them.
- Vendors — third parties with their tier, compliance attestations (SOC 2 / ISO), DPA status, and review dates.
- Assets — inventory of systems and equipment in scope.
- Vulnerabilities — tracked vulnerabilities with severity and remediation SLAs.
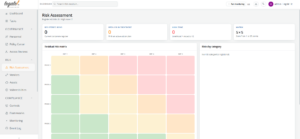
Each register works the same way: browse, filter, search, and open a record to see its details and linked records.
Connections
Where: Connections (bottom of the sidebar, /conexiones/) — administrators only.
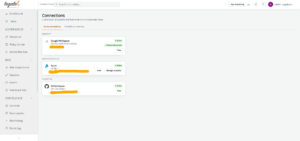
Connections link external systems so the platform can (progressively) verify controls and collect evidence automatically. The page has two tabs: Active connections (what is linked, grouped by category, with a green Active or red Error pill) and Available connections (what you can add).
GitHub Issues (ticketing)
What it is for: read-only access to a GitHub repository’s issues, used for ticketing evidence.
Step 1 — create the token in GitHub (needs access to the target repository):
- Go to GitHub → Settings → Developer settings → Personal access tokens → Fine-grained tokens → Generate new token.
- Resource owner: your organization (e.g. despapeliza-llc), not your personal account.
- Repository access: Only select repositories → choose the repository.
- Permissions → Repository permissions → Issues: Read-only (Metadata Read-only is added automatically).
- Set an expiration per your security policy, generate, and copy the
github_pat_…value immediately — GitHub shows it only once.
Step 2 — connect in the GRC:
- Connections → Available connections → GitHub Issues → Connect.
- Repository: owner/repository (e.g. despapeliza-llc/Proyecto-PDP).
- Access token: paste the token. Alias: keep or adjust the display name.
- Select Connect. The platform validates the token against GitHub before saving; on success you land on the connection’s page with a green “connected” banner.
Azure (infrastructure)
What it is for: read-only access to your Azure subscription and directory, the base for infrastructure checks and account sync.
Step 1 — prepare the app registration in Azure (once, by an Azure admin):
- Azure portal → Microsoft Entra ID → App registrations → New registration (single tenant). Copy the Application (client) ID and Directory (tenant) ID from its Overview page.
- Certificates & secrets → New client secret → copy the Value immediately (visible only once). Note its expiry date.
- API permissions → Add a permission → Microsoft Graph → Application permissions → add all five:
User.Read.All,Reports.Read.All,Directory.Read.All,Policy.Read.All,AuditLog.Read.All→ Grant admin consent. - Subscriptions → your subscription → Access control (IAM) → Add role assignment → role Reader → assign it to the app.
Step 2 — connect in the GRC:
- Connections → Available connections → Azure → Connect.
- Enter the Tenant ID, Subscription ID, Application ID, and Application secret; optionally set an alias; leave User identity mapping on UPN unless your directory usernames differ from work emails.
- Select Connect. The platform verifies the credentials and the Reader role before saving.
- If an amber notice appears saying Microsoft Graph permissions are missing, complete Step 1.3 (permissions + admin consent) and then use Test connection — the notice clears when the check passes.
Managing any connection
Open a connection (View) to:
- See the status banner (green connected with last-verified time, or red with the error).
- Review account information (identifiers are shown; secrets are always masked and can never be viewed again).
- Rename it: type in the Alias field and select Save alias.
- Test connection — re-validates credentials now and updates the status.
- Disconnect — removes the connection and its stored credentials after a confirmation page.
All connection actions (create, test, disconnect) are recorded in the Event Log.
Security notes: credentials are encrypted at rest and never displayed after saving. When a token or secret expires, the connection flips to Error — disconnect and reconnect with a fresh credential. Track secret expiry dates in your calendar.
Event Log
Where: Compliance → Event Log (/eventos/)
The Event Log is the platform’s audit trail — every significant action (sign-ins, control changes, evidence uploads, connection tests, policy publications) with who, what, when, and from which IP address.
- Filter by category chips (Access, Controls, Evidence, Frameworks, Alerts, Connections, Policies…), by actor, and by date range; combine filters with the search box.
- Timestamps show as relative time (“2 hours ago”); the exact time appears on hover.
- The object of an event links to the record when it still exists.
- Results are paginated (50 per page).
- Export CSV downloads what you are currently filtering (up to 5,000 rows).
Users and access management
Where: Trust → User Access (/usuarios/) — administrators only.
- Create a user: User Access → New user → set name, email, role, and the module matrix (which modules the user can view and which they can write to).
- Edit a user to change their role or module permissions at any time.
- Suspend a user to block access without deleting their history (their past actions remain in the Event Log).
Follow least privilege: give read-only access unless the person actively maintains that module, and use the auditor role for external reviewers.
Customer Portal (Trust)
Where: Trust → Customer Portal
The portal lets customers request compliance documents under NDA:
- A customer account (portal role) signs in and sees the documents available.
- The customer submits a document request.
- An administrator reviews and approves or rejects the request; approved documents become available to that customer.
Notifications
- The bell icon in the top bar shows your unread notifications (alerts raised, tasks due, evidence expiring).
- Alerts are generated automatically by the platform’s rules (for example: a control marked as gap, or evidence reaching 30/7 days before expiry) and resolve themselves when the condition clears.
- Acknowledging an alert records who acknowledged it and keeps it from re-notifying.
Troubleshooting
| Problem | Cause and solution |
|---|---|
| “Please select a file” when adding a document | The file field is empty — choose a file before submitting. |
| “Unsupported format…” on upload | Only PDF, DOC/DOCX, XLS/XLSX, CSV, TXT, PNG, JPG are accepted. |
| “The file cannot exceed 20 MB” | Compress or split the document. |
| “A control with this code already exists” | Each control code is unique per organization. Pick the existing control instead, or use a different code for a custom control. |
| GitHub connect: “Repository not found, or the token lacks access” | The token was created on the wrong resource owner (personal instead of organization) or the repository was not selected. Regenerate the token. |
| GitHub connect: “Invalid or expired access token” | The token was revoked or has expired — create a new one. |
| Azure connect: “Tenant not found” / “Application not found” / “Invalid application secret” | One of the IDs or the secret is wrong — copy them again from the app registration’s Overview page and Certificates & secrets. |
| Azure connect: “The app has no access — assign the Reader role” | The Reader role assignment on the subscription is missing (Azure → Step 1.4). |
| Azure: amber Graph permissions notice | The five Graph application permissions are not granted or admin consent is missing; fix in Entra, then Test connection. |
| A connection shows Error | Open it and select Test connection to see the exact message. Expired credentials require disconnect + reconnect. |
| A control shows red (Overdue) on the dashboard | It has not been verified in over 90 days. Review it and toggle/confirm its status, or use Mark verified after a periodic review. |
| I can’t see a module | Your role doesn’t include it — request access from an administrator. |
| Password reset email never arrives | Check spam first; if nothing, contact an administrator (email delivery may not be configured yet). |
Prepared by the QA team. For corrections or additions, contact the compliance administrator.