 AI
AIObjective: Prepare and send a document to be signed.
Español
English
Português
Steps:
1. Access the document repository
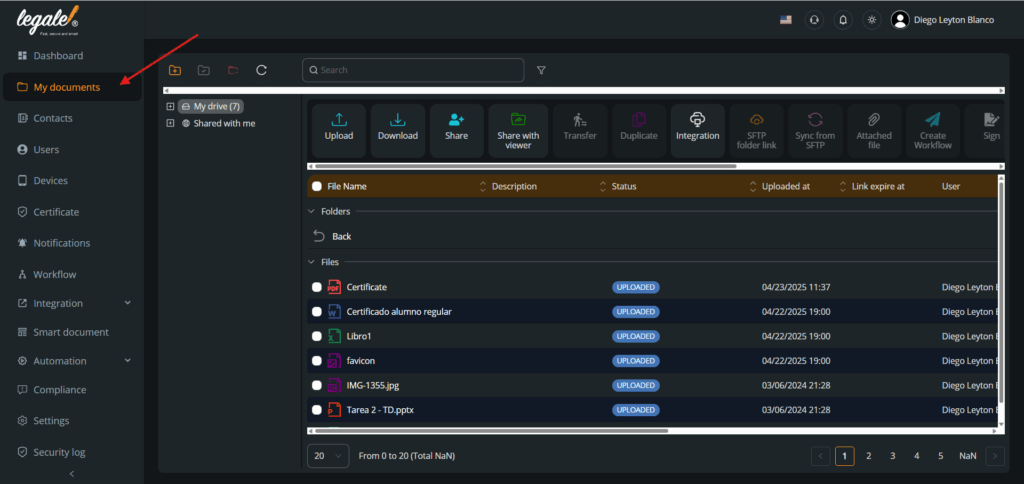
From the sidebar, go to My Documents and locate the file you want to send for signature.
2. Select the document
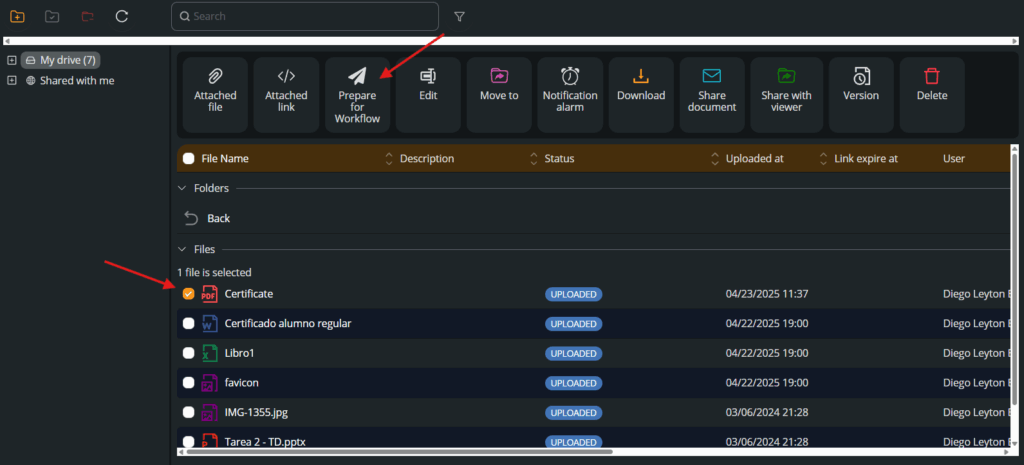
Click the checkbox next to the document to activate the top action bar and click on Prepare for Workflow.
3. Prepare for workflow
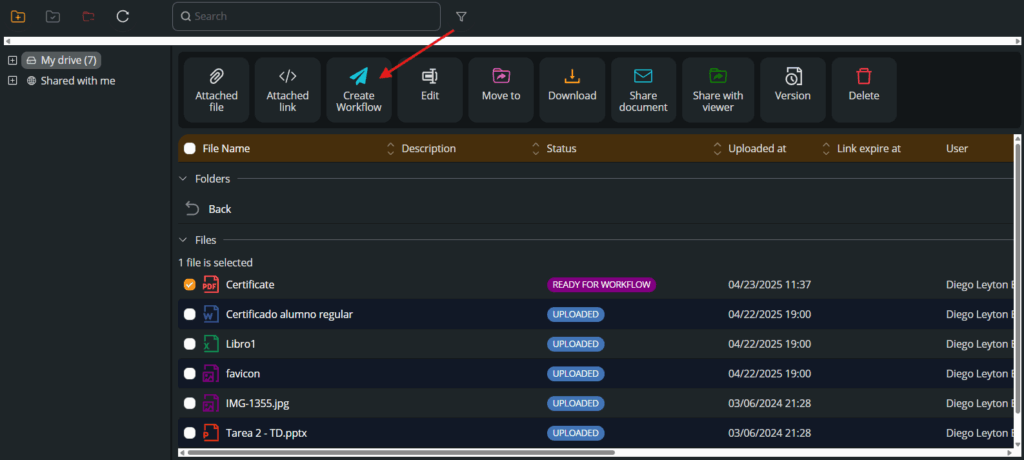
Click on Create Workflow to start the signing configuration process.
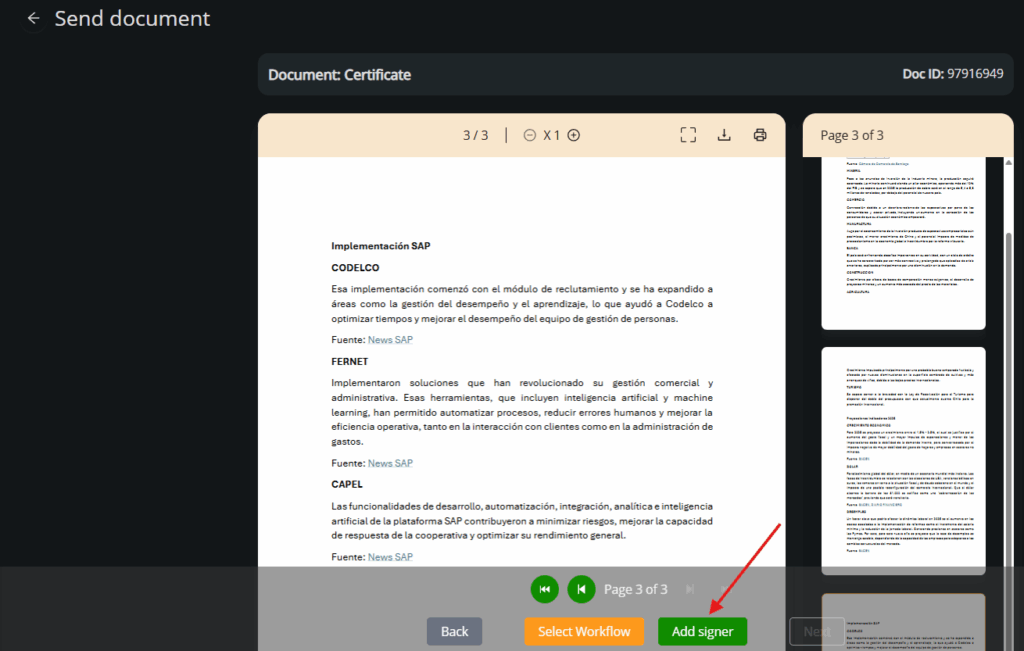
4. Add signer(s)
Use the Add signer button to assign who will sign the document.
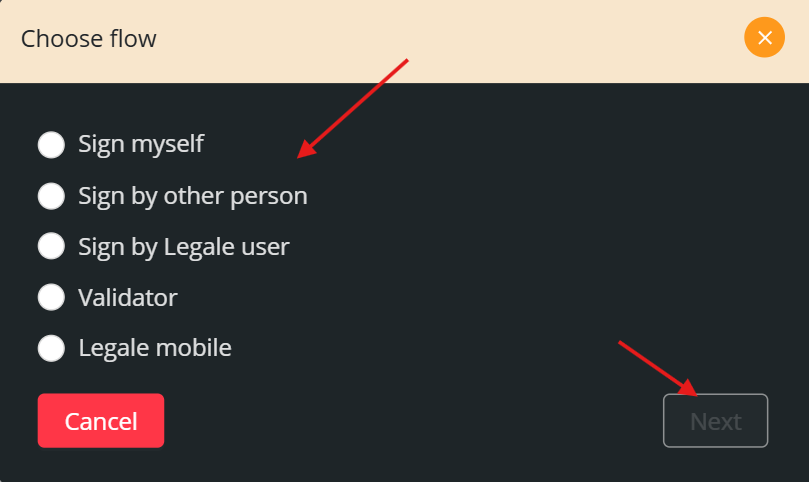
5. Choose the signature type
Select one of the following options according to your case:
-
Sign myself
-
Remote
-
Remote SMS
-
Cloud certificate
-
Local certificate
-
Remote advanced signature
-
-
Sign by other person
-
Remote
-
Remote SMS
-
Remote advanced signature
-
-
Sign by Legale user
-
Cloud certificate
-
Local certificate
-
Define by signer
-
-
Validator
-
Contact
-
Legale user
-
-
Legale mobile
-
Select tablet
-
After selection, click Next.
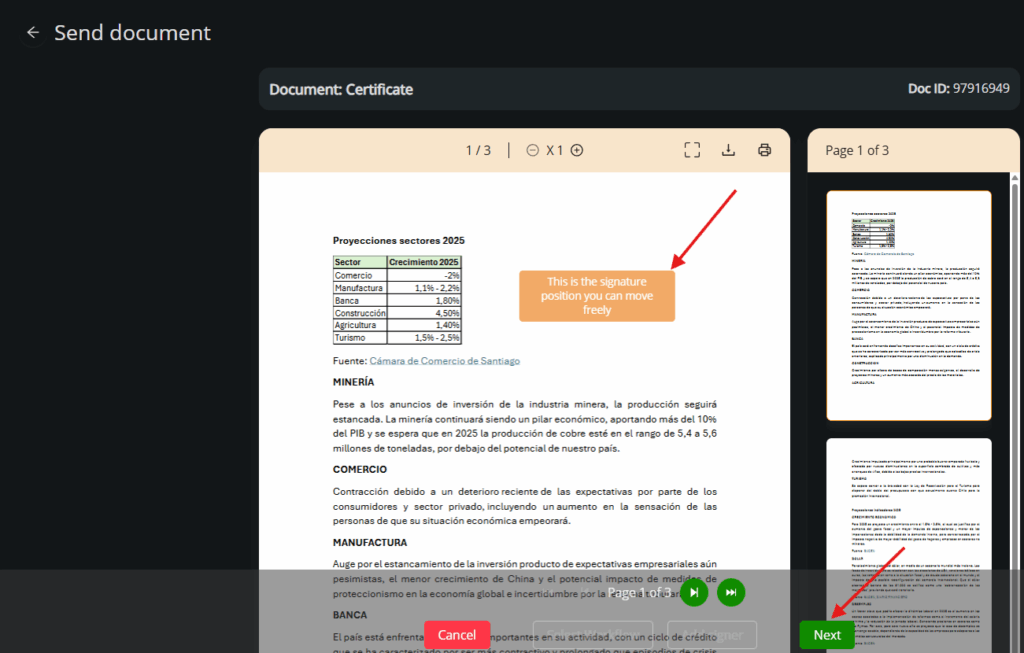
6. Adjust the signature position
Drag the signature box to the desired location within the document and click Next to proceed.
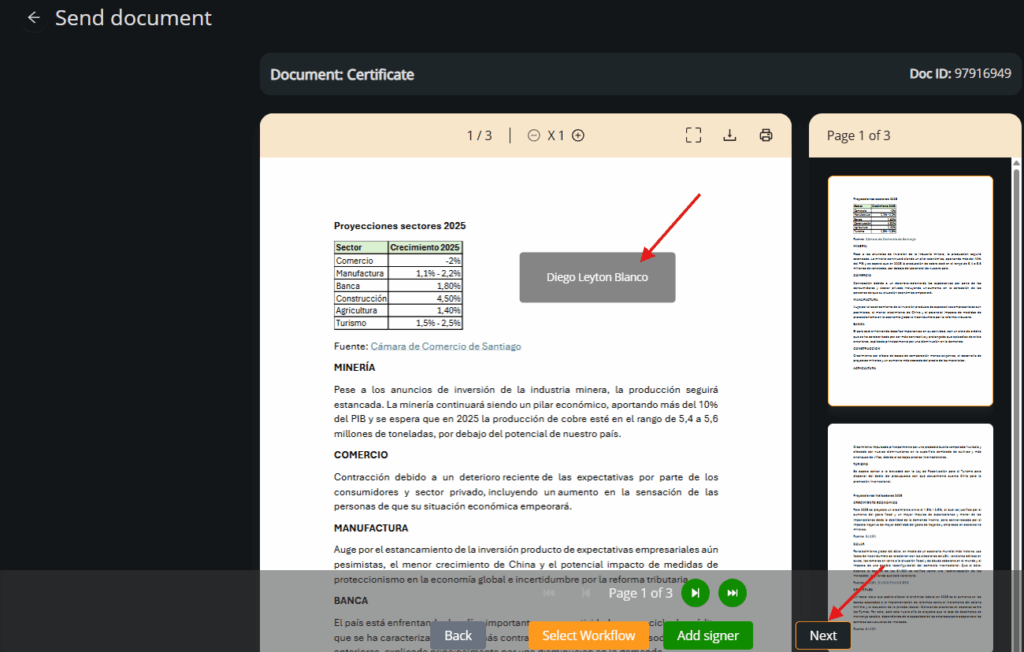
7. Confirm signer and workflow
Check signer details and click Next to configure the workflow.
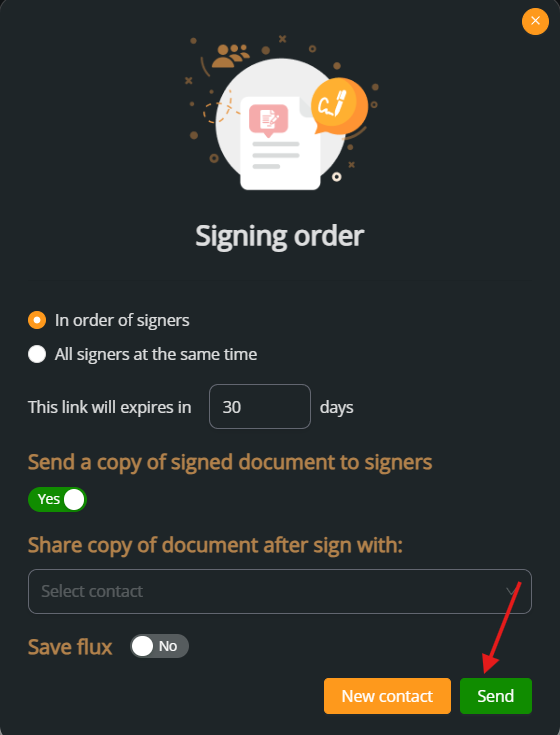
8. Final settings and send
Choose whether signatures should be in order or simultaneous. Set expiration for the signing link and decide if a signed copy should be emailed.
Click Send to launch the process.
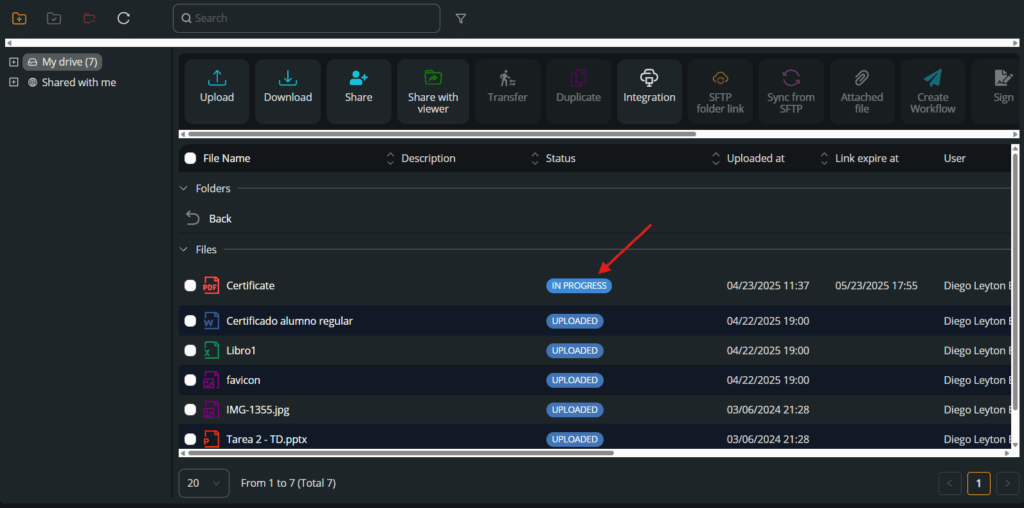
9. Check document status
After sending, the document status will change to IN PROGRESS, indicating the signature process has begun.
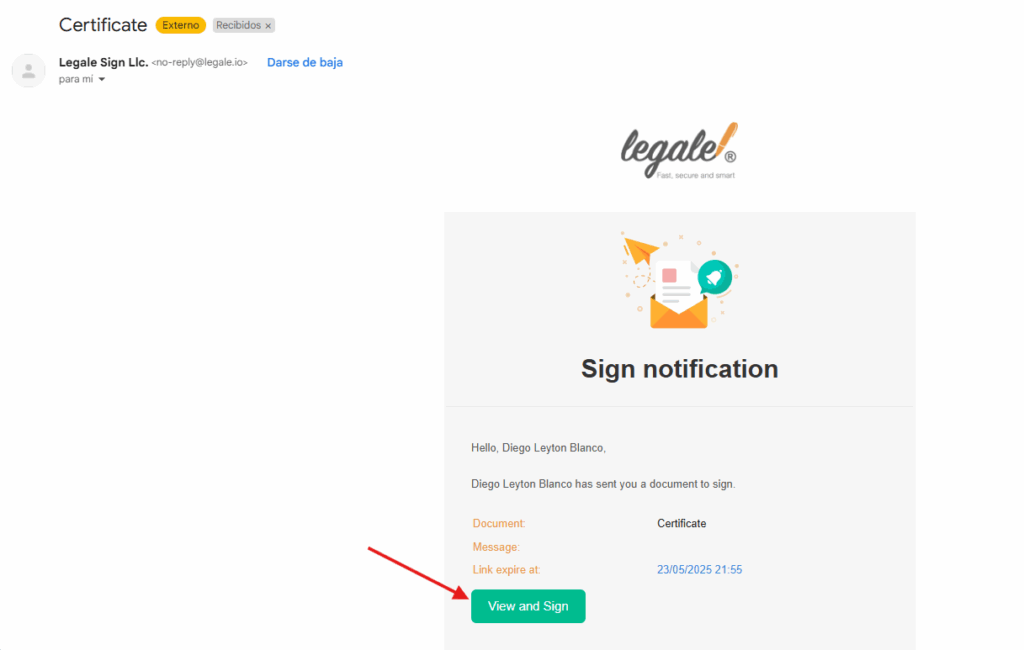
10. Email notification to signer
The signer will receive an email with a secure link to View and Sign the document.
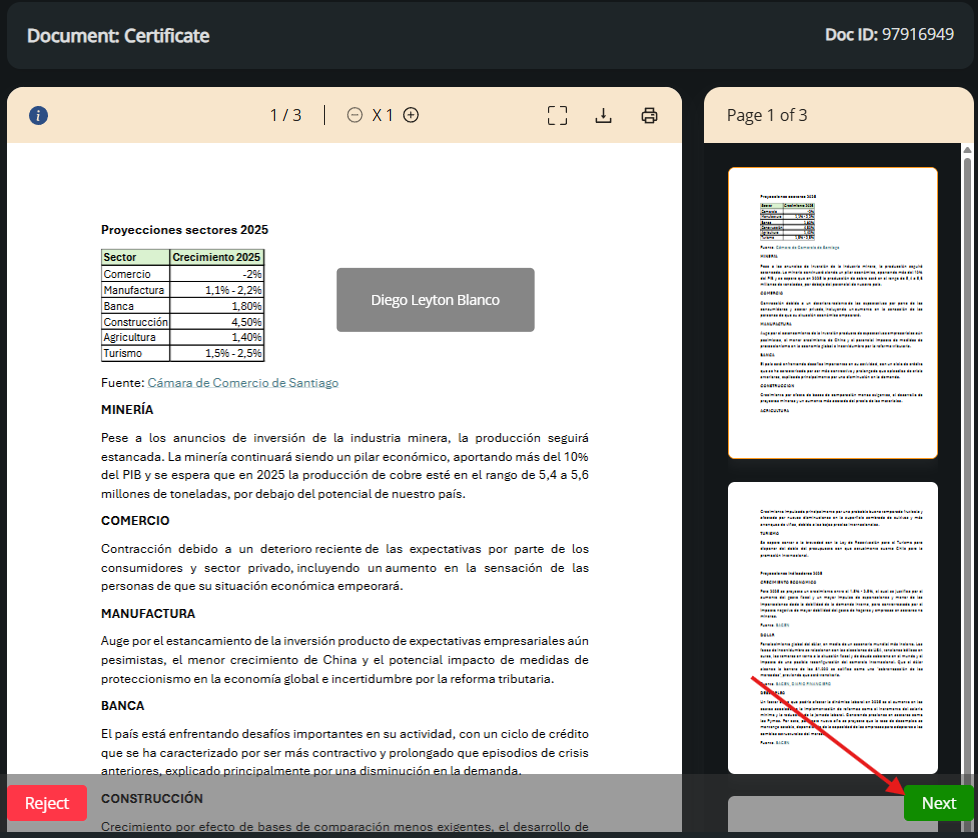
11. Signer reviews the document
The recipient opens the signing link and reviews the document before proceeding. They can click Next to continue or Reject if the content is incorrect.
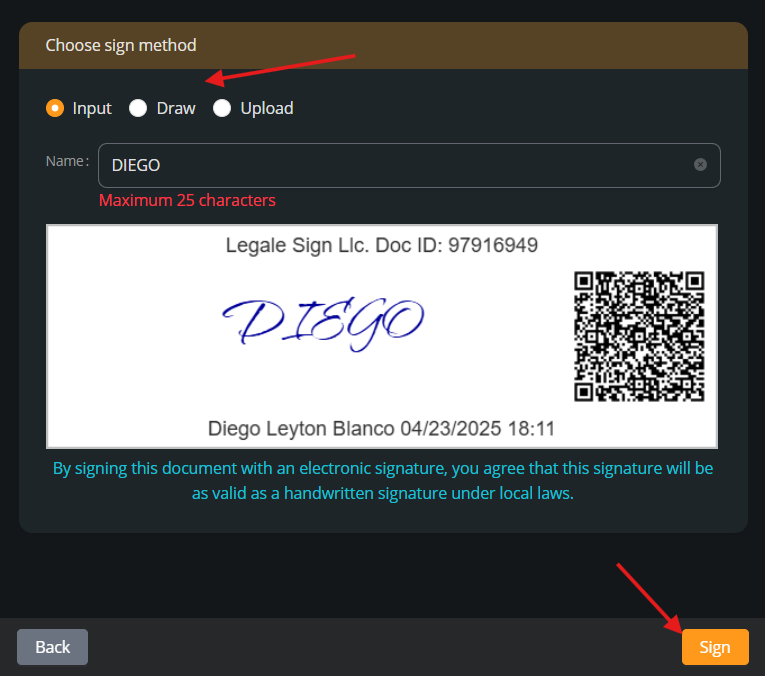
12. Choose the signing method
The signer selects how they want to sign:
-
Input: Type your name.
-
Draw: Sign using a mouse or touchpad.
-
Upload: Use a pre-generated signature image.
Once ready, click Sign.
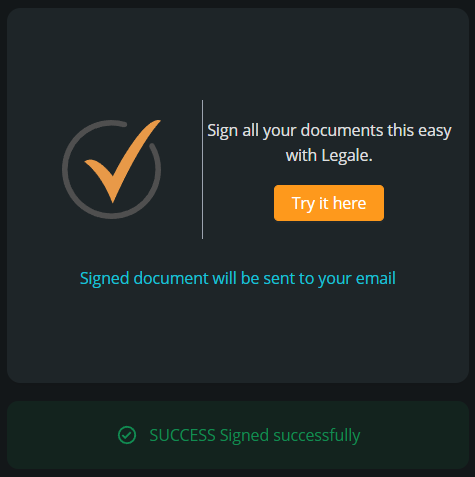
13. Confirmation of successful signature
A success message is shown. The signed document will be sent automatically to the email address of the signer.
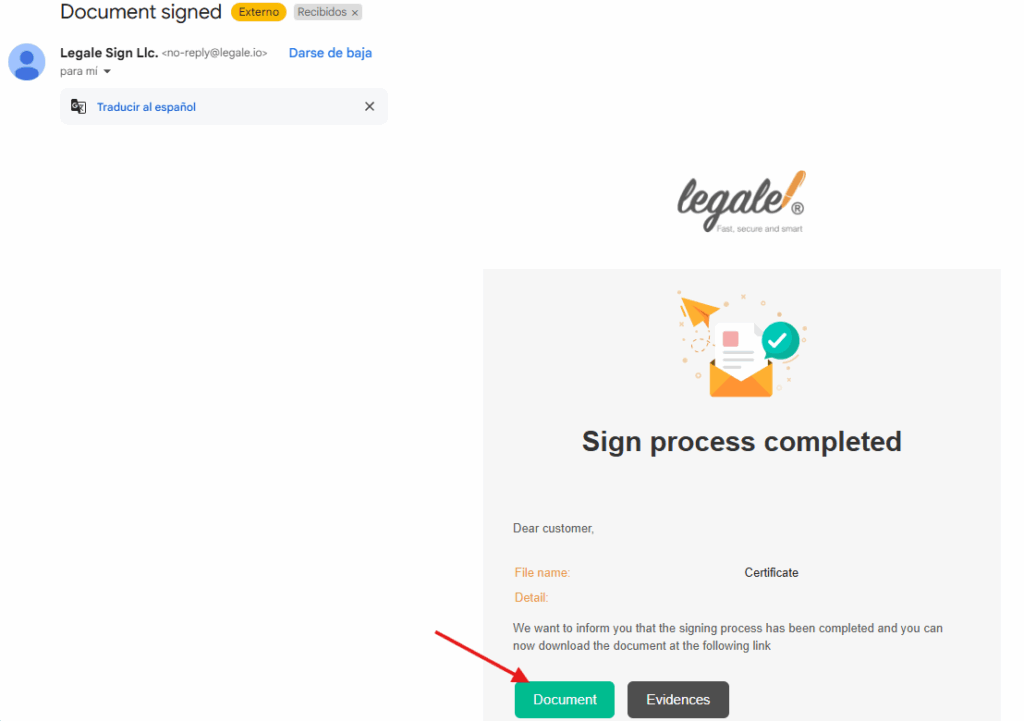
14. Email confirmation to the signer
The signer receives an email titled “Document signed”, with secure links to:
-
Download the signed document
-
Access evidences
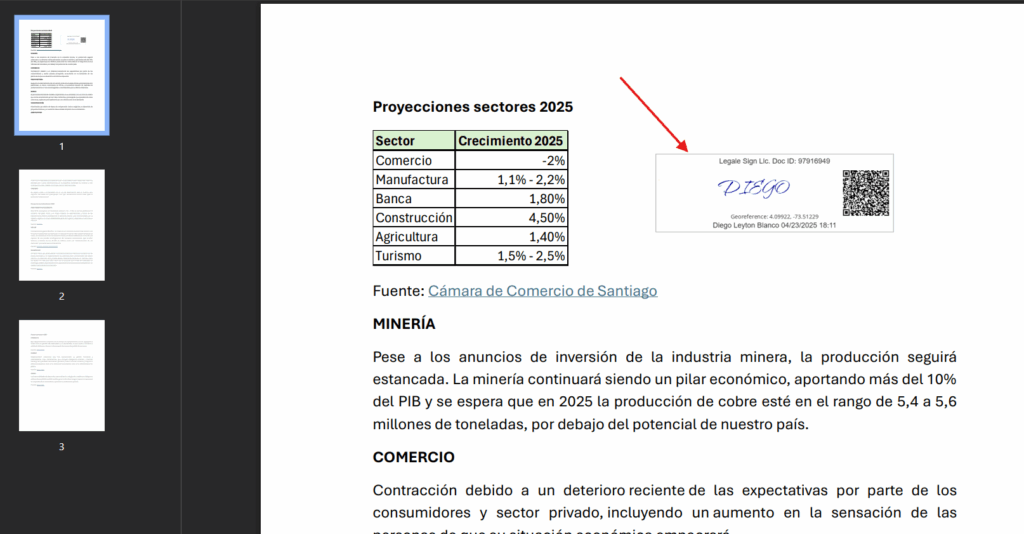
15. Visual confirmation of embedded signature
The document now includes the electronic signature block with metadata (name, timestamp, QR, geolocation, etc.).
16. Document status is updated
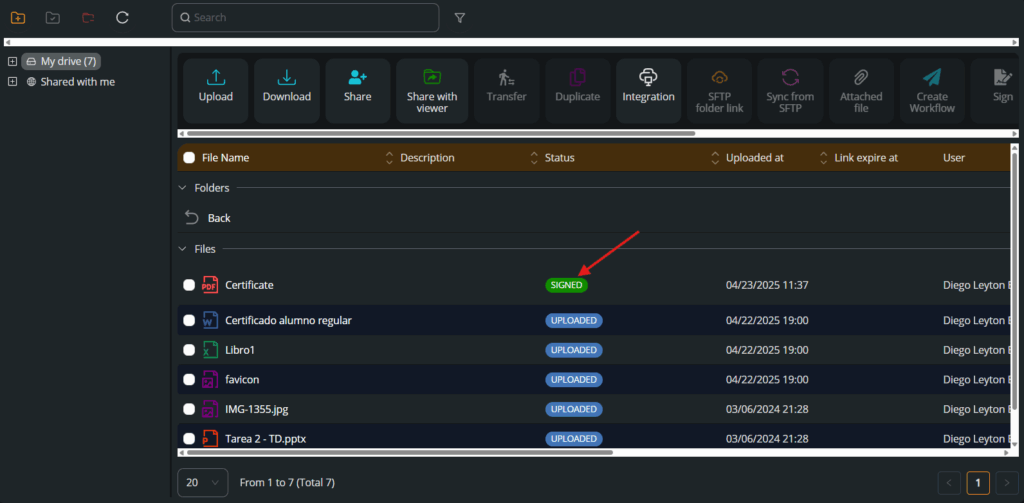
Back in My Documents, the file’s status changes to SIGNED, confirming that the process was completed successfully.