 AI
AIObjective: Set up automatic workflows to improve efficiency.
Español
English
Português
Steps:
1. Associate a Smart Document
Select the smart document that will be used as the base for the automation flow. In this example, it contains 4 fields and a signature area.

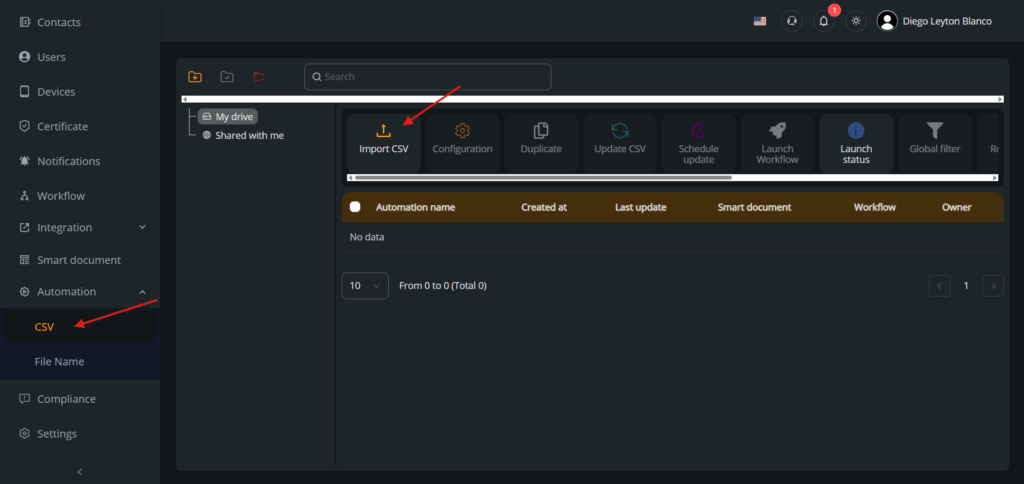
2. Access the Automation module
From the left-hand menu, select the Automation option to begin configuration. Then press the Import CSV button to select your file.
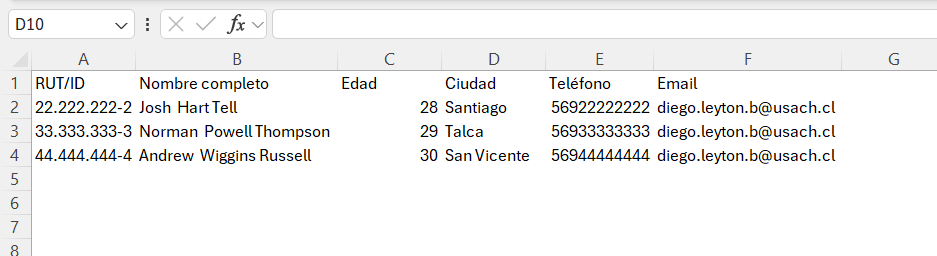
3. Create the CSV with recipients
Upload a CSV file that contains the signers data and other variable fields.
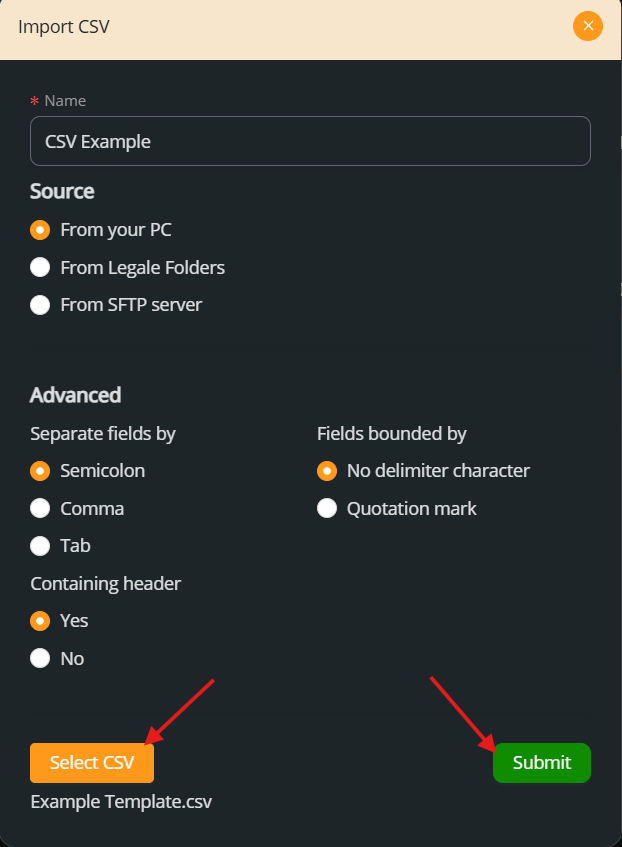
4. Select the document
Make sure to name the file properly, then press Select CSV, choose the document, and click Submit to confirm.
5. Confirm the document status
In the main view, you can confirm the file has been successfully uploaded.
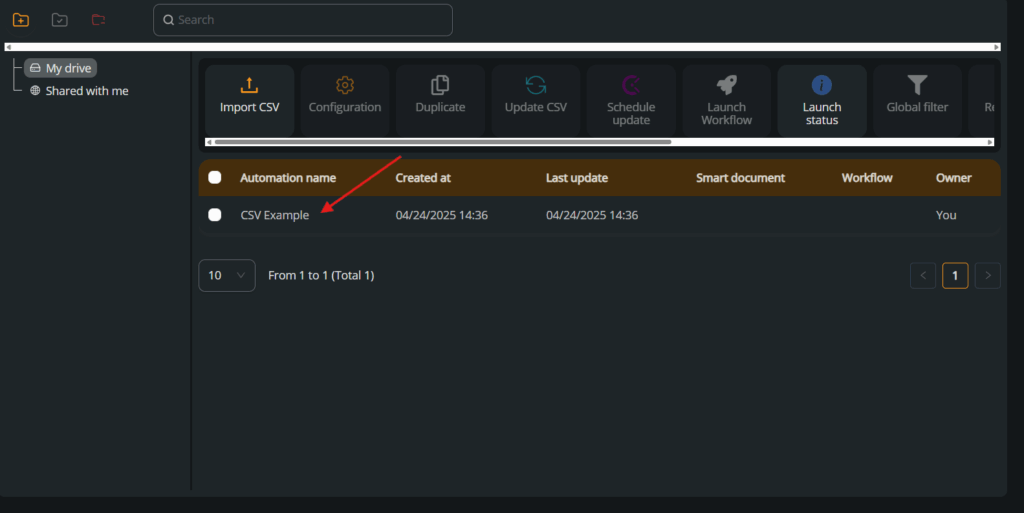
6. Configure actions
Click on the created automation to unlock the Configuration option.
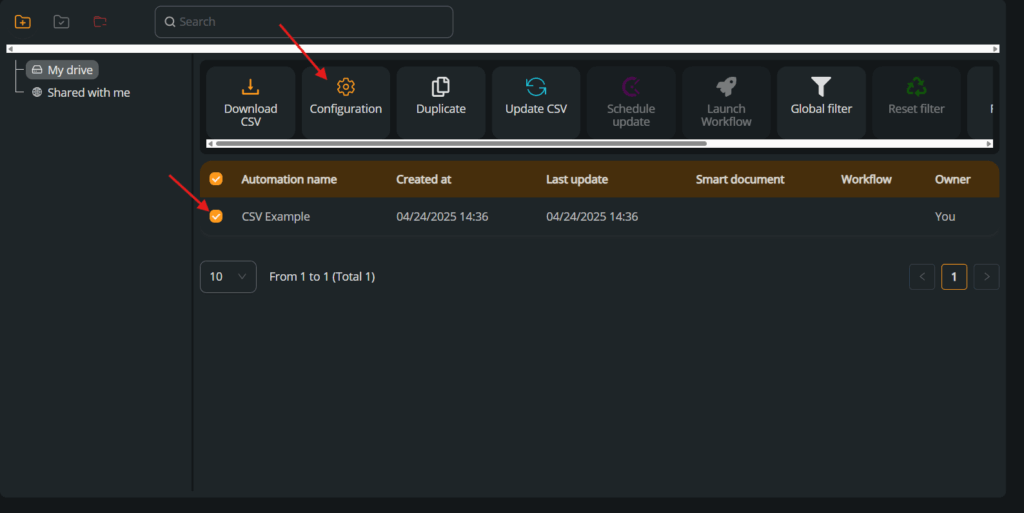
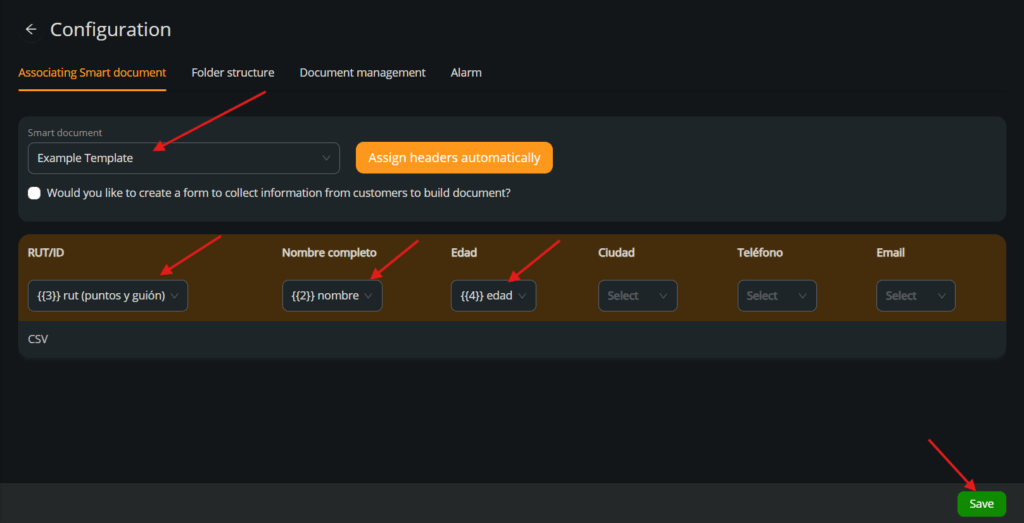
7. Select the Smart Document
Manually associate the smart document shown in step 1. Then, map the CSV columns to the corresponding fields in the document. In this case: name, ID, and age.
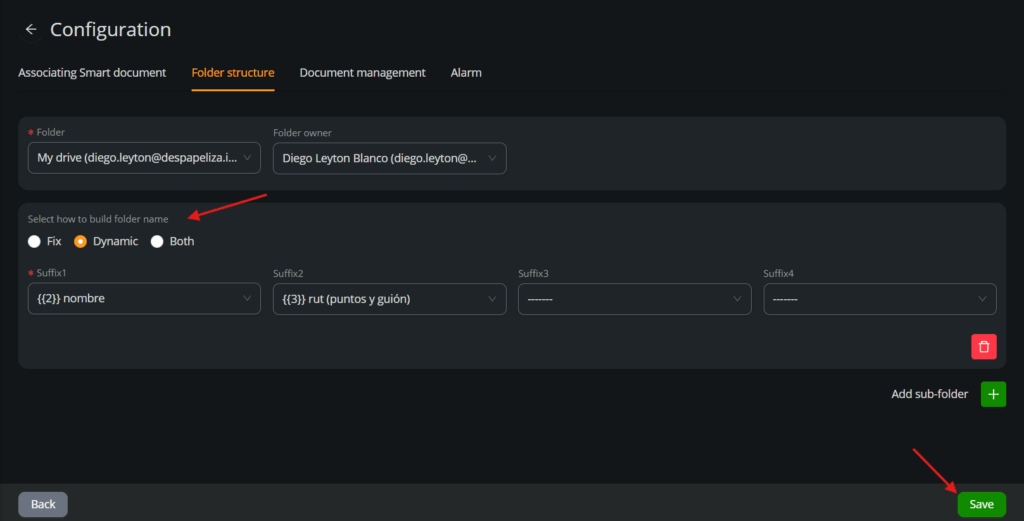
8. Configure the folder structure
Choose where the signed files will be stored and under which user. Select a dynamic folder so each recipient gets their own folder with the signed file. Name the folder using associated fields.
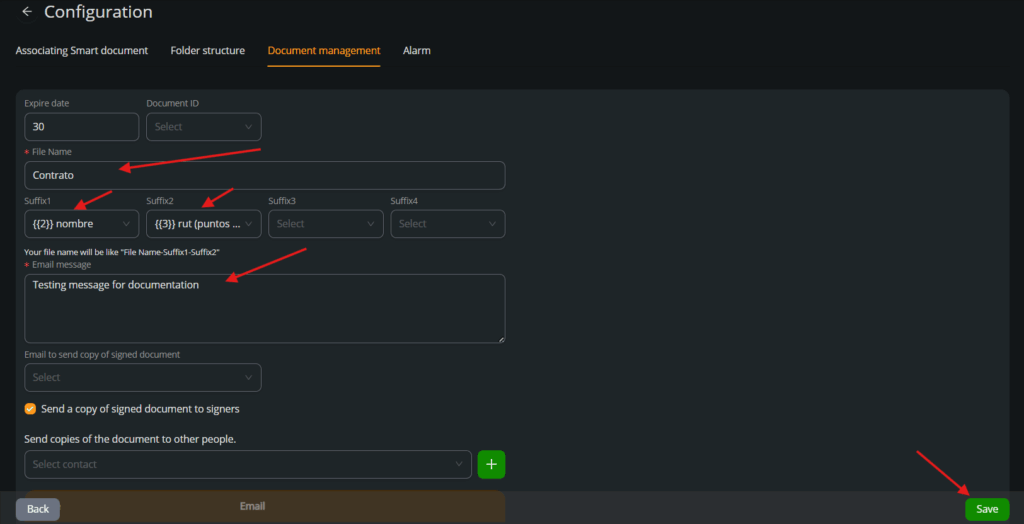
9. Configure the document structure
Optionally, set an expiration period for the sent document. You must assign a name and suffixes using associated fields, and define the message that will appear in the email body sent to signers.
10. Configure the workflow
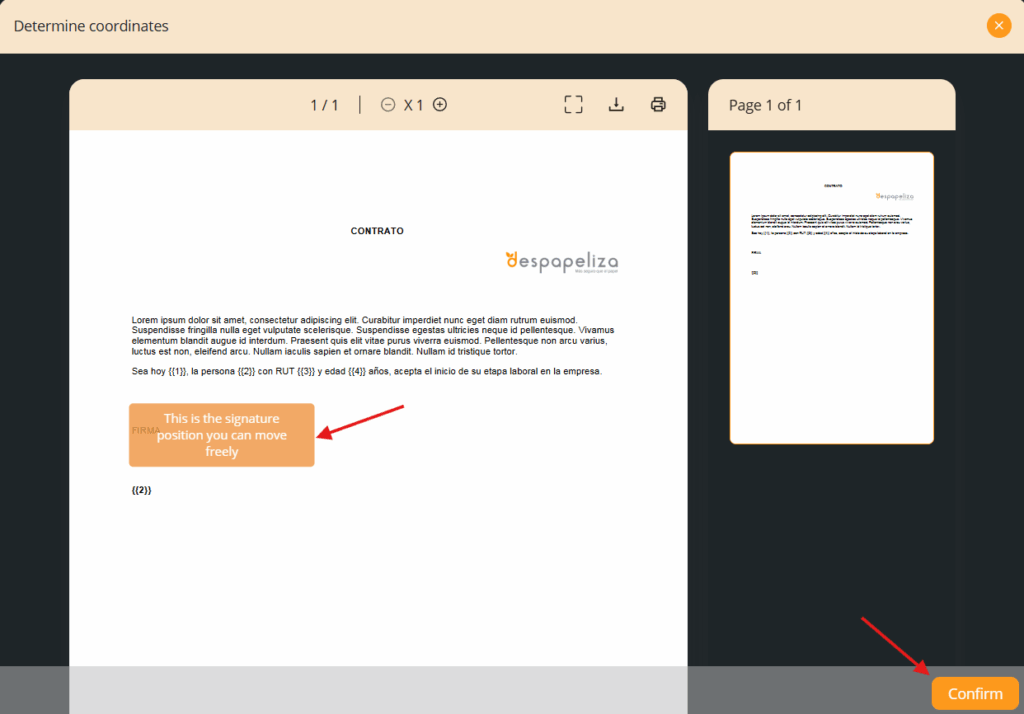
Set the sending order (priority or simultaneous). Choose the type of signature, associate the recipient emails, and define the manual signature position by clicking Determine coordinates.

11. Set the signature position
In the document body, manually position the signature field and click Confirm once you are sure.
12. Confirm all configurations
Click Save once the entire workflow configuration is complete.

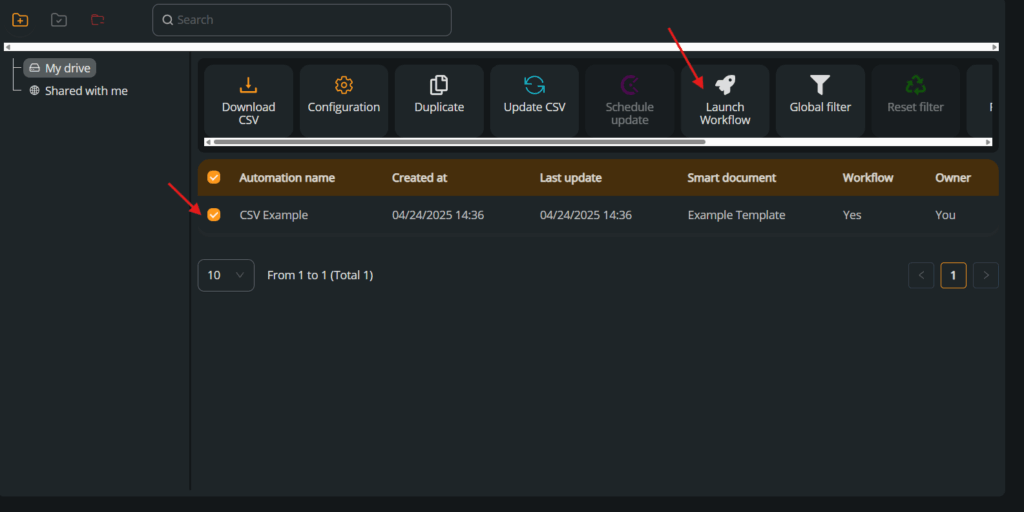
13. Launch the workflow
Click the automation again to unlock the Launch Workflow action.
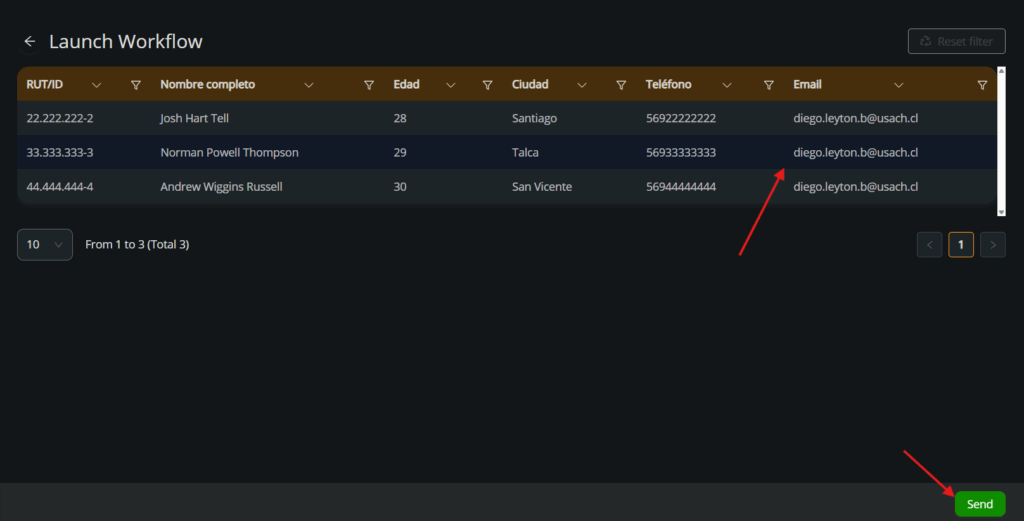
14. Review data
Review the CSV content one final time and click Send to initiate the workflow.
15. Verify sending
A Succeeded message confirms that the workflow has been successfully sent to recipients.

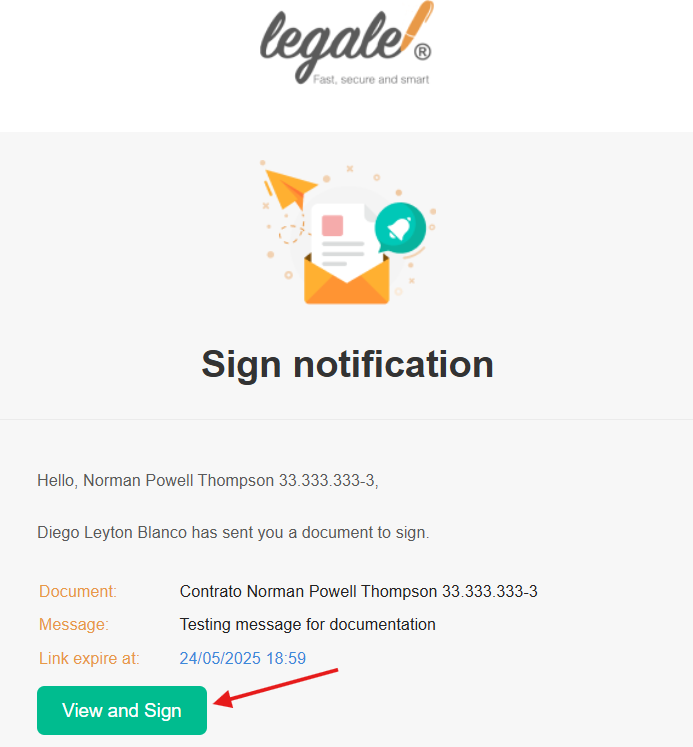
16. Receive the email
Recipients receive the email with the body message defined in step 9.
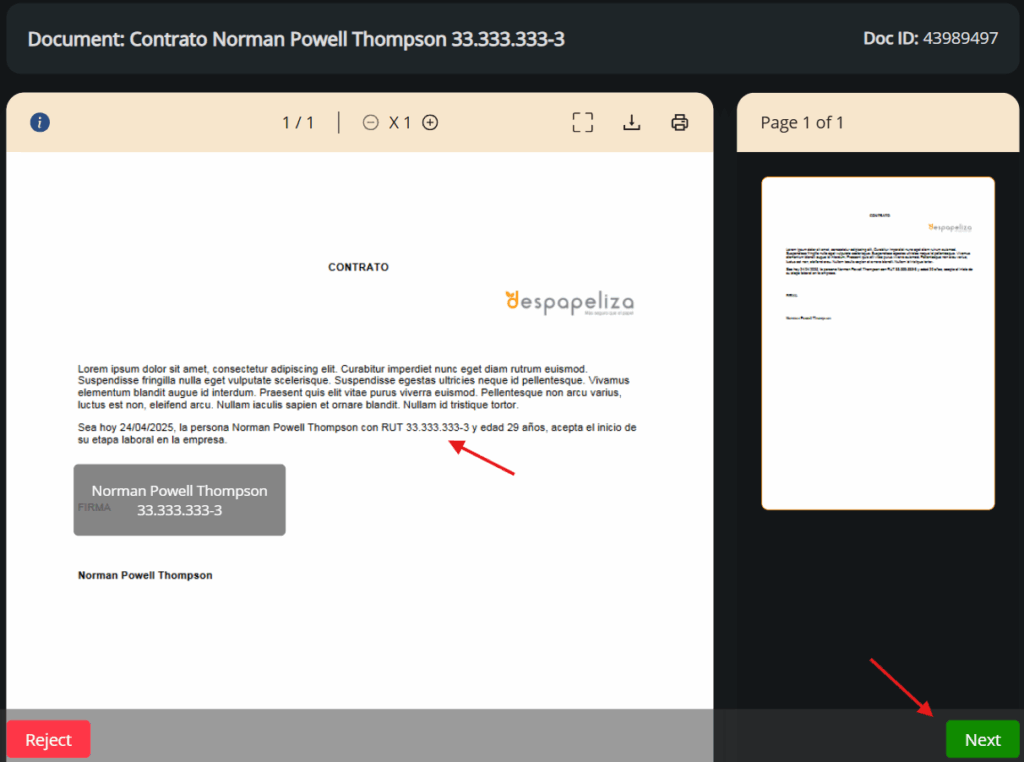
17. Automation in action
The automation immediately fills in the recipient’s data—only the signature needs to be added.
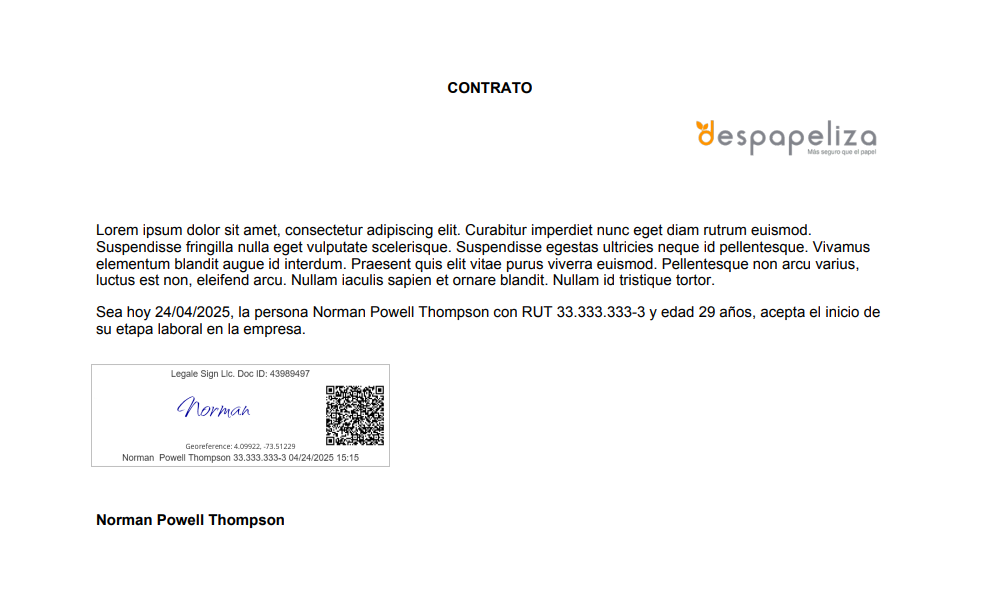
18. Final document status
The signer receives a copy of the automatically completed and signed document.
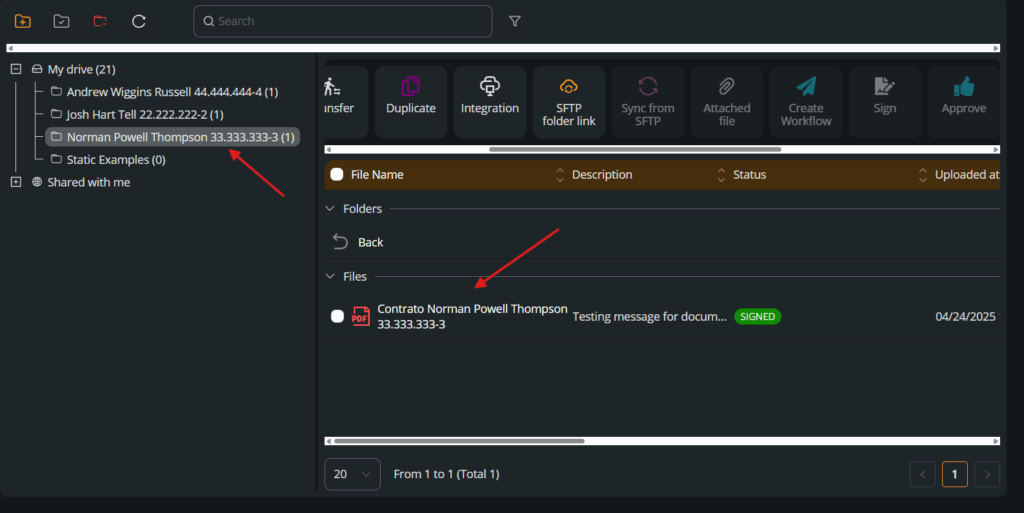
19. Dynamic folders
Once the workflow is launched, a dynamic folder and file are created for each recipient as configured.