

 AI
AI
Finances
Sales and contracts
Human Resources
Legal department
Operations
Security
Chilean Labor Department
Digital Signature
This feature allows users to transform dates imported from a CSV file into the date formats configured in a Smart Document.
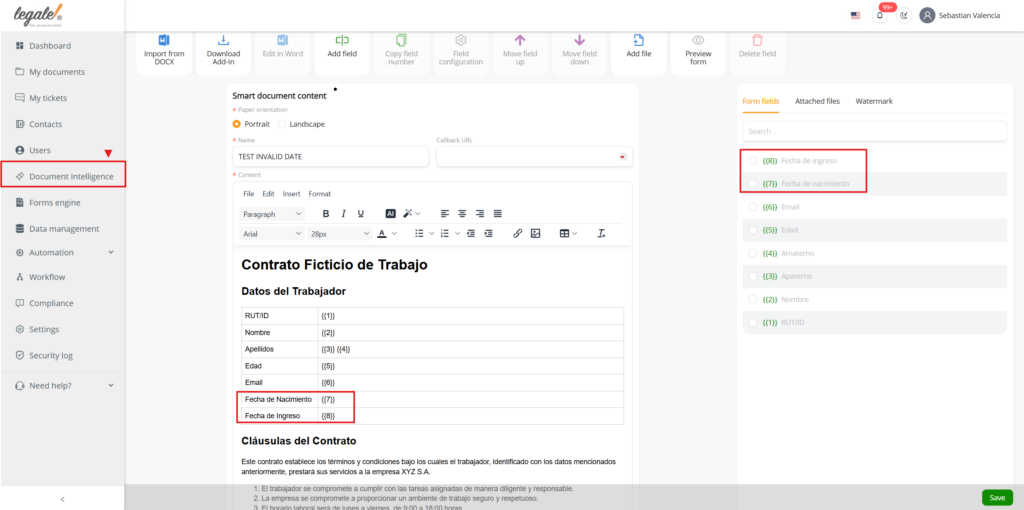
In this example, we will configure two date variables:
The dates stored in the CSV may use different formats. During the CSV automation configuration, the platform must be informed of the original format of each date. The Smart Document will then display the dates using the formats previously configured for each variable.
Go to the Smart Documents section and create a new Smart Document or open an existing one.
The Smart Document must contain the variables that will receive the information imported from the CSV file.
For this example, add the following variables:
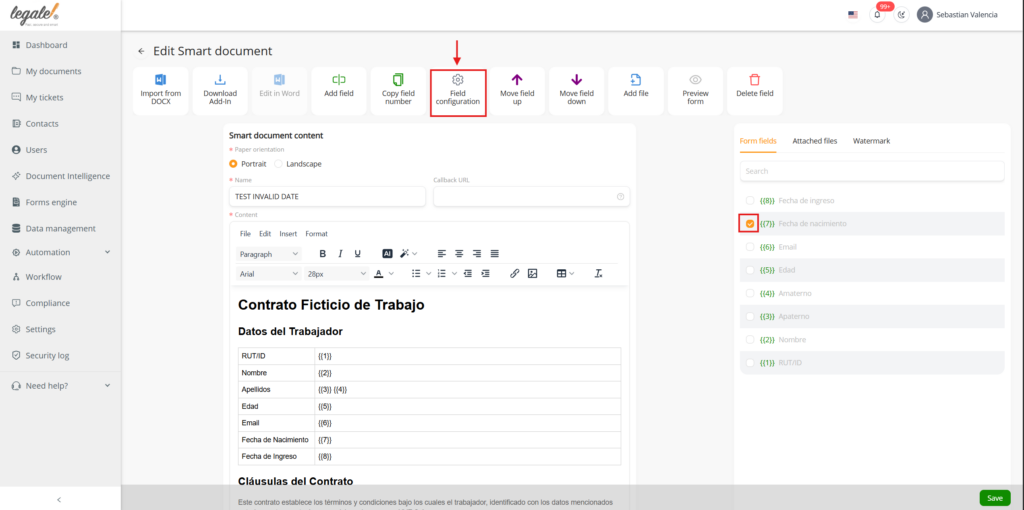
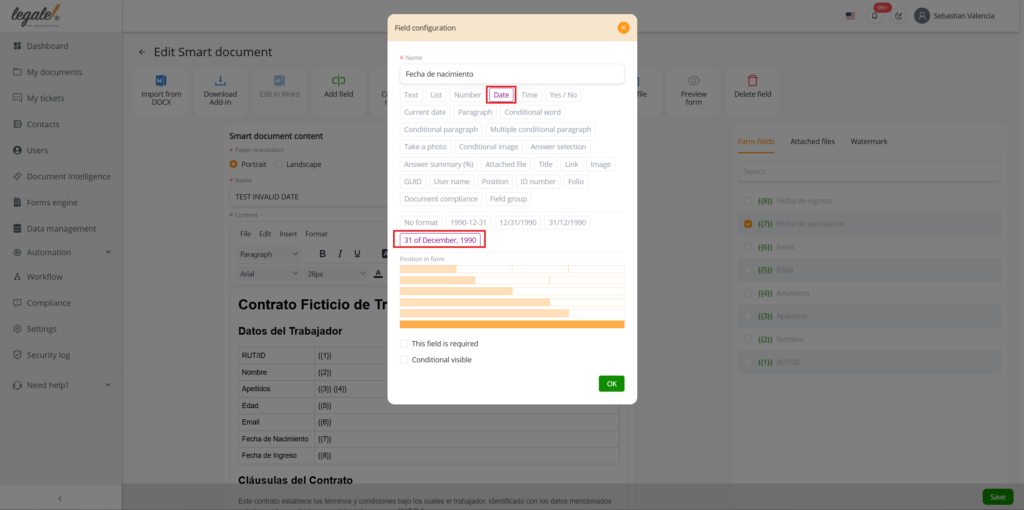
Select the Date of Birth variable and configure it as a Date field.
Choose the format in which the date should be displayed in the generated document.
Example:
31 December 1990
Next, select the Start Date variable and configure it as a Date field.
For this variable, select the following display format:
31/12/1990
These settings determine how each date will appear in the final generated document, regardless of how the original value is written in the CSV file.
After configuring both variables, click Save to save the Smart Document.
Make sure all variables and date formats have been configured correctly before continuing with the CSV automation.
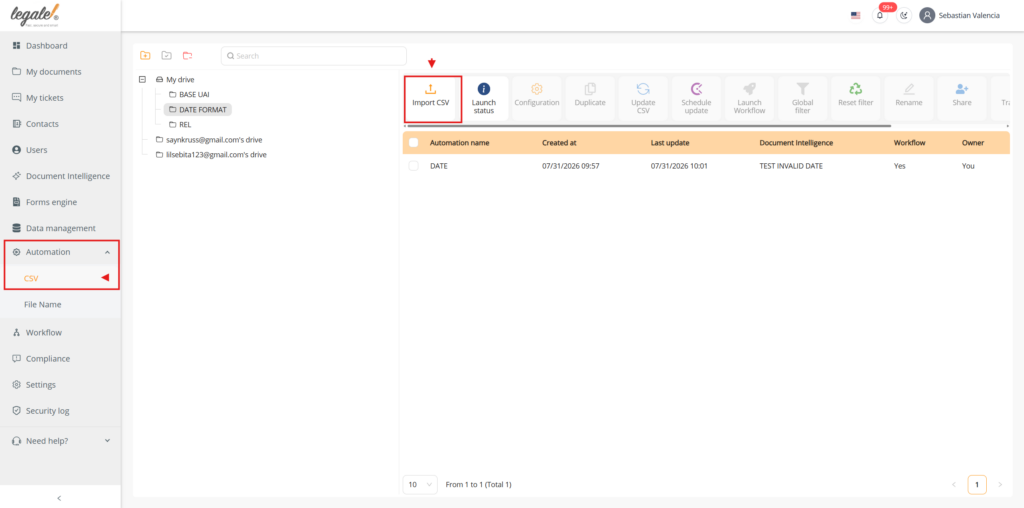
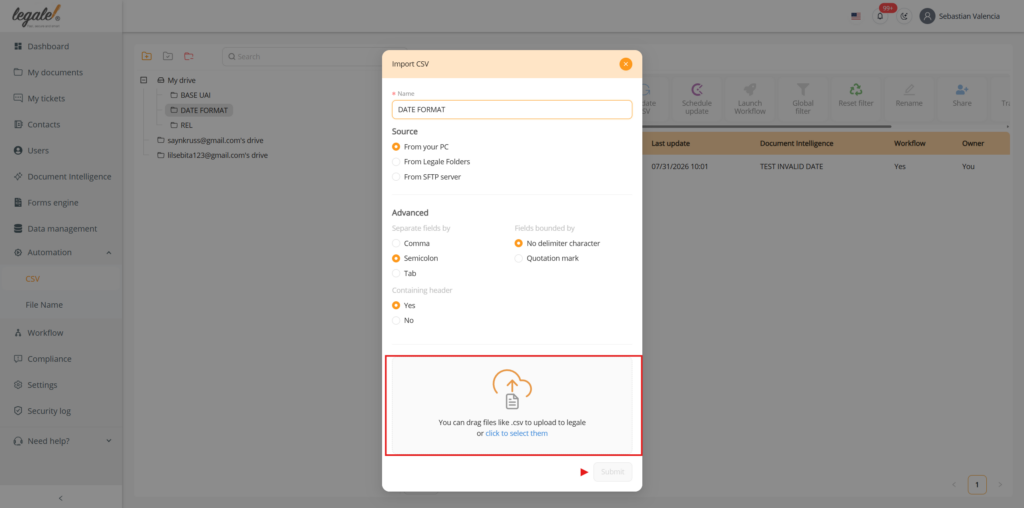
Go to the CSV Automation section.
Upload the CSV file containing the information that will be used to generate the documents.
The CSV must include columns corresponding to the variables configured in the Smart Document. In this example, it must contain columns for:
Enter a name for the uploaded CSV file and complete the upload process.
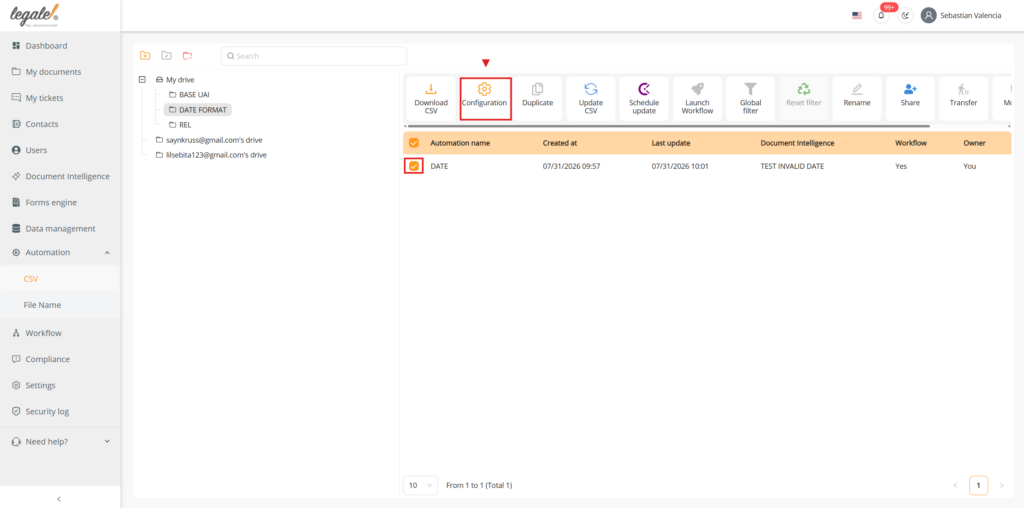
Once the CSV file has been uploaded, select the corresponding automation and click Configuration.
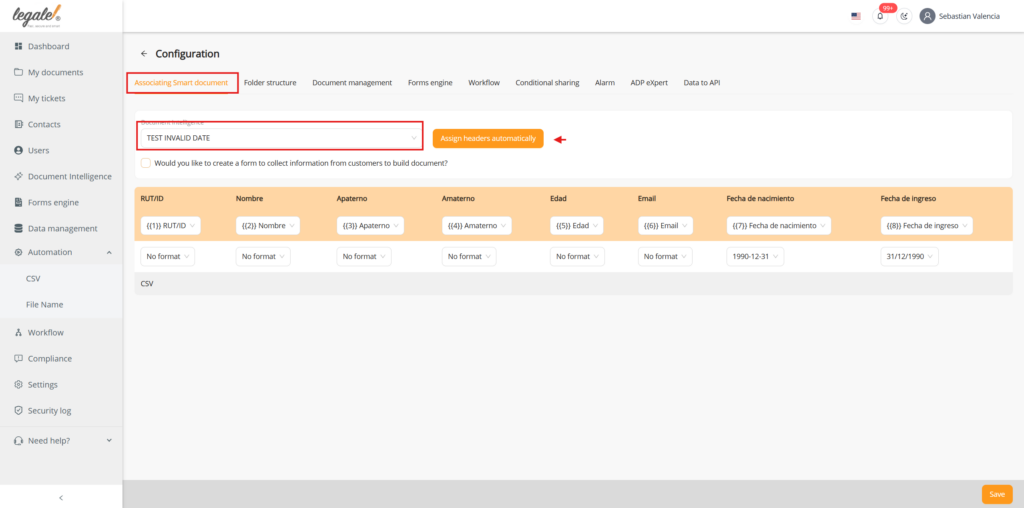
The platform will request that a Smart Document be associated with the automation.
Select the Smart Document configured in the previous steps.
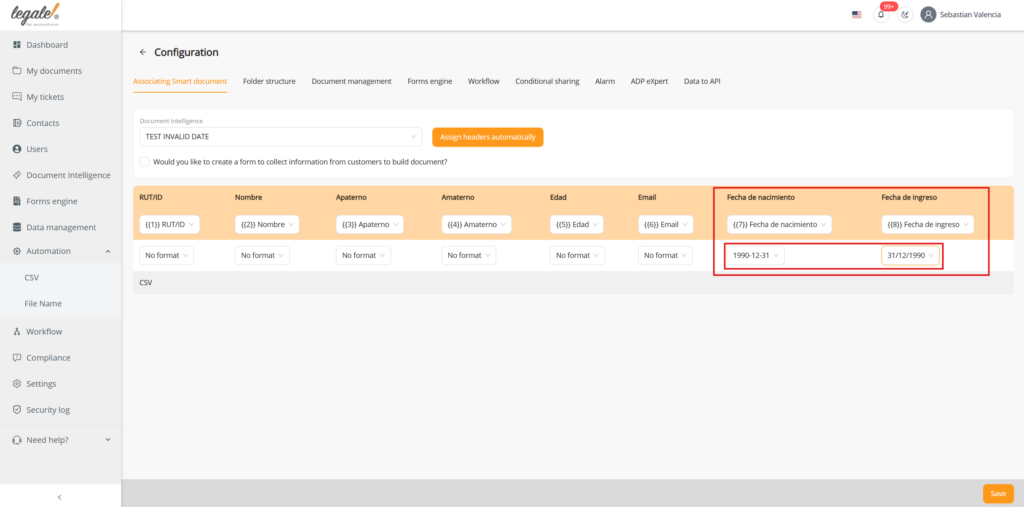
After selecting the Smart Document, use the Automatically Assign Headers option.
The platform will attempt to associate each CSV column with its corresponding Smart Document variable.
Verify that the following headers have been correctly assigned:
If a header is not assigned correctly, select the corresponding variable manually.
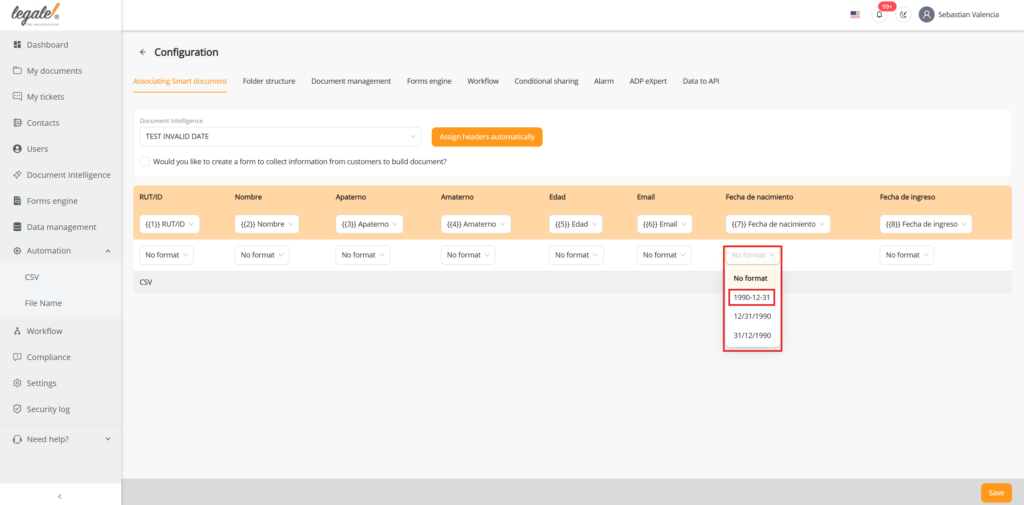
Below each date variable, an additional field labeled No Format or Unformatted will be displayed.
This field must be used to indicate the format in which the original date is written in the CSV file.
In this example, the Date of Birth value is stored in the CSV as:
1990-12-31
Therefore, select the input format that corresponds to:
YYYY-MM-DD
In this example, the Start Date value is stored in the CSV as:
31/12/1990
Therefore, select the input format that corresponds to:
DD/MM/YYYY
This configuration allows the platform to correctly interpret each CSV value before converting it into the format configured in the Smart Document.
After configuring the date formats, complete the remaining CSV automation steps.
Review the following information before continuing:
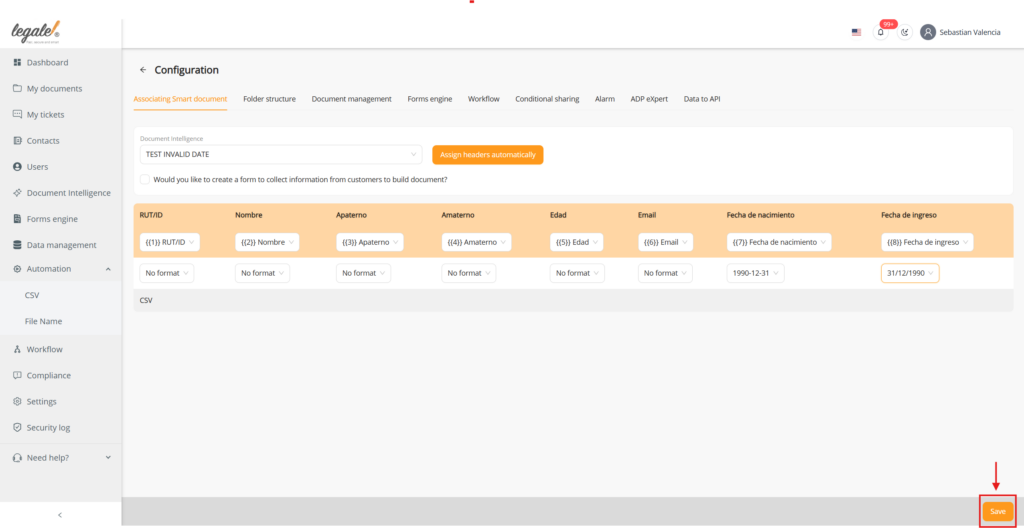
Save the automation configuration.
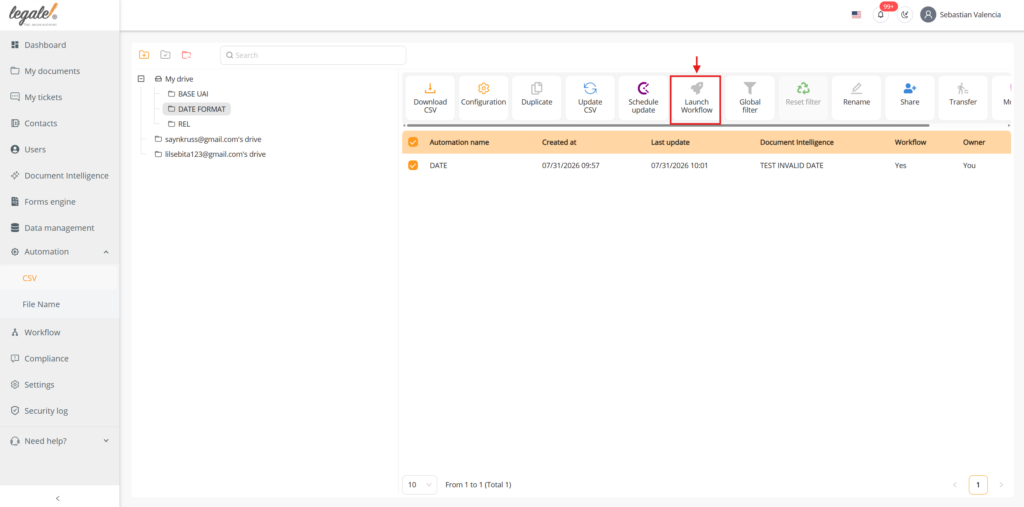
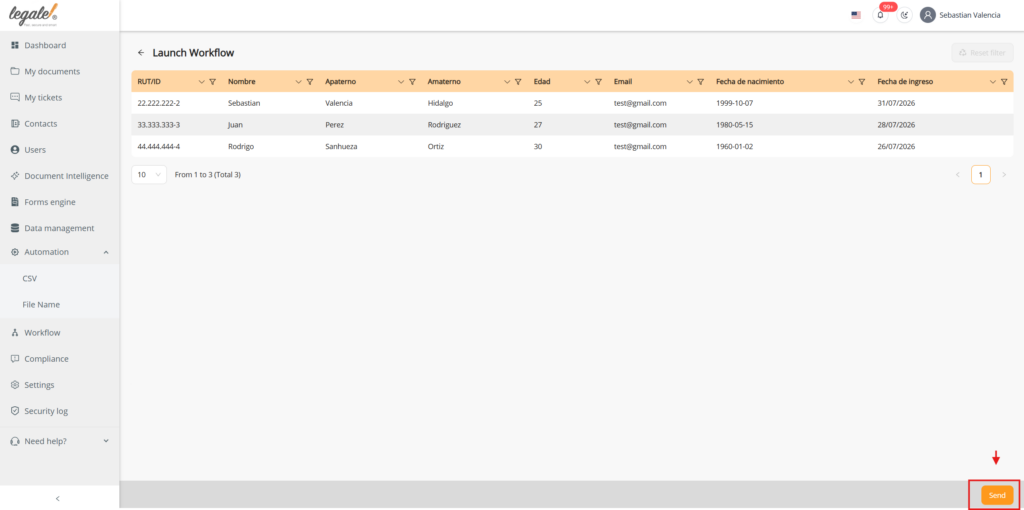
Once the configuration has been completed, start the workflow to process the CSV file and generate the documents.
The platform will read the original dates from the CSV, interpret them using the selected input formats, and display them using the formats configured in the Smart Document.
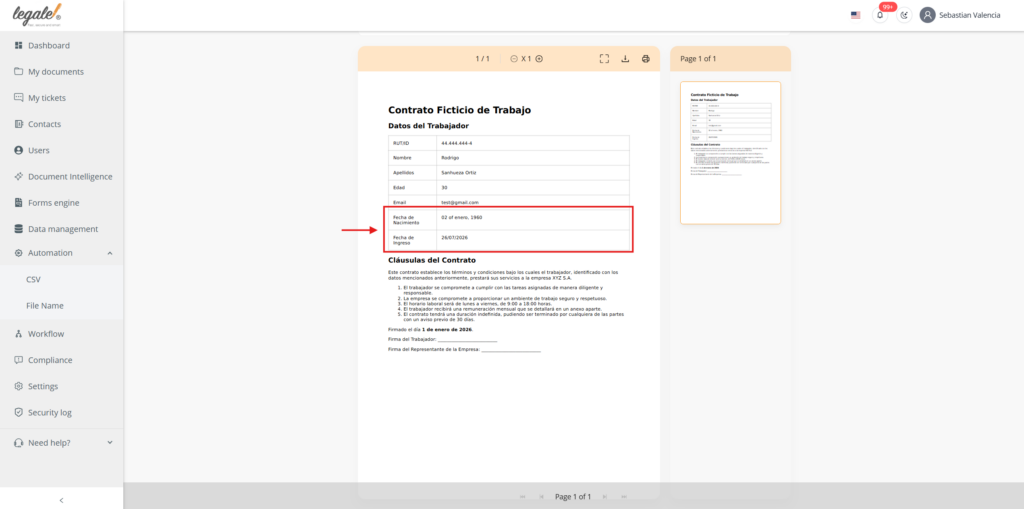
After the workflow has finished, open one of the generated documents.
Verify that the dates are displayed in the expected formats.
| Variable | Original CSV value | Format displayed in the document |
|---|---|---|
| Date of Birth | 1990-07-31 | 31 of July 2026 |
| Start Date | 26/07/1990 | 26/07/1990 |
The generated document should display each date according to the format configured in its corresponding Smart Document variable.
The input format selected in the CSV automation must exactly match the format of the values stored in the CSV file.
For example:
If the selected input format does not match the CSV value, the platform may not recognize the date correctly or may generate an incorrect result.
All values within the same CSV column should use a consistent date format.
AI
Finances
Sales and contracts
Human Resources
Legal department
Operations
Security
Chilean Labor Department
Digital Signature
Use this form to reach our agent quickly. We're here to assist you.
Learn how we handle your information in our Privacy Policy.
Less paperwork. More control.
Move every agreement forward.
Make every employee process simpler.
Clear agreements. Confident decisions.
Keep work moving safely.
Everything you need to work smarter.
Explore how your information is protected.
Guidance for digital employment processes.
Explore signing options and quality standards.