 AI
AIFEA Cloud Enrollment
The FEA Cloud Enrollment process is essential to activate the Advanced Electronic Signature in the cloud, enabling legal representatives to sign large volumes of documents securely and with full legal validity. This enrollment ensures that identity verification, authentication, and signing credentials are centralized and managed in compliance with Chilean regulations.
Video Tutorial
Before starting the enrollment process, you can watch the following video tutorial to see the complete step-by-step process for completing the FEA Cloud Enrollment.
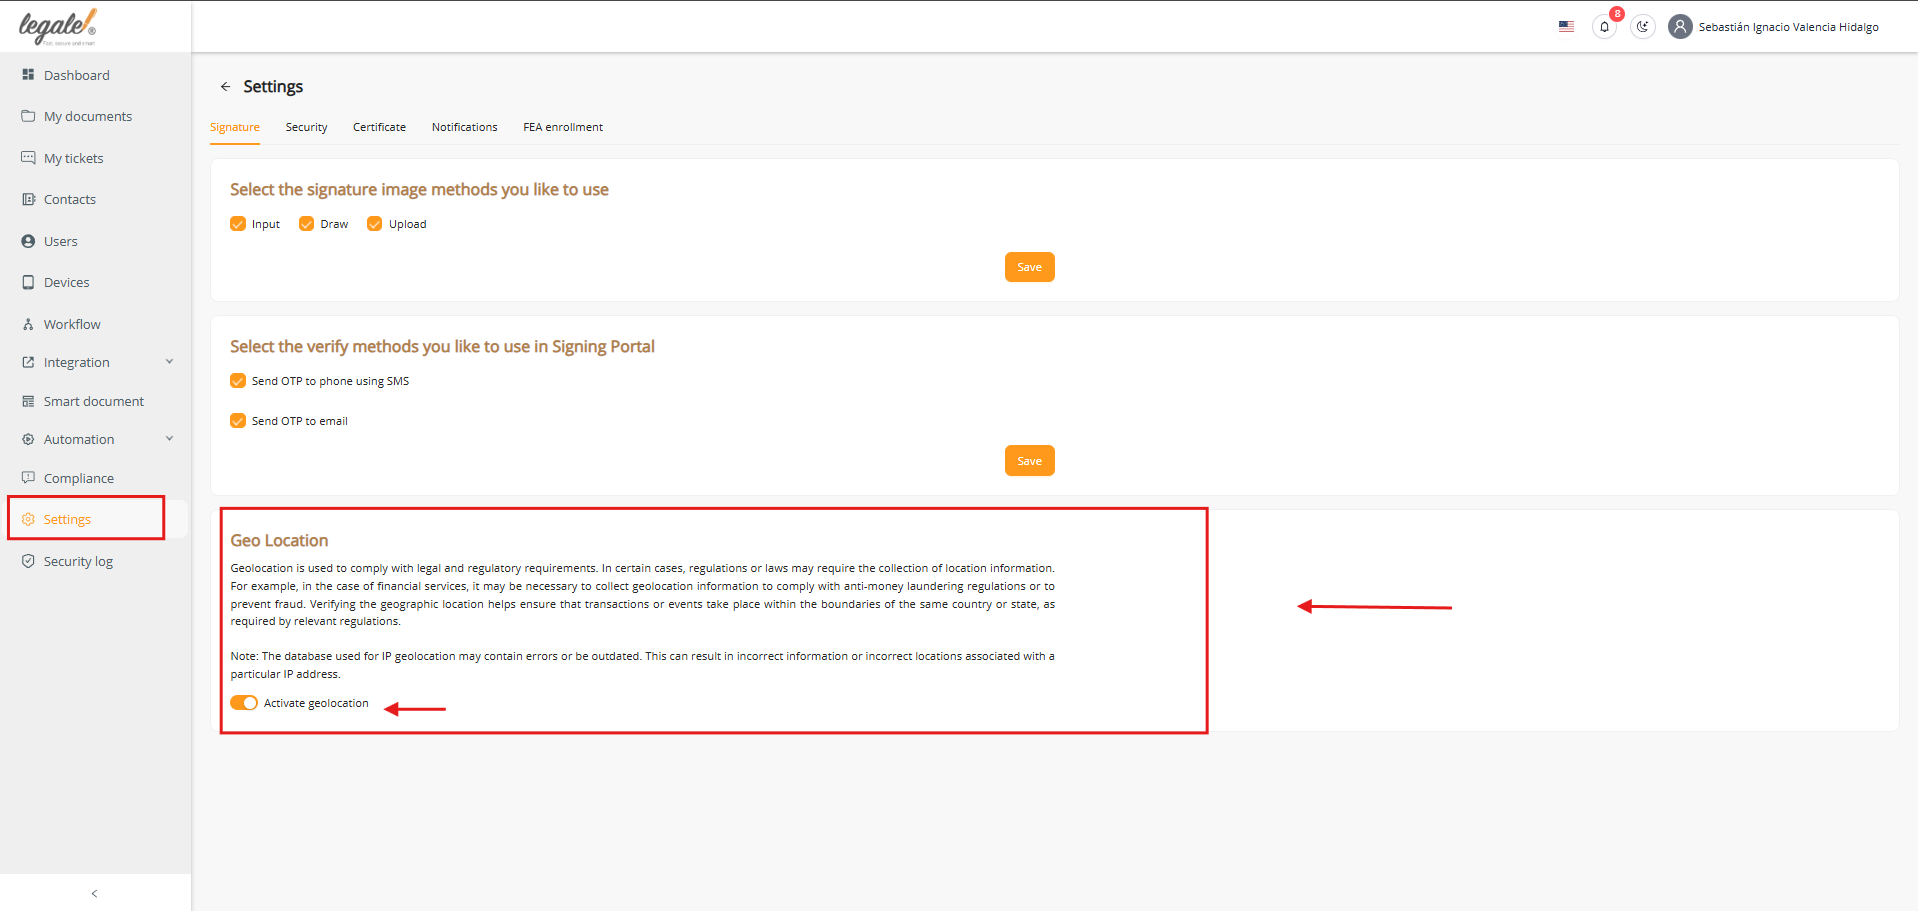
Step 1: Enable Geolocation
Before beginning the enrollment, enable Geolocation in the system:
-
Go to Settings > Signature.
-
Activate the Geolocation option.
This step is required by Chilean regulation so that the system records the exact location of the signer, ensuring legal compliance and traceability during massive signature processes.
Step 2: Access FEA Enrollment
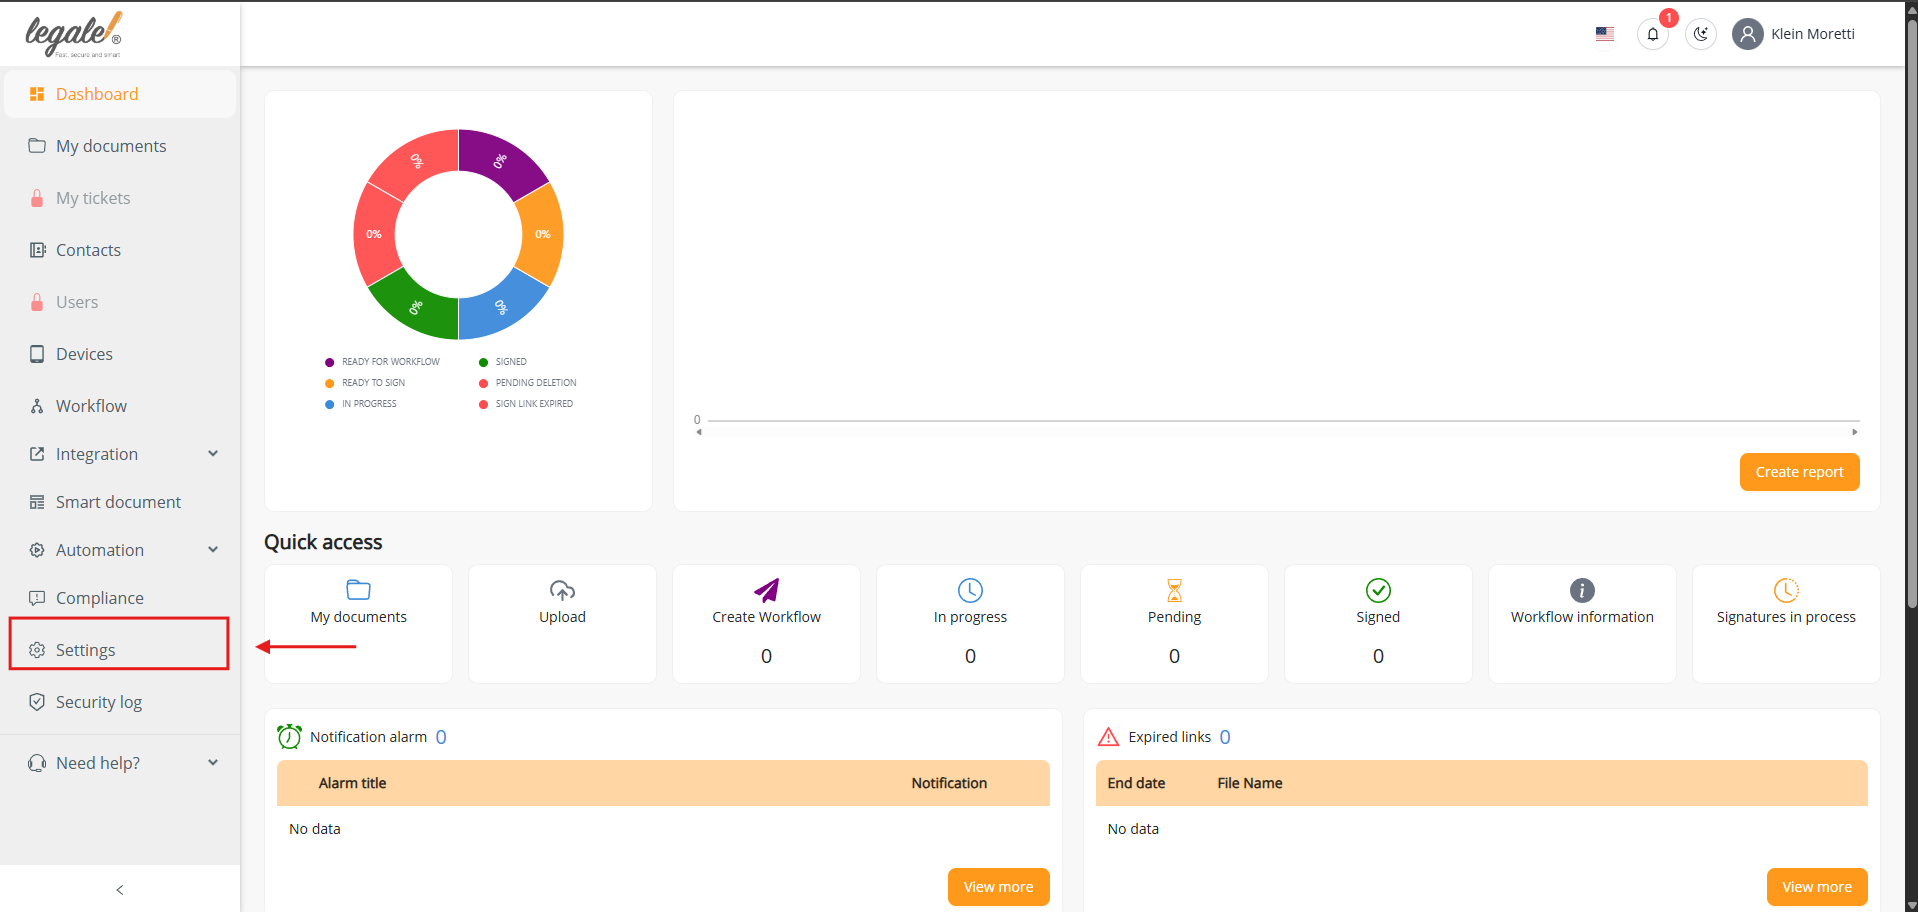
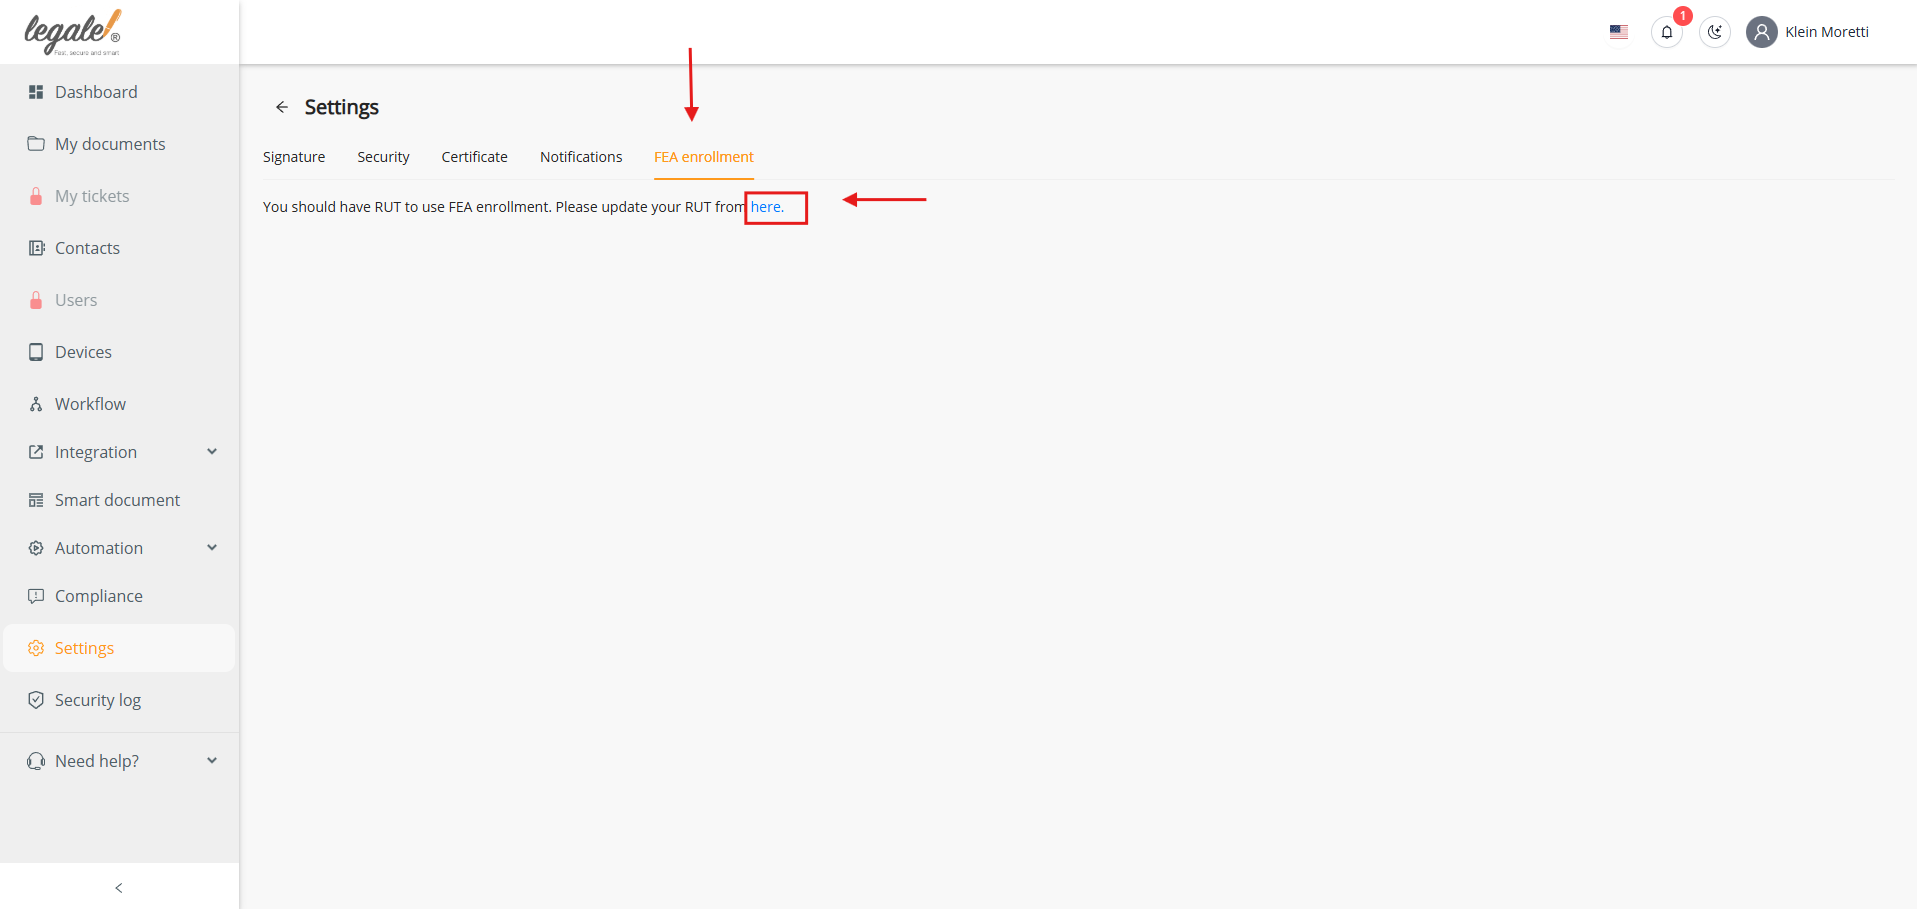
From the Dashboard, open Settings and select FEA Enrollment.
If your RUT is not yet registered, a message will appear:
“You should have RUT to use FEA Enrollment. Please update your RUT from here.”
Click here to update your information.
Step 3: Update Profile
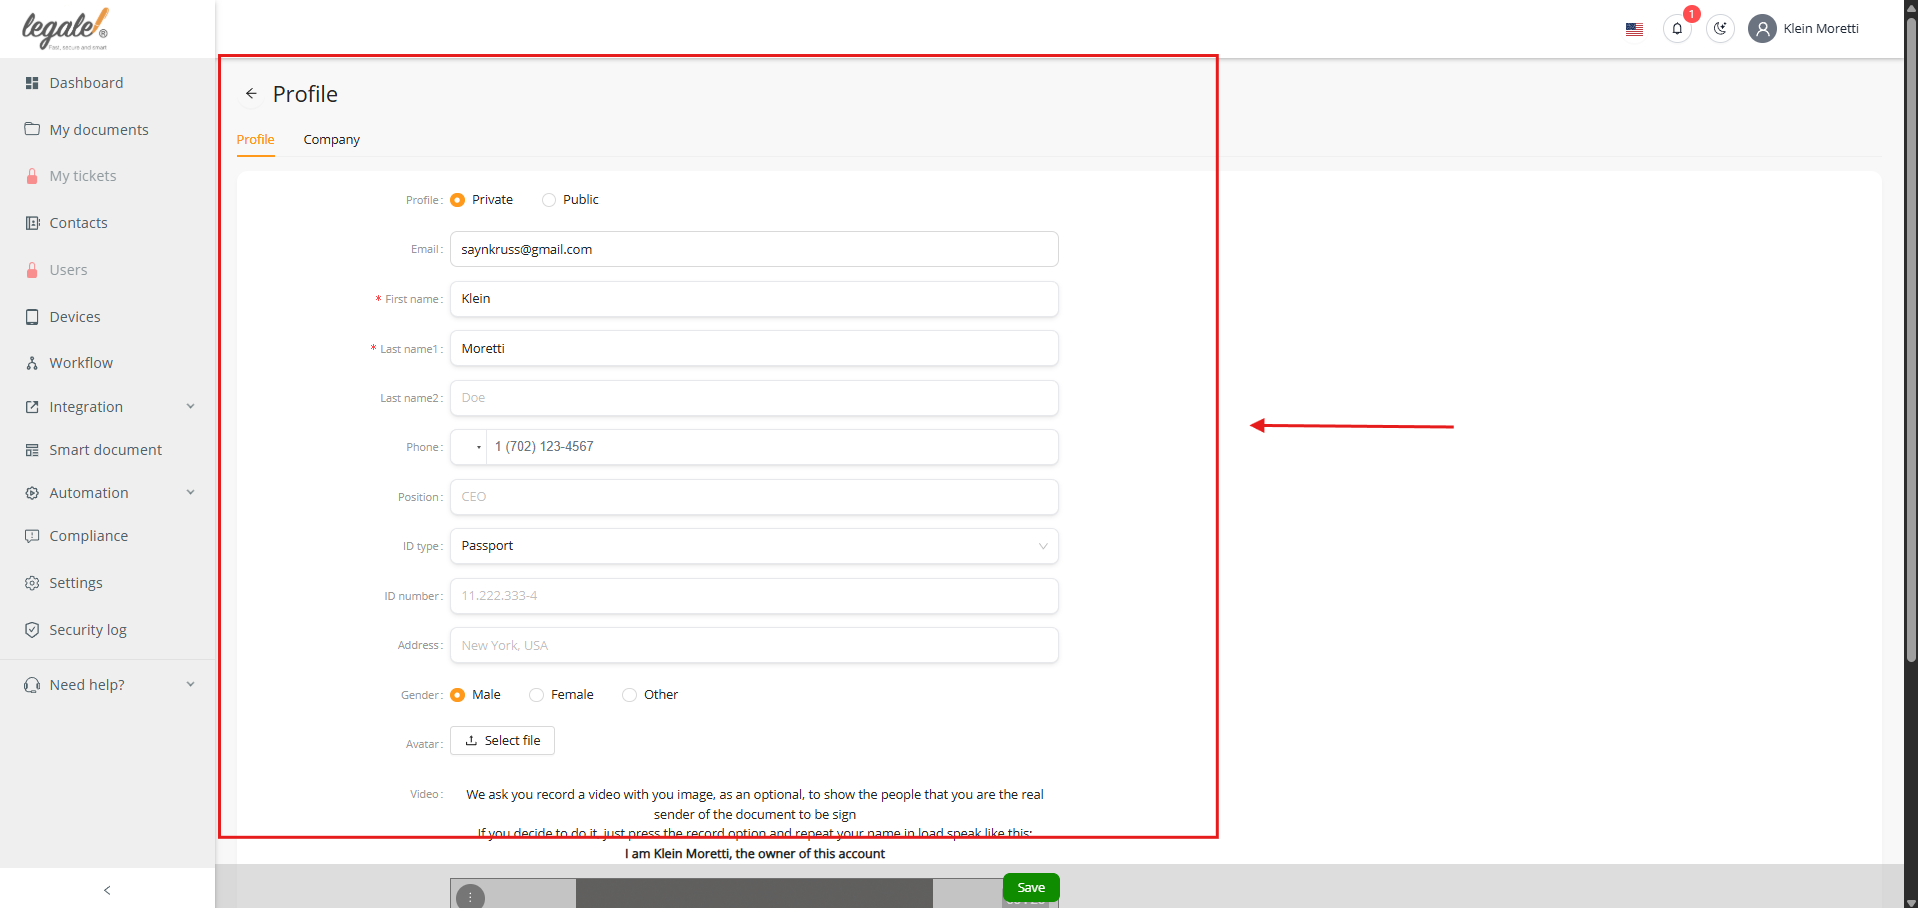
In the Profile section, enter all personal details exactly as they appear in the Civil Registry:
-
First and last names
-
Phone number
-
RUT and ID type
-
Address
This is critical, as mismatched information will block the enrollment. Save the changes before continuing.
Step 4: Advanced ID Verification
Return to FEA Enrollment. You will now see the Advanced ID Verification screen, which requires:
- Your ClaveÚnica credentials
- Your National ID card
- Completing the transfer verification process
- Creating a 4-digit PIN
Click Continue to verification to start the process.

Step 5: ClaveÚnica Authentication
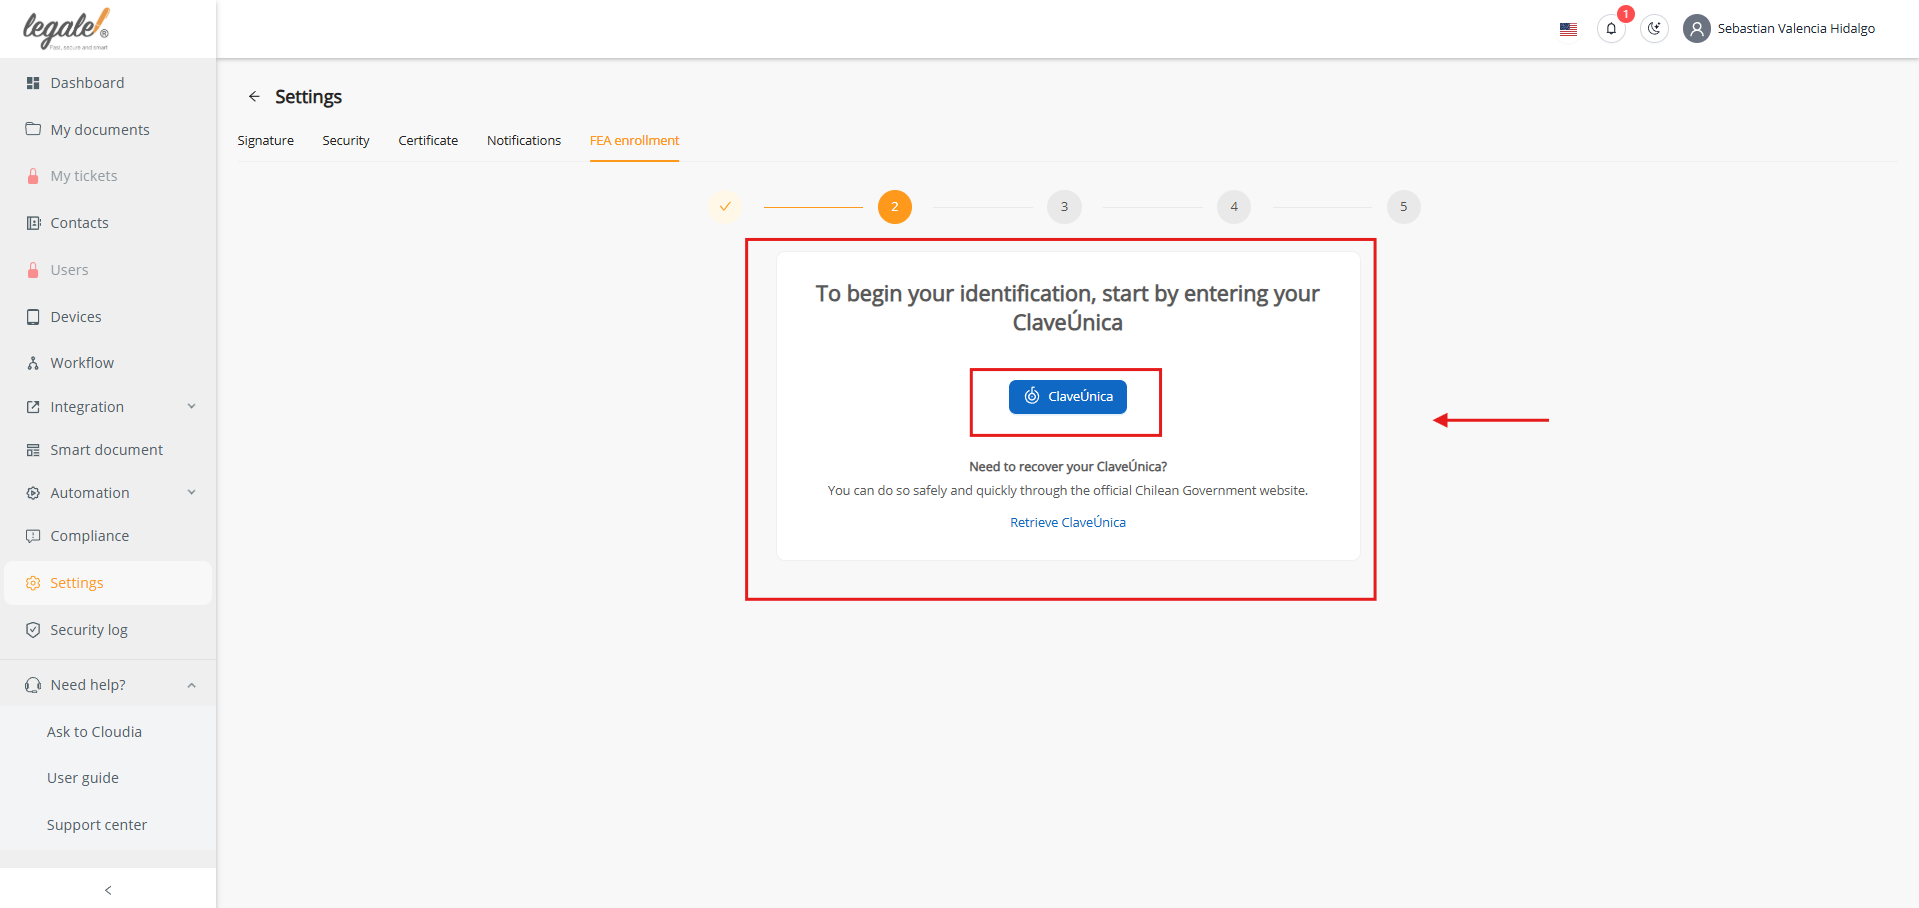
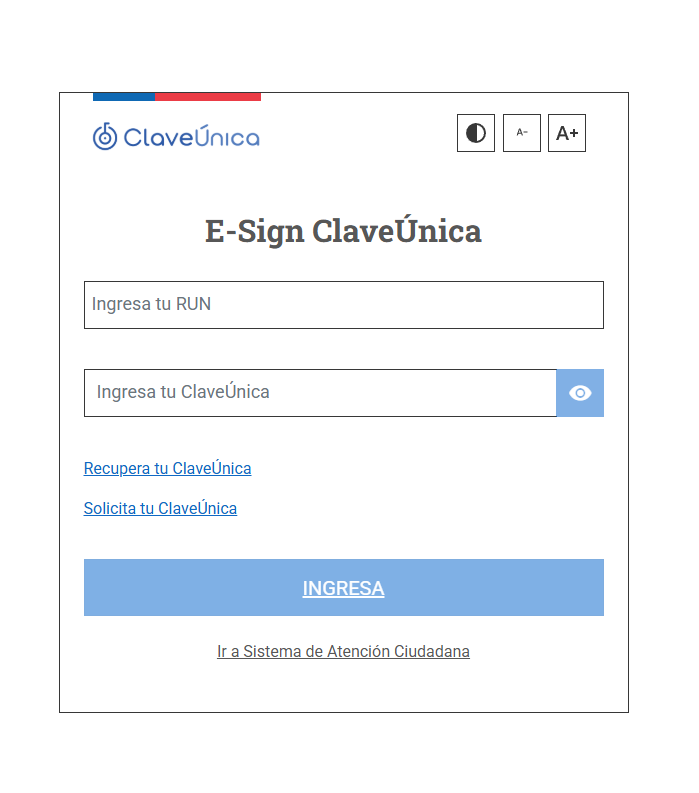
The system will redirect you to the official ClaveÚnica login.
-
Enter your RUN and ClaveÚnica password.
-
Confirm to proceed.
This step validates your identity directly against government systems.
Step 6: National ID Document Number
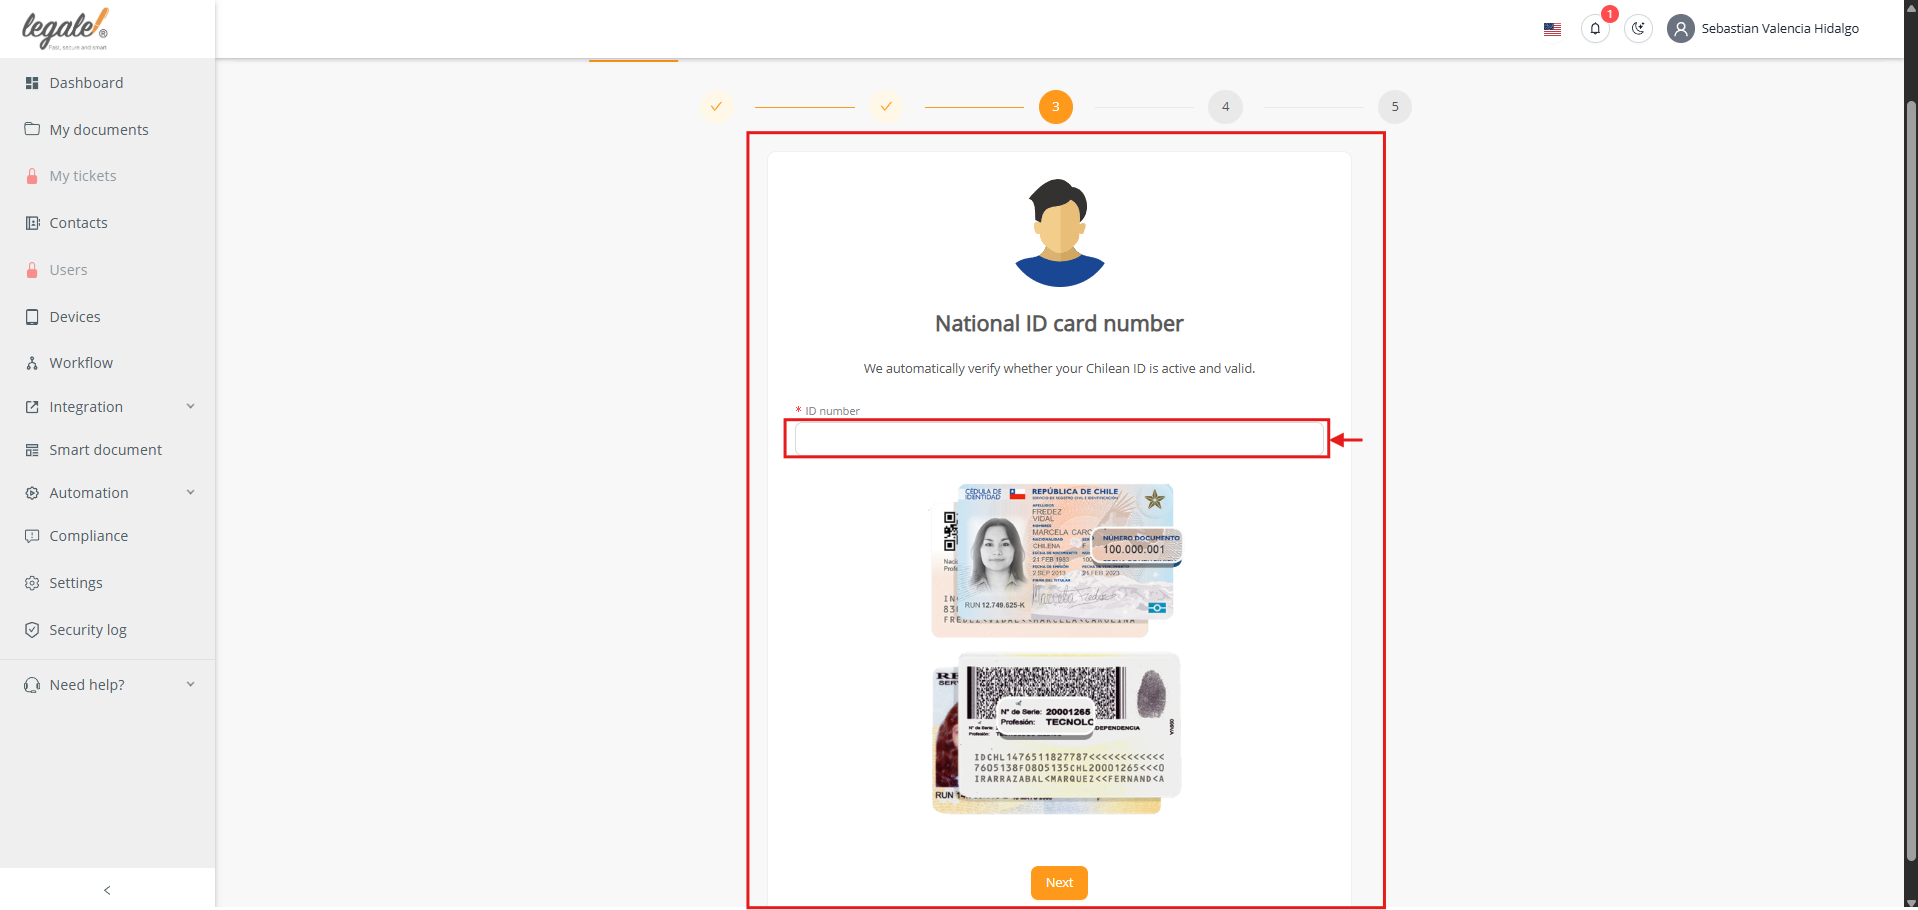
After authentication, provide the document number from your Chilean National ID.
The platform automatically checks its validity.
Step 7: Transfer Verification
As part of the identity verification process, you will be asked to complete a bank transfer instead of answering personal security questions.
Follow the transfer instructions displayed on the screen and use the banking details provided during the enrollment process. Once the transfer has been completed, the system will validate the transaction before allowing you to continue with the enrollment.

Once the transfer is completed successfully, click Return to Origin to return to the enrollment page. You will then be able to continue with the process and create your 4-digit security PIN.
Once the transfer is completed successfully, click Return to Origin to return to the enrollment page. You will then be able to continue with the process and create your 4-digit security PIN.
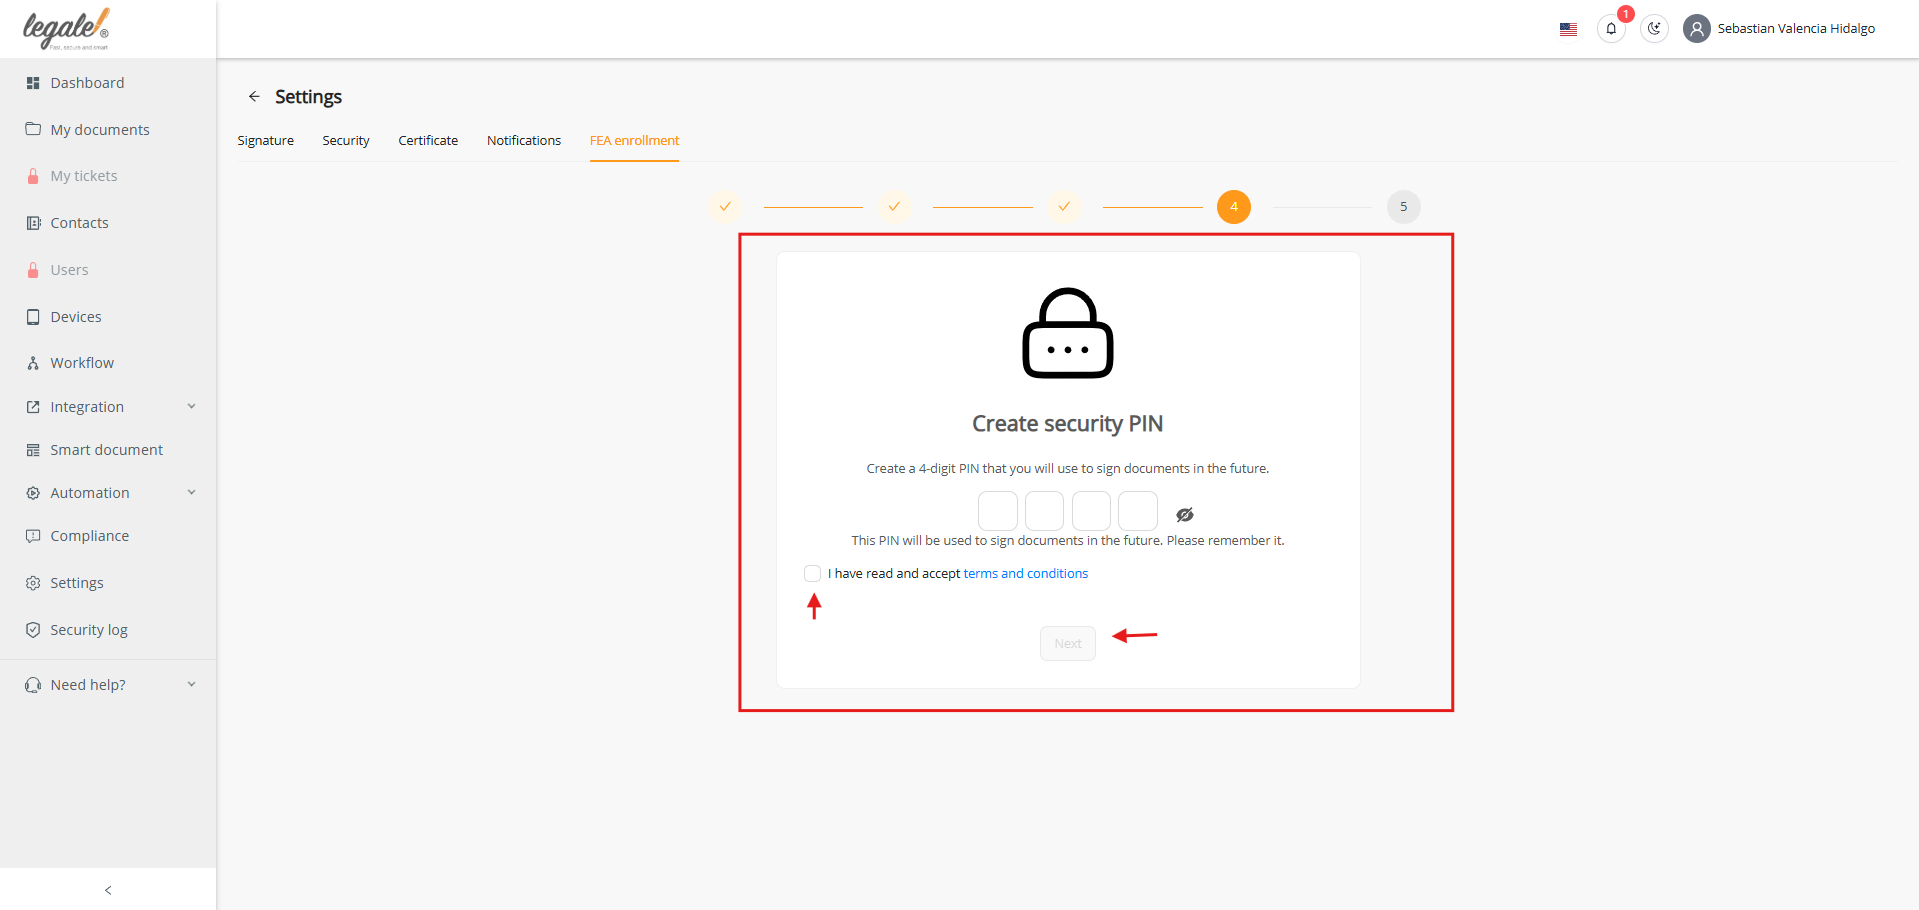
Step 8: Create Security PIN
Set up your 4-digit PIN, which will be required for every signing operation.
-
Enter the PIN.
-
Accept the Terms and Conditions.
-
Click Next to confirm.
Step 9: Completion
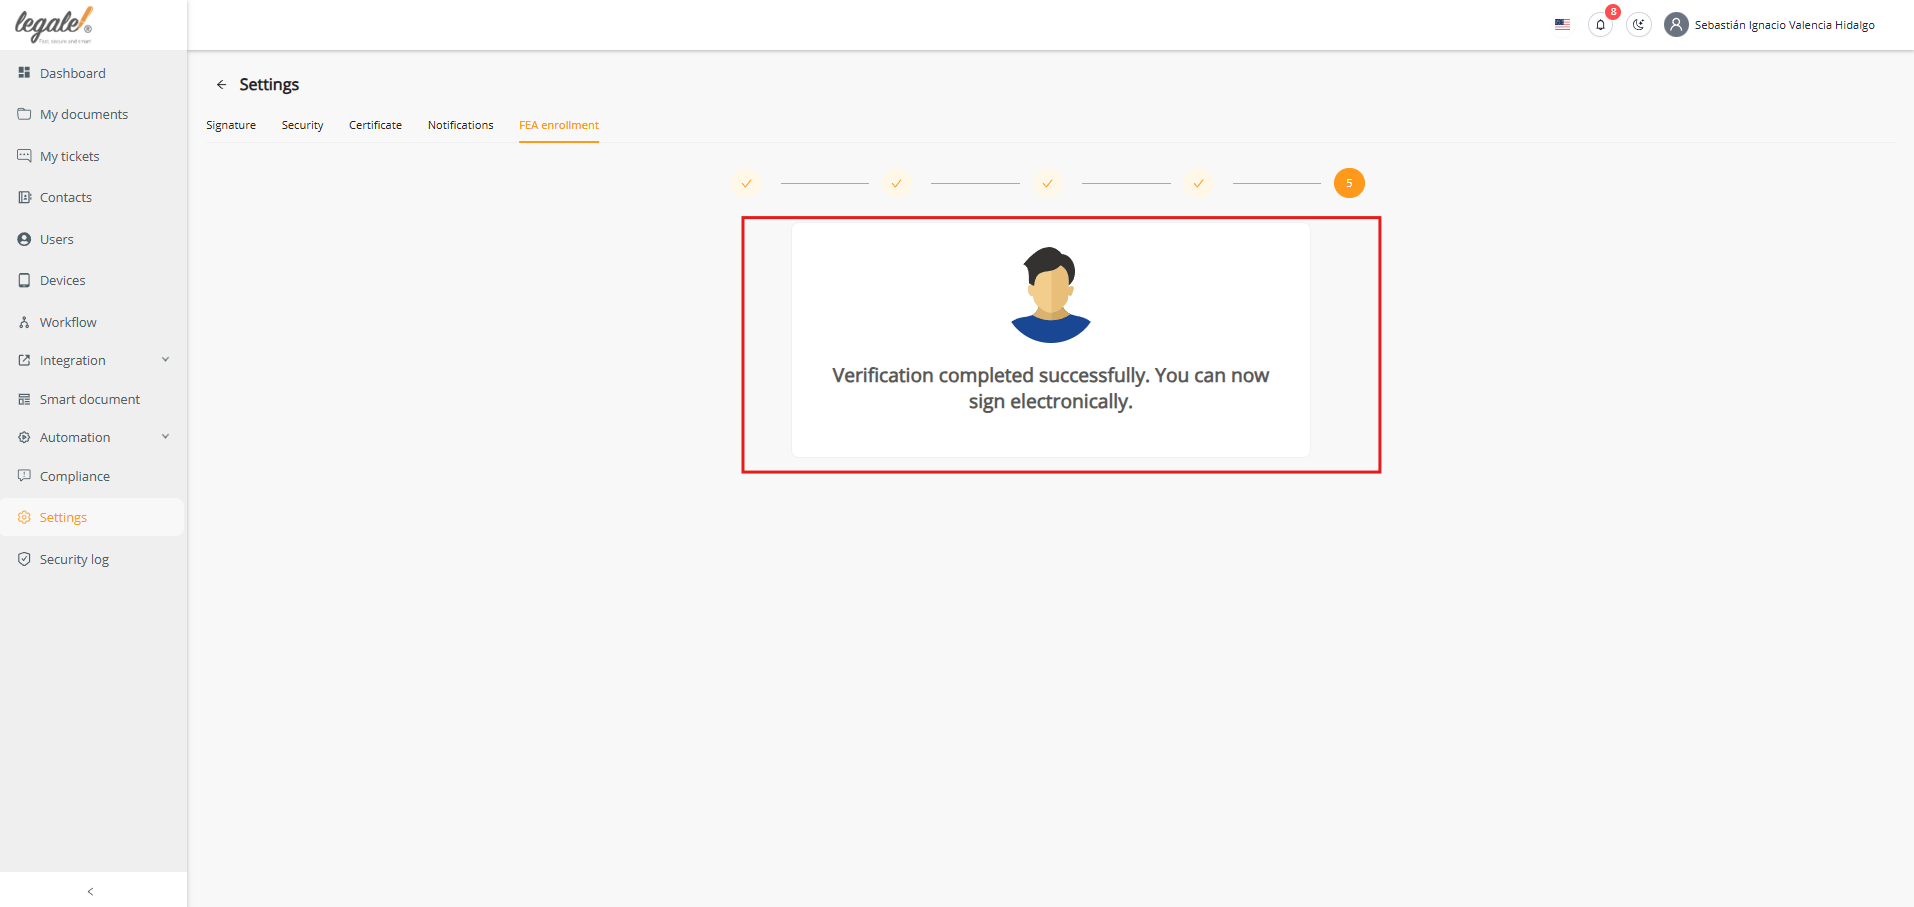
Once all steps are complete, you will see the confirmation:
“Verification completed successfully. You can now sign electronically.”
From this point, you are fully enrolled for cloud-based Advanced Electronic Signature (FEA), enabling legal representatives to sign documents massively and securely.