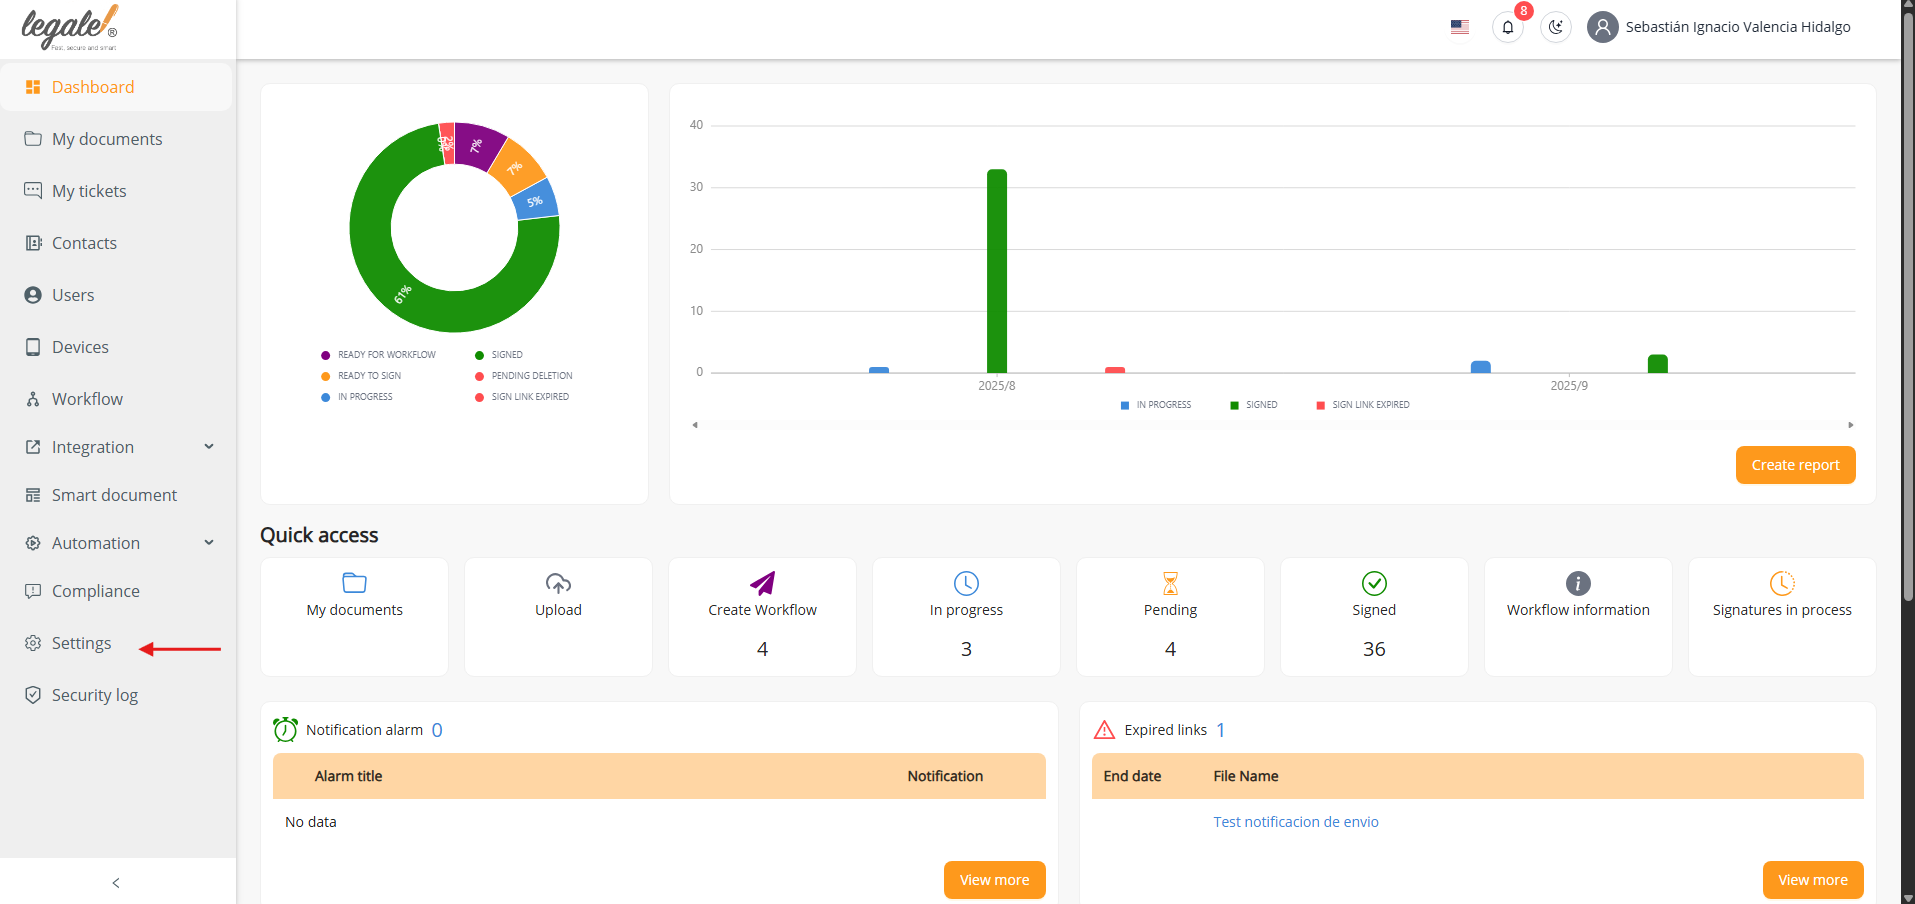
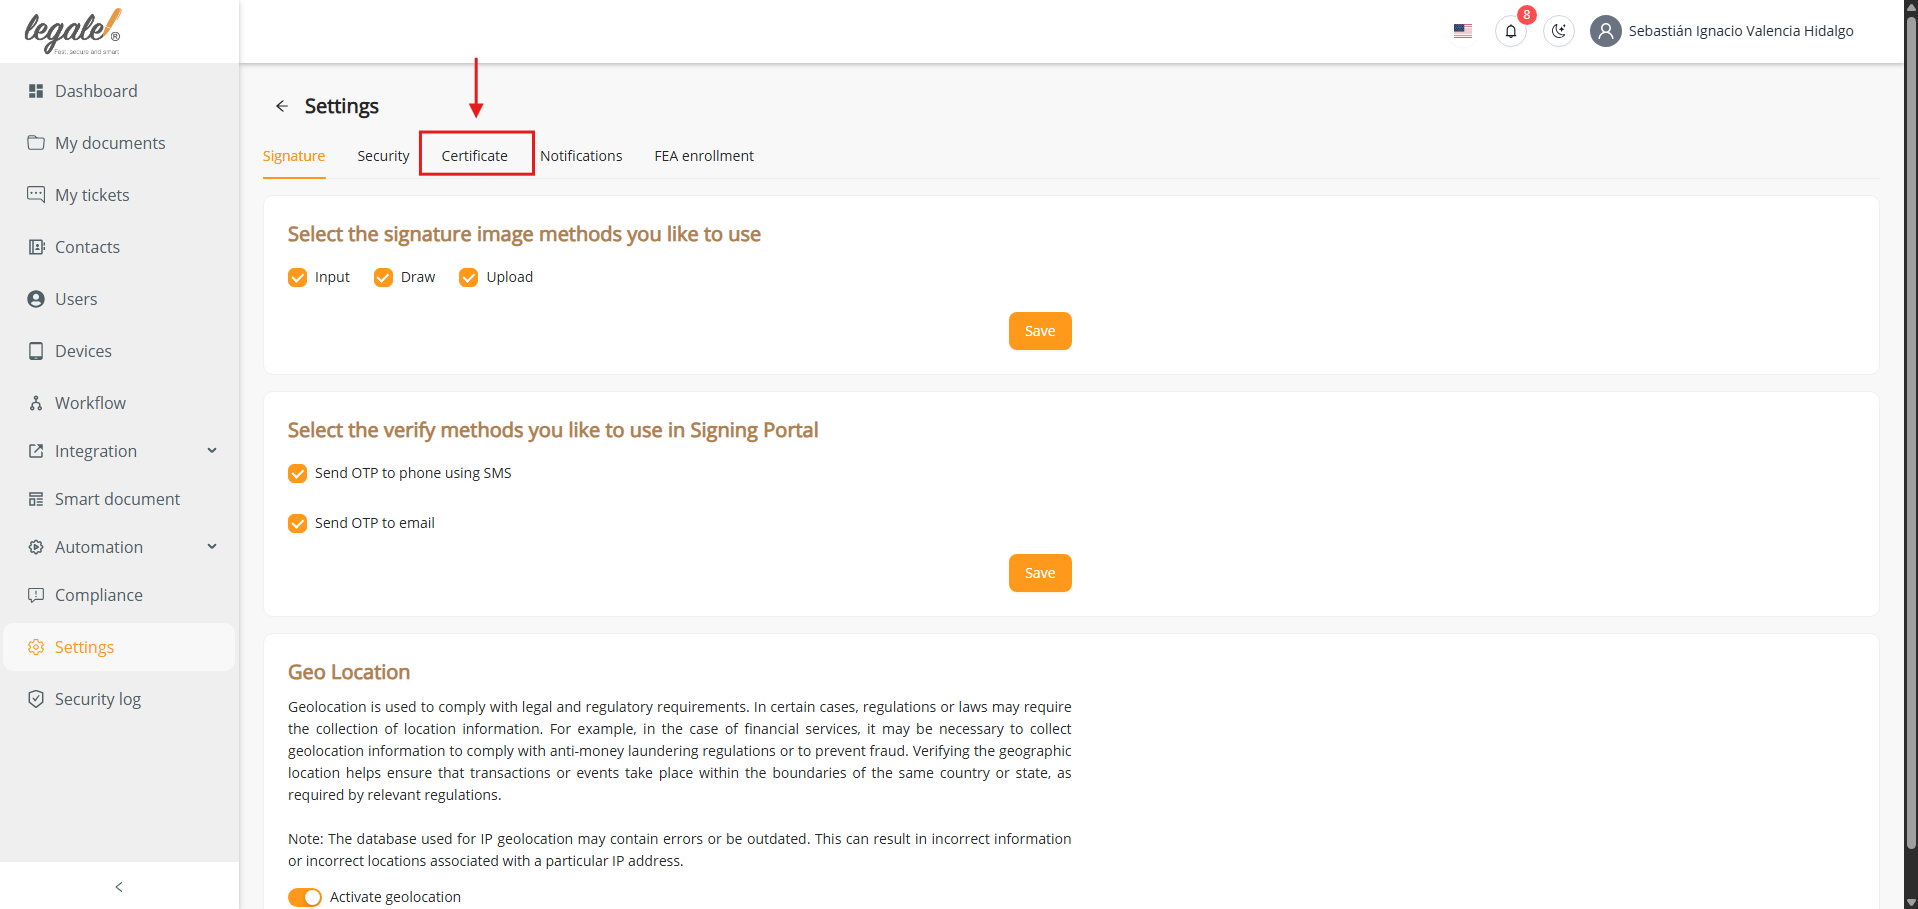
1. Accessing the Certificate menu #
To manage and configure cloud certificates in Legale, you must first go to the Settings section located in the left sidebar of the dashboard. Once inside the Settings menu, several configuration tabs will be displayed at the top of the screen, including Signature, Security, Notifications, and others. To begin the certificate setup, you must specifically select the Certificate tab. This is where all the options related to certificate upload and signature image configuration are centralized.
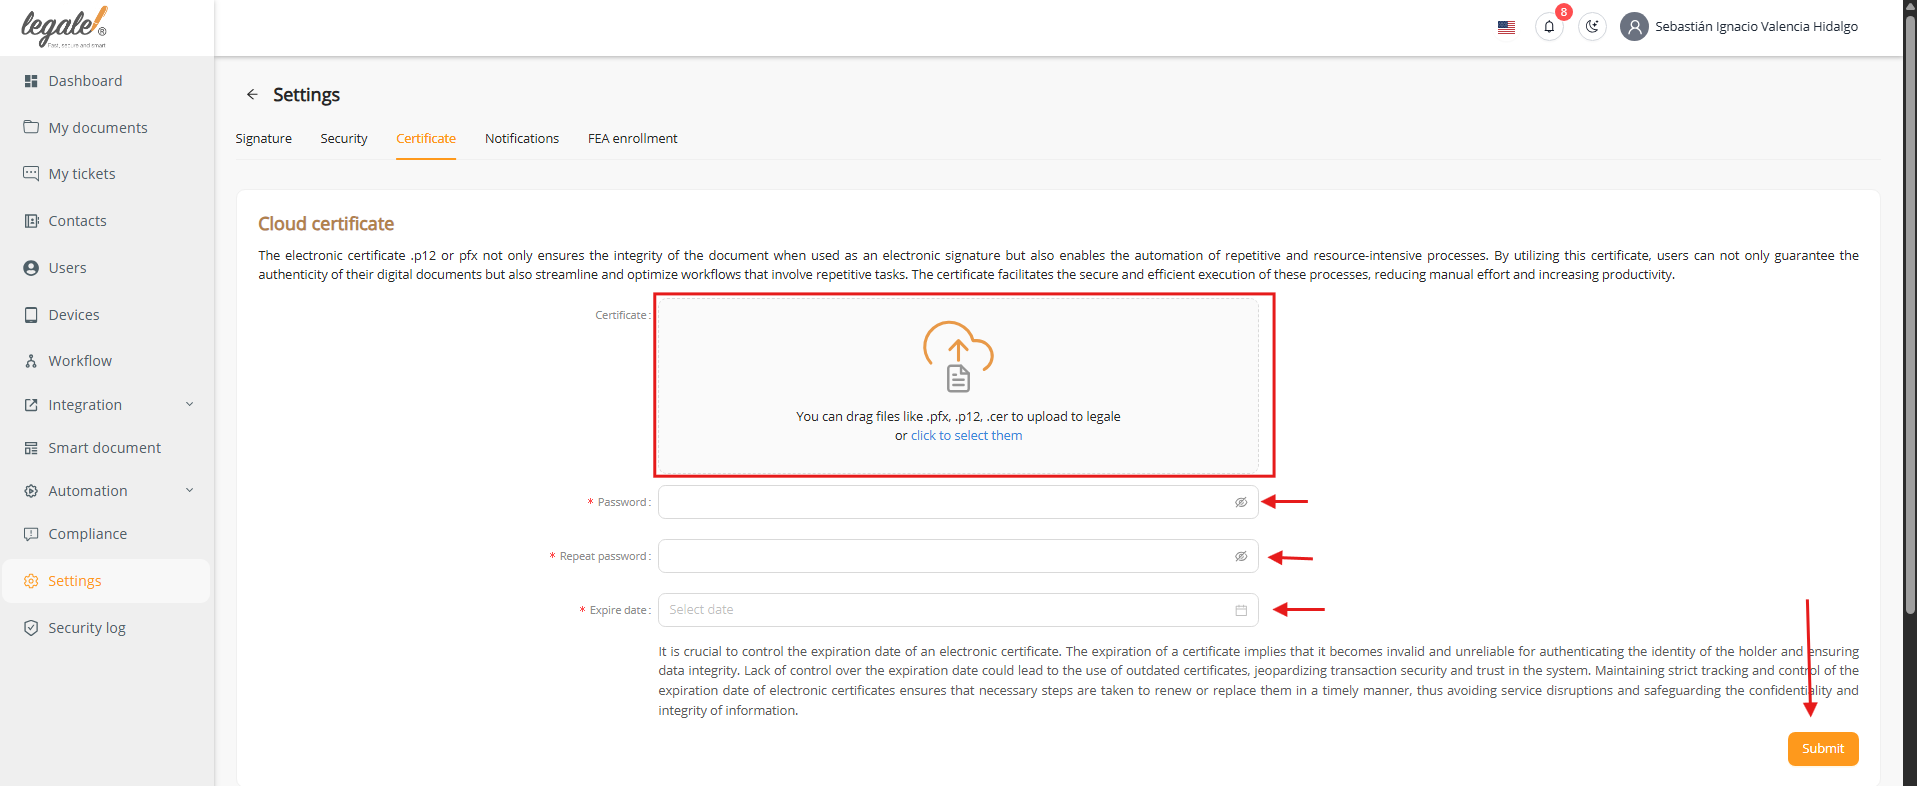
2. Uploading a cloud certificate #
Within the Certificate tab, the platform allows you to upload your electronic certificate. It is important to note that only files with the extensions .p12 or .pfx are accepted. The upload area provides the option to drag and drop the file directly, or alternatively, you can click the selection box to browse and upload it manually. After choosing the certificate file, you must type in the corresponding Password and then confirm it by re-entering it in the Repeat password field. To ensure proper validity control, the system also requires selecting an Expiration date through the calendar input. Once all fields are completed, the process is finalized by clicking the Submit button located at the bottom right of the form.
3. Certificate successfully uploaded #
When the information has been correctly entered and submitted, the platform confirms the action with a success message indicating that the certificate has been uploaded. From that moment, the uploaded file appears in the Certificate section, where it is stored and linked to the user account. Through this interface, it is possible to review the certificate, replace it with another one, or remove it if necessary, ensuring that the user maintains full control over the validity and availability of their certificate.
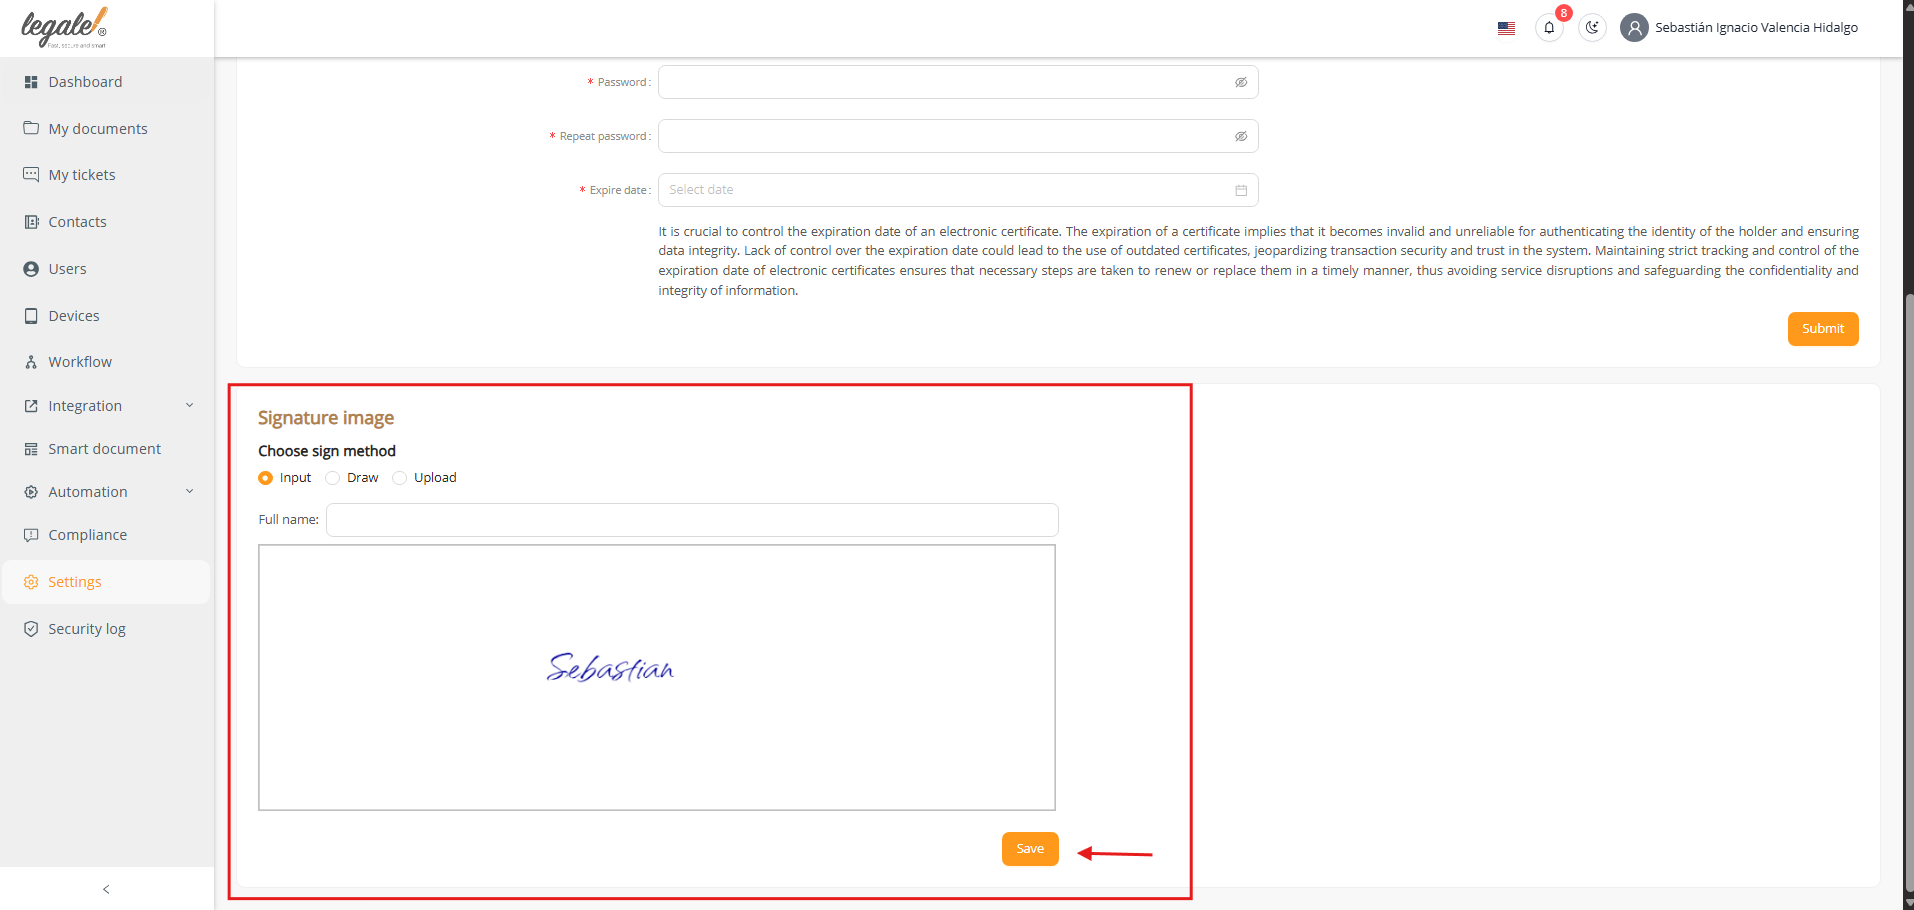
4. Configuring the certificate signature image #
Once the certificate has been uploaded, the user must configure the signature image that will be visually associated with the certificate when signing documents. This step is essential because it defines how the electronic signature will be displayed in signed files. In the Signature image section, the user may choose between three methods: Input, which generates the signature automatically from the typed name; Draw, which allows drawing the signature manually using the interface; or Upload, which enables the import of an existing image file containing a scanned or pre-designed signature. After selecting the preferred method and confirming the signature, the process concludes by pressing the Save button. At this point, the cloud certificate and the visual signature image are both registered and ready to be used in the platform for secure electronic signing processes.


