- Opening the CSV configuration panel
- Linking CSV columns to smart document variables
- Assigning CSV fields to smart document variables
- Selecting folder structure for automated storage
- Creating folder names from CSV data
- Customizing document naming and email notification
- Setting up the signing workflow from CSV
- Signature position configuration
- Finalizing signature placement
- Saving signature configuration
- Optional alarm setup for automation monitoring
- Automation successfully linked to workflow and smart document
- Final execution: Launching the workflow
- Sending the documents
- Smart document log – Workflow completed
- Email notification – Signature request
- Data merged from CSV
- Document status in folder structure
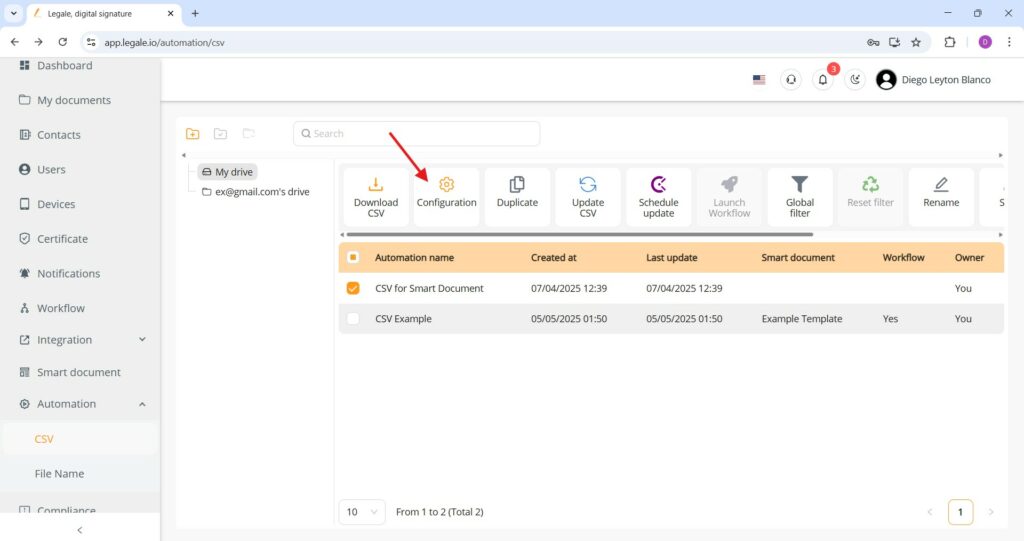
Opening the CSV configuration panel #
After selecting the imported CSV automation entry, clicking the Configuration button opens the settings panel.
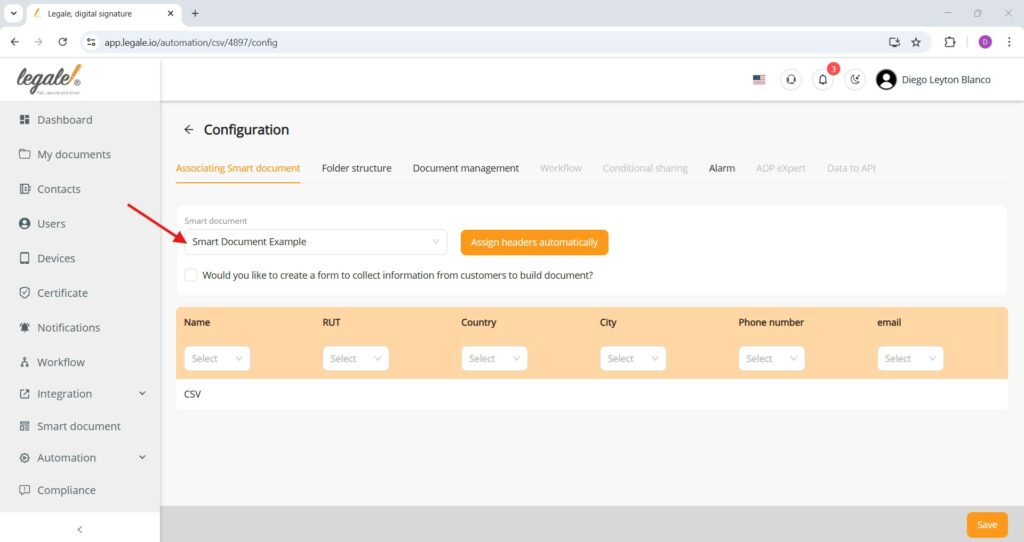
Linking CSV columns to smart document variables #
In the configuration view, the selected smart document template appears at the top, and the CSV headers below can be mapped manually or by clicking “Assign headers automatically” to match each column (such as Name, RUT, Country, City, Phone number, and Email) with the corresponding variables used in the smart document.
Learn how to add and manage fields in the Smart Document
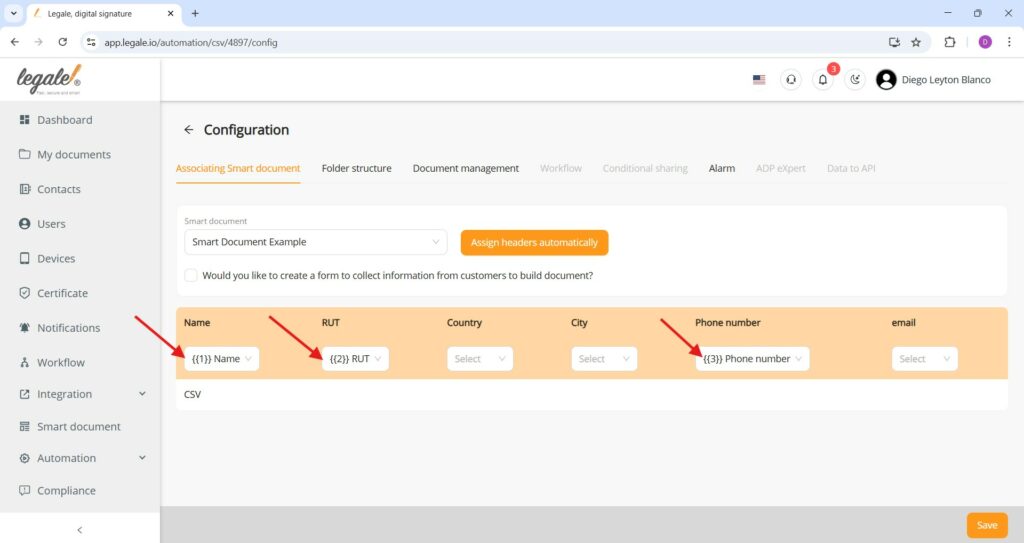
Assigning CSV fields to smart document variables #
The CSV columns are explicitly mapped to the smart document’s placeholder variables such as {{1}} Name, {{2}} RUT, and {{3}} Phone number, ensuring that each document generated through automation is dynamically populated with personalized values, and these same variables can also be reused to define custom file names and folder paths.
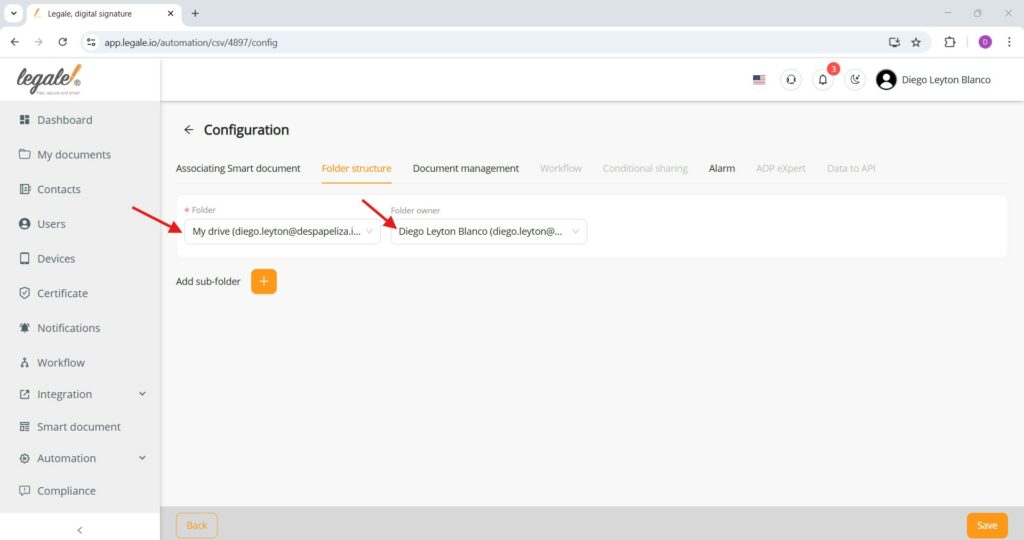
Selecting folder structure for automated storage #
Here the destination folder structure is defined to store the documents that will be generated automatically from the CSV, allowing the user to select a base drive and folder owner, and optionally configure sub-folders using variables.
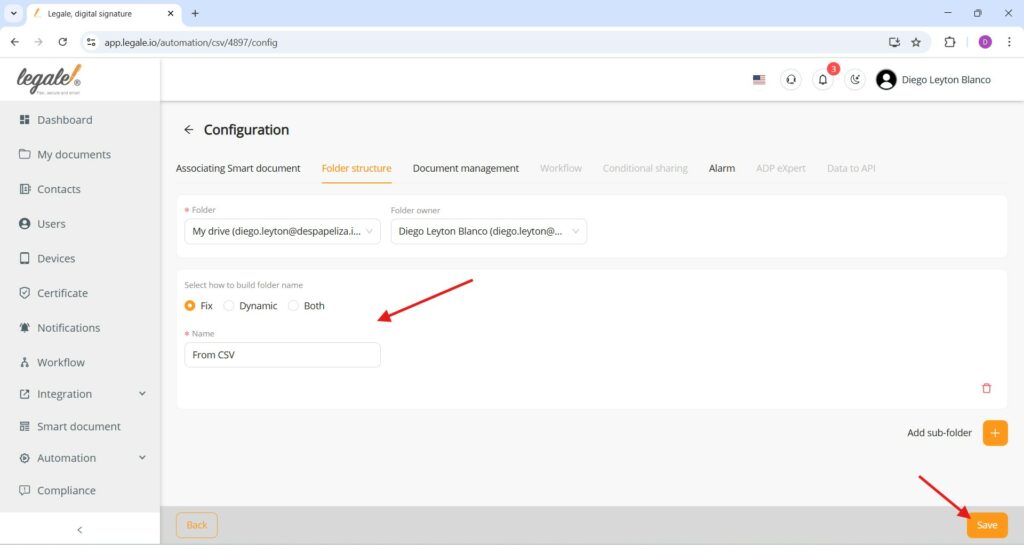
Creating folder names from CSV data #
The folder structure is configured to use a fixed root directory while dynamically generating document names based on CSV data values. Selecting the “Fix”, “Dynamic,” or “Both” option and assigning a name to the main folder ensures that each generated document is organized into the appropriate folder.
Learn the difference between Fix and Dynamic folder
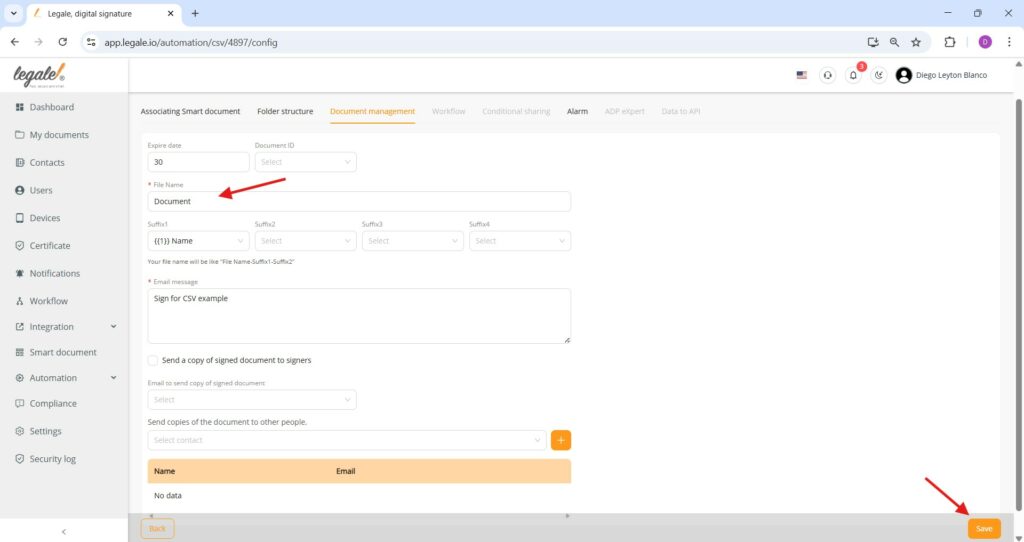
Customizing document naming and email notification #
In this configuration step, a base document name is defined (e.g., “Document”) and dynamic suffixes such as {{1}} Name are added to personalize each generated file using values from the CSV file, resulting in names like “Document Despapeliza”; additionally, a custom email message is written to be sent to signers, ensuring that all recipients receive a clear and standardized communication when signing their respective documents.
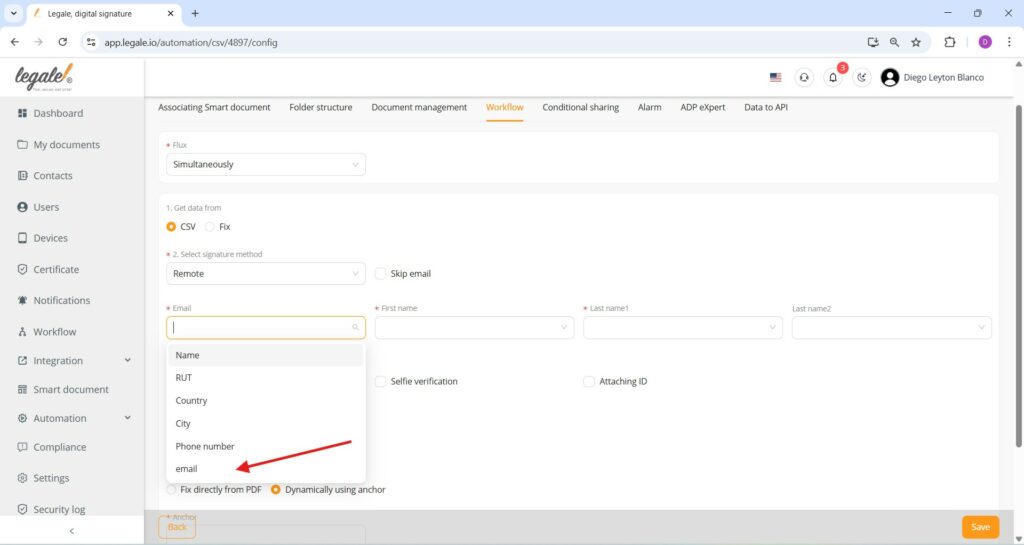
Setting up the signing workflow from CSV #
The signature flow is set to “Simultaneously”, allowing all signers to receive the document at the same time; data is sourced directly from the uploaded CSV, with the signature method selected as “Remote” to facilitate digital signing via email; the email field is dynamically populated by linking it to the corresponding “email” column from the CSV, ensuring each signer receives a personalized document and signature request based on their respective email address.
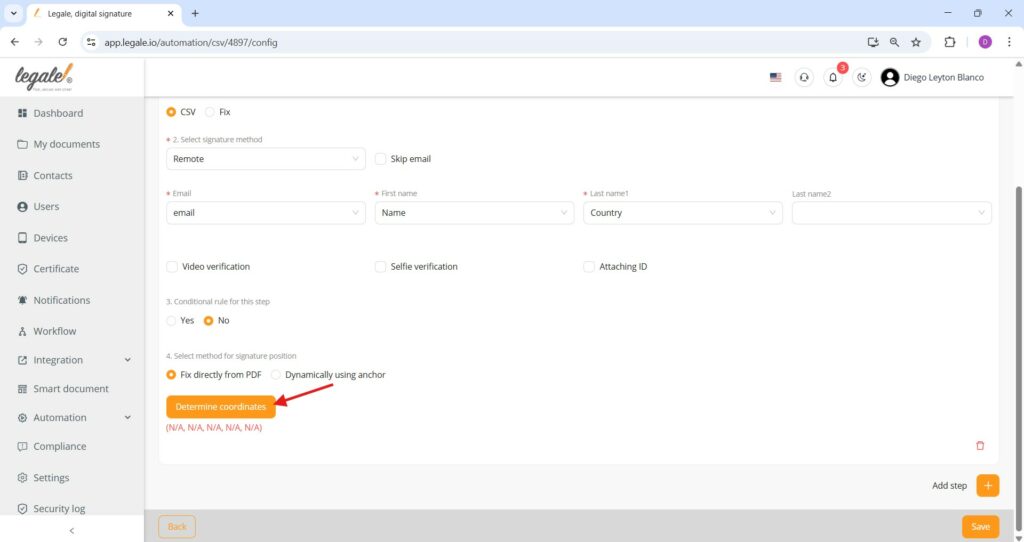
Signature position configuration #
The final step in configuring the CSV-driven digital signature process involves setting the signature placement within the document; in this interface, the method chosen is “Fix directly from PDF,” which requires manually selecting the exact coordinates where the signature will appear by clicking “Determine coordinates”.
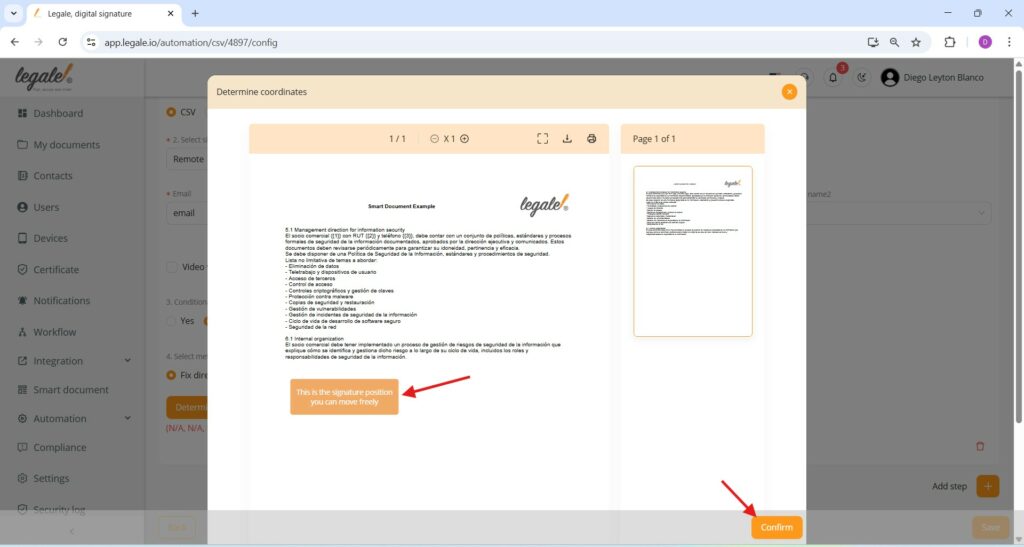
Finalizing signature placement #
The user visually places the signature field within the PDF template by dragging the “This is the signature position” marker to the appropriate location; once positioned accurately, clicking the “Confirm” button locks in the coordinates, ensuring each recipient’s signature appears exactly where intended in the smart document generated from the CSV automation.
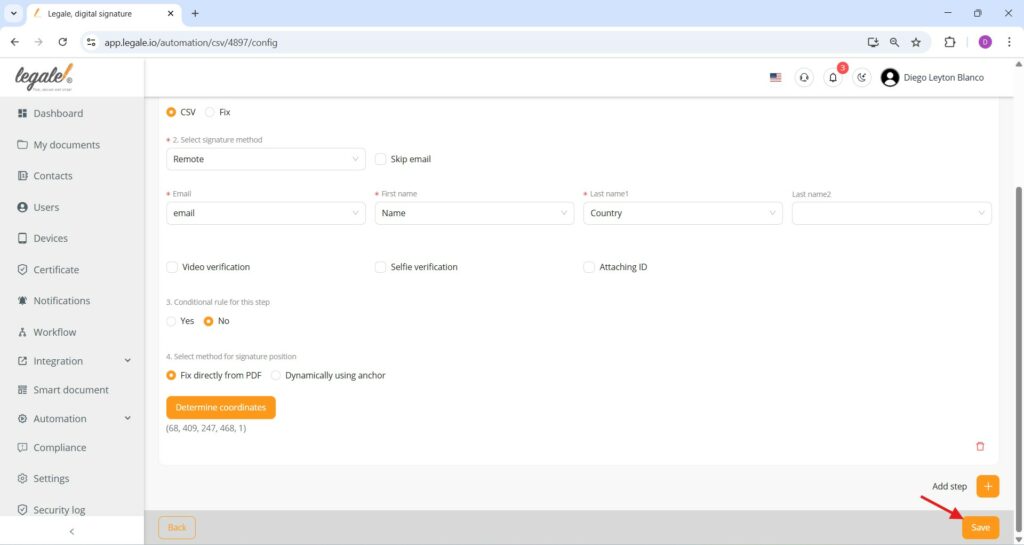
Saving signature configuration #
After setting all the signature step parameters—choosing CSV as the data source, selecting the signature method (Remote), assigning dynamic fields such as email, name, and country, and defining the exact signature coordinates—clicking the “Save” button at the bottom right finalizes and stores the configuration, making the automation ready for document generation and remote signing.
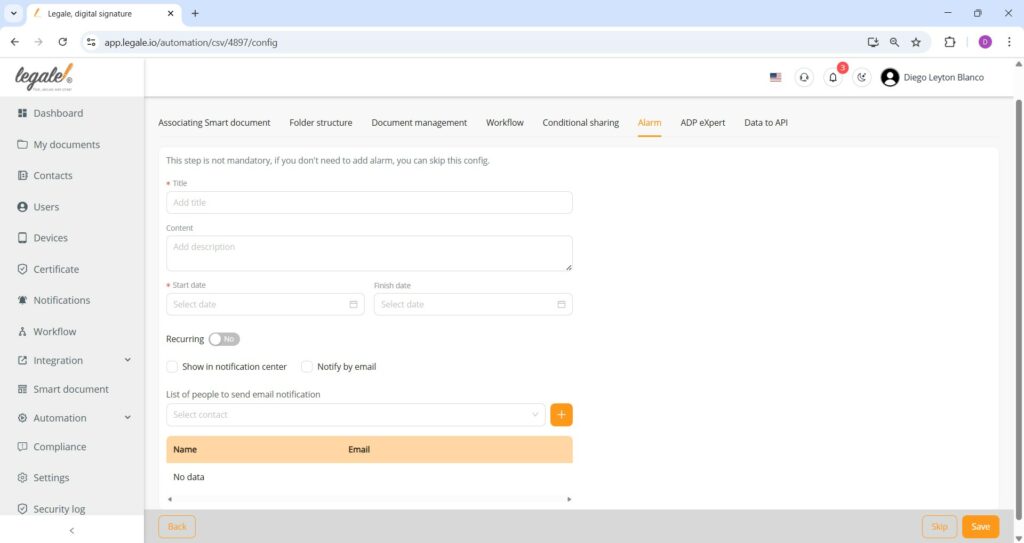
Optional alarm setup for automation monitoring #
In the Alarm configuration tab, users have the option to set alerts related to the automation process. This includes specifying a title, a description, start and end dates, and whether the alarm should recur. Additionally, users can choose to display the alarm in the notification center, send email notifications, and define a list of recipients.
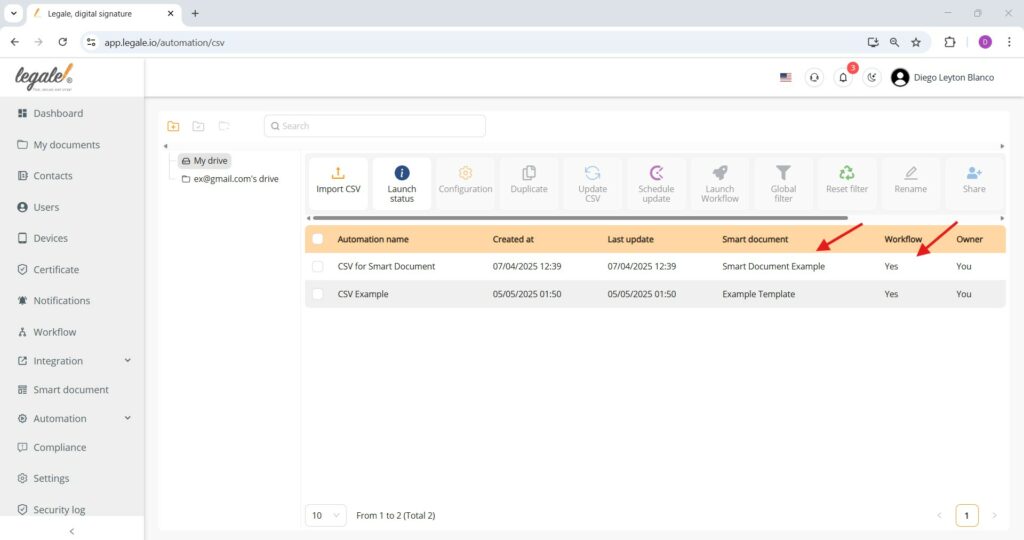
Automation successfully linked to workflow and smart document #
The final overview confirms that the automation process named “CSV for Smart Document” is fully configured and linked to the designated Smart Document template “Smart Document Example” with an active workflow. The entry under the “Workflow” column marked “Yes” indicates that all the configuration steps were completed and saved correctly.
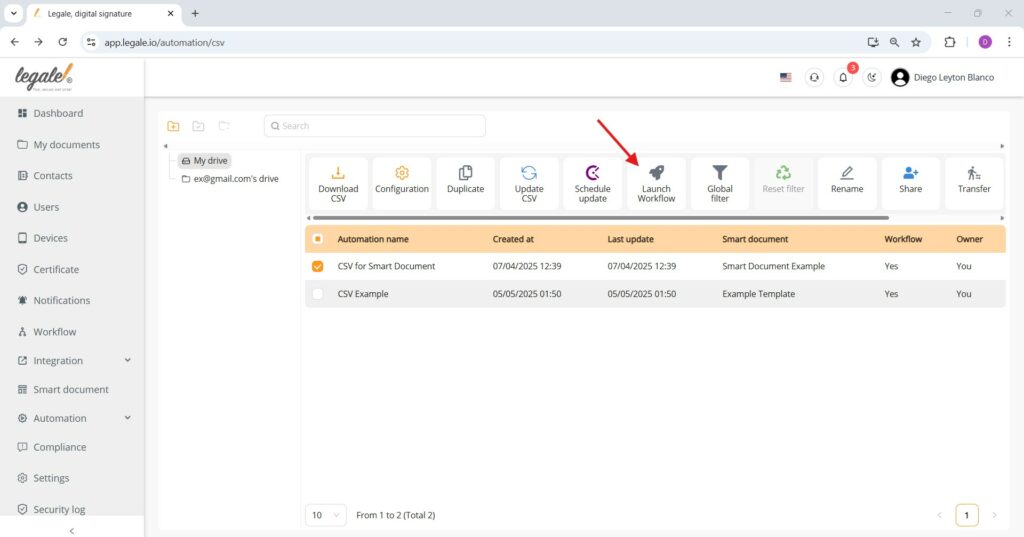
Final execution: Launching the workflow #
The final step in the automation setup is launching the workflow by selecting the configured automation (“CSV for Smart Document”) and clicking the “Launch Workflow” button. This action triggers the document generation and signature process for each CSV entry using the associated Smart Document template.
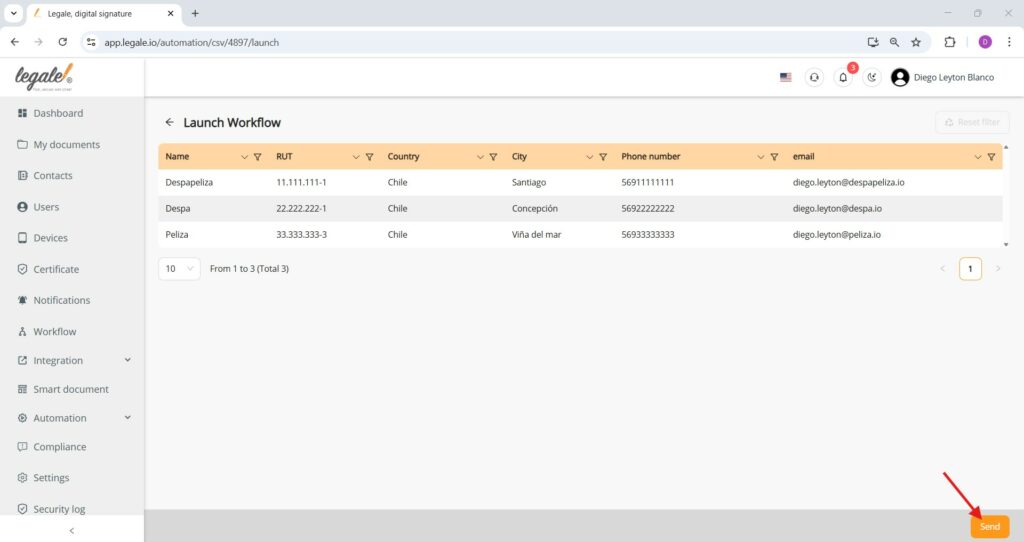
Sending the documents #
The automation presents a preview of the recipients extracted from the uploaded CSV file, showing all relevant details such as name, RUT, country, city, phone number, and email. By clicking the “Send” button, the system initiates the workflow.
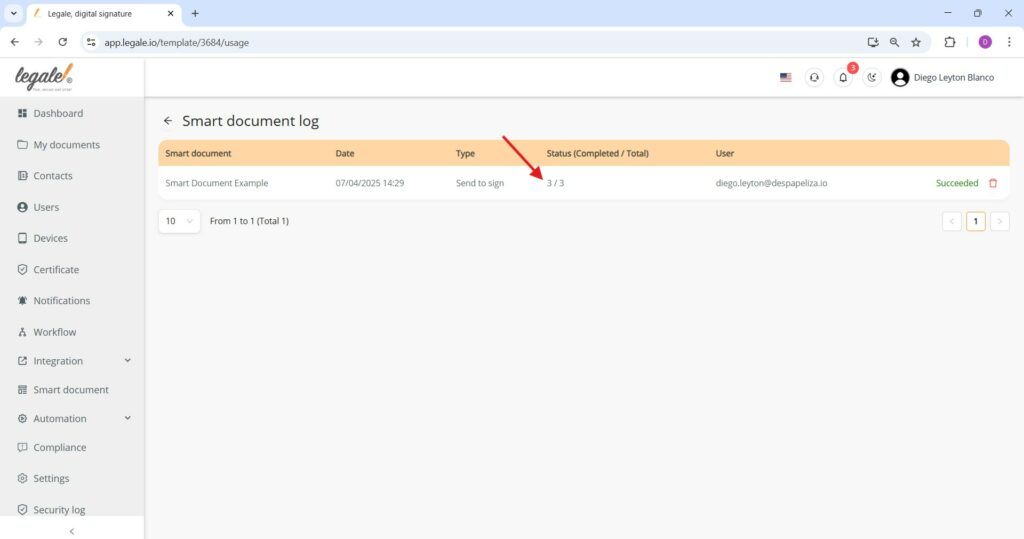
Smart document log – Workflow completed #
The Smart Document log confirms successful execution of the CSV-driven automation. The interface displays that all three documents associated with the “Smart Document Example” were generated and sent out, with the status indicating 3 out of 3 email sent ready to sign. The user who initiated the workflow is shown alongside the final status marked as “Succeeded”
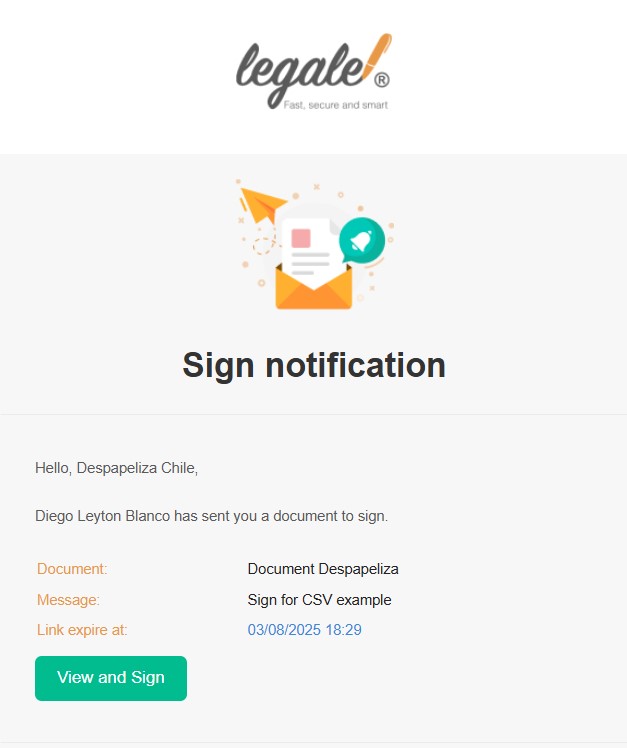
Email notification – Signature request #
This email serves as a notification from Legale, informing the recipient “Despapeliza Chile” that a digital document titled “Document Despapeliza” has been sent for signature by Diego Leyton Blanco. The message attached to the request is “Sign for CSV example”, and the link to access and sign the document.
Data merged from CSV #
The document titled “Smart Document Example” displayed in the Legale viewer confirms that the automated CSV-to-document workflow has correctly populated the smart template with personalized data. Specifically, the placeholder fields for the company name, RUT, and phone number have been filled as expected: “Despapeliza” is listed as the commercial partner, with the corresponding RUT 11.111.111-1 and phone number 56911111111 clearly shown. Additionally, the bottom of the document includes the dynamically positioned signature box labeled “Despapeliza Chile”, verifying successful document generation, data merging, and remote signature configuration through the Legale platform.
Lear how to sign your documents

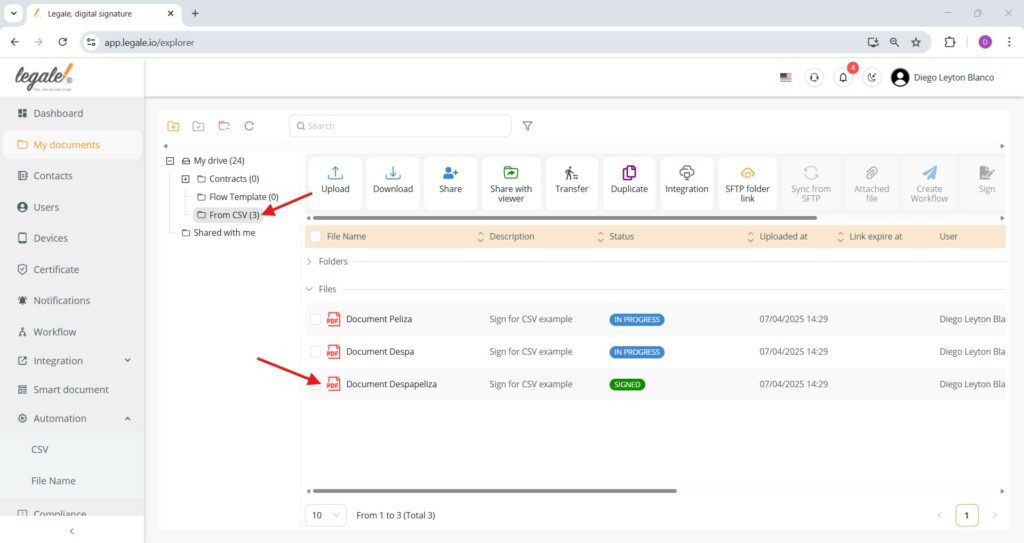
Document status in folder structure #
All documents generated from the CSV automation are now organized in the “From CSV” folder under “My Drive”. The screenshot confirms three separate documents – Document Peliza, Document Despa, and Document Despapeliza – each created from the smart document template and personalized using CSV data. Their statuses show real-time progress: Document Despapeliza is marked as SIGNED, indicating completion, while the other two documents remain IN PROGRESS, pending signature. This validates that the automated merge and dispatch process is functioning correctly, with accurate document naming and classification based on the fix folder configuration previously set up.