Compliance report #
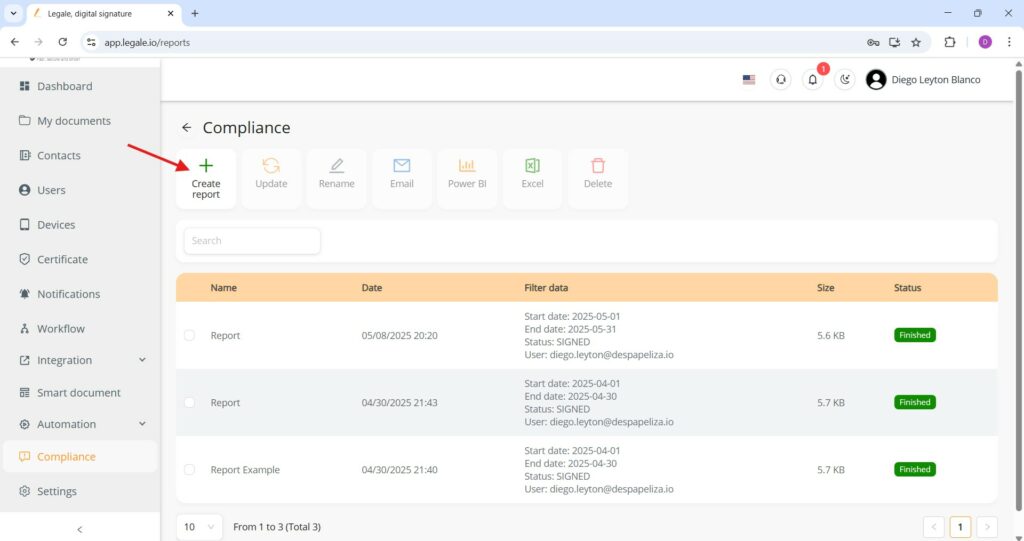
On the Compliance screen, users can generate a report by clicking the “Create report” button located in the upper left section. Once a report is created, it appears in the list below with relevant details such as the name, date of creation, filter criteria (including start and end dates, signature status, and associated user), file size, and the status of the report—indicated as “Finished” when the report is ready.
Filters and generation #
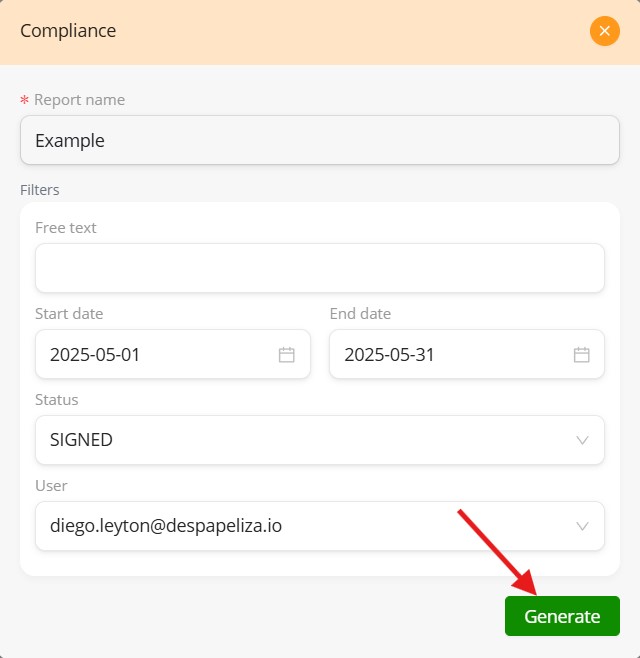
To create a compliance report, enter a Report name and apply any desired filters in the “Filters” section:
-
Free text: Optional keyword filter.
-
Start date / End date: Define the reporting period.
-
Status: Select document status (e.g., SIGNED).
-
User: Assign the user whose activity you want to include in the report.
Once all fields are set, click the green “Generate” button to create the report.
Viewing reports #
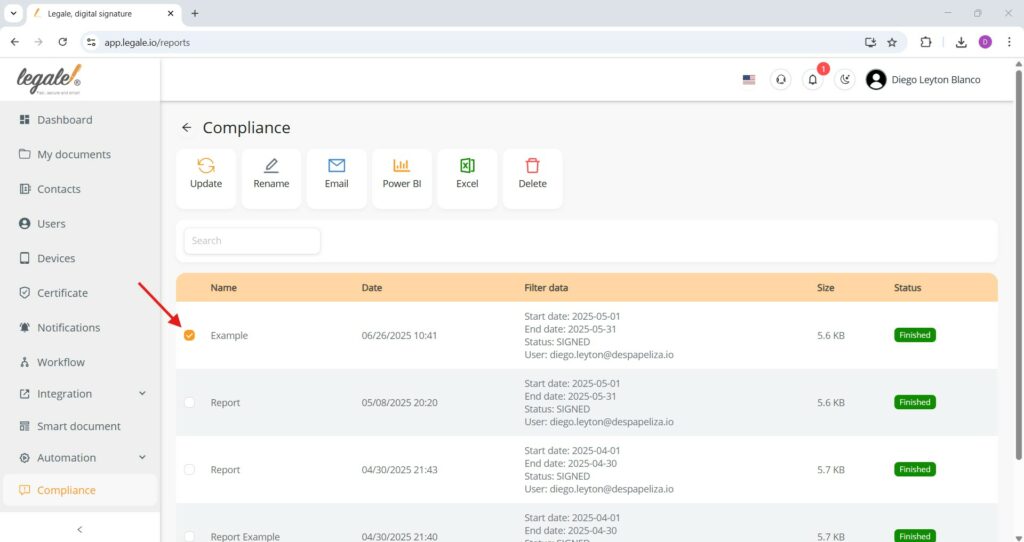
After generating a compliance report, it will appear in the list below the “Compliance” section. Each row includes the report name, the creation date, the filter data used (such as the date range, user, and status), the file size, and the current status, typically marked as “Finished”.

Report options #
To interact with any report, simply check the box next to its name. Once selected, you can choose from several actions available at the top, such as updating the report to modify its parameters, renaming it for better identification, emailing it directly, exporting it to Power BI, downloading it in Excel format, or deleting it if it is no longer needed.
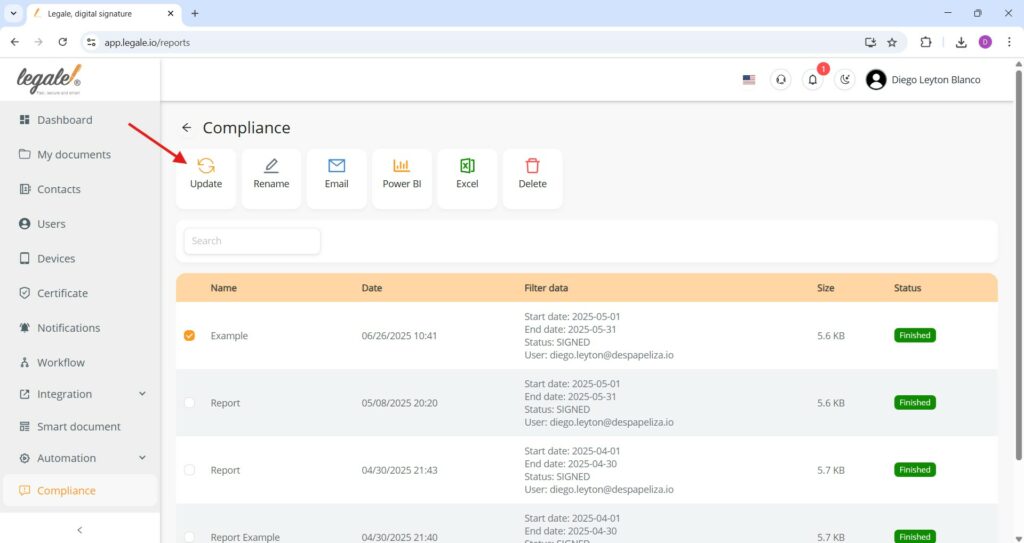
Update an existing compliance report #
To modify an existing report, first select it by checking the box next to its name, then click the “Update” button located at the top. This will reopen the report configuration screen, where you can adjust any of the previously set parameters such as the date range, status, user, or report name. After making your changes, confirm them by clicking “Save”, which will overwrite the existing report with the updated information while keeping the report available in the same list.
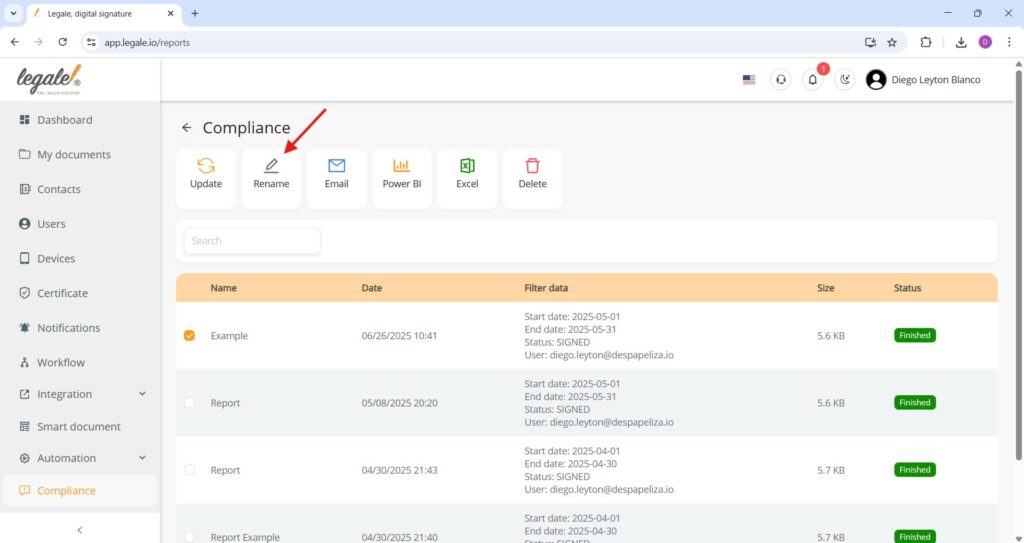
Rename a compliance report #
To rename a report, simply select it by ticking the checkbox next to its current name, then click the “Rename” button located at the top. A field will appear allowing you to type the new name for the selected report. After entering the desired name, confirm the action so the report list reflects the updated title.
Export a compliance report #
To export a compliance report, first select the desired report by ticking the checkbox next to its name. Then, you can choose among the available export options. Click the “Email” button to send the report directly via email. If you wish to connect the data to a dashboard, select the “Power BI” button. To download the report as a spreadsheet, click the “Excel” button.

Delete a compliance report #
To remove a compliance report, select the report by ticking the corresponding checkbox and then click on the “Delete” button located in the top menu bar. This will permanently remove the selected report from the list, so make sure to confirm the deletion if prompted, as the action cannot be undone.


