- Add fields to a Smart Document
- Insert fields into the document
- Configure the field properties
- Copy the field number
- Field number reused in content
- Insert additional fields with unique identifiers
- Edit field settings from the configuration menu
- Reorder form fields
- Add file to the Smart Document
- Delete a field from the smart document
- Preview the Smart Document form
- Form preview view
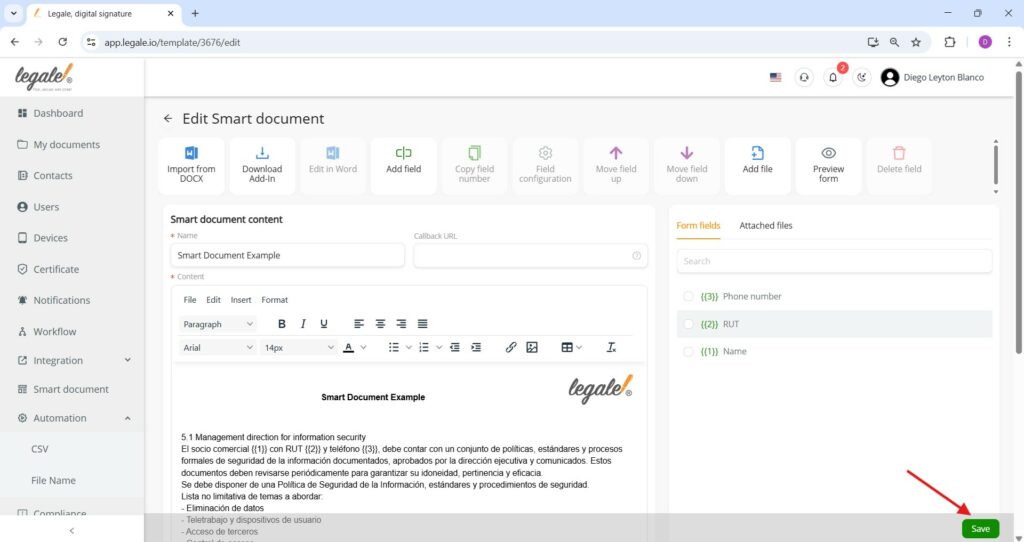
- Save the Smart Document
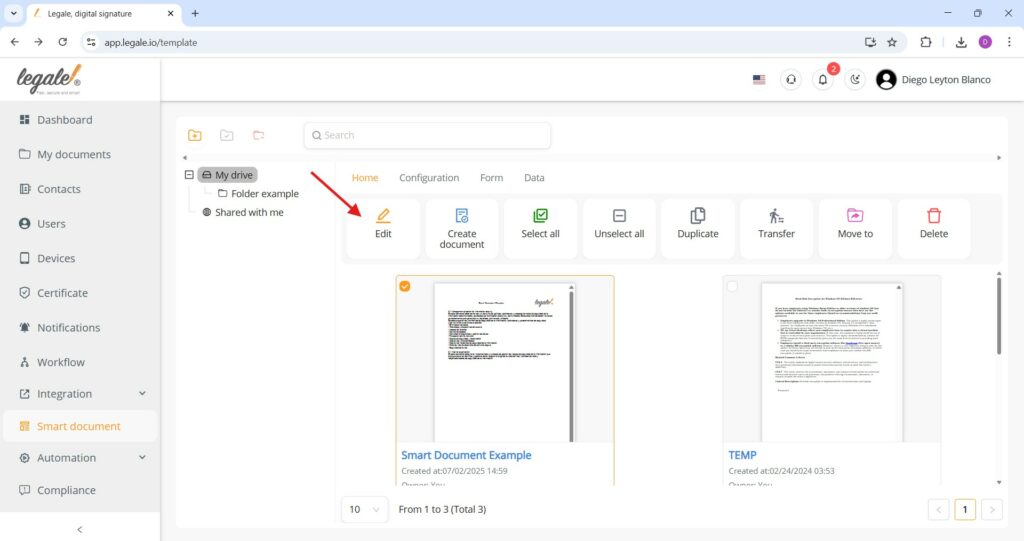
Add fields to a Smart Document #
To add fields to a Smart Document, select the template from your drive and click the Edit button; this will open the document in editing mode.
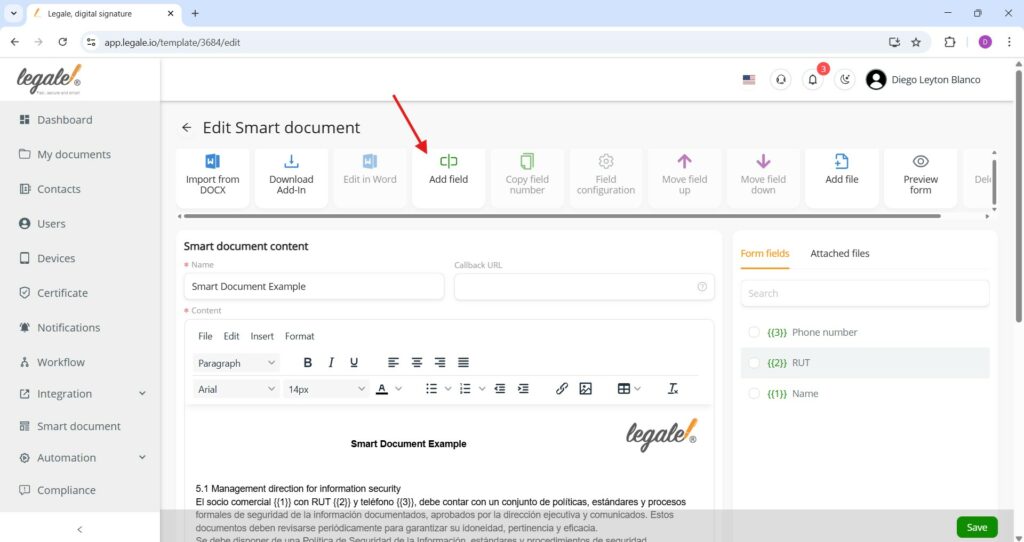
Insert fields into the document #
While editing your Smart Document, click on the Add field button to start to insert variables.
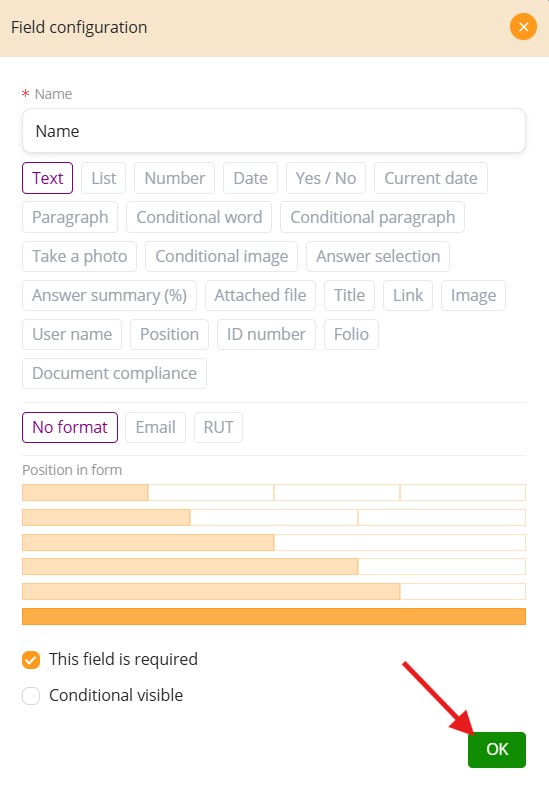
Configure the field properties #
When adding a field, use the Field configuration panel to define its properties—set a name (e.g., “Name”), choose a data type (like Text, Number, Date, etc.), apply formatting (e.g., Email, RUT), and mark it as required if needed. Once configured, click OK to create the field.
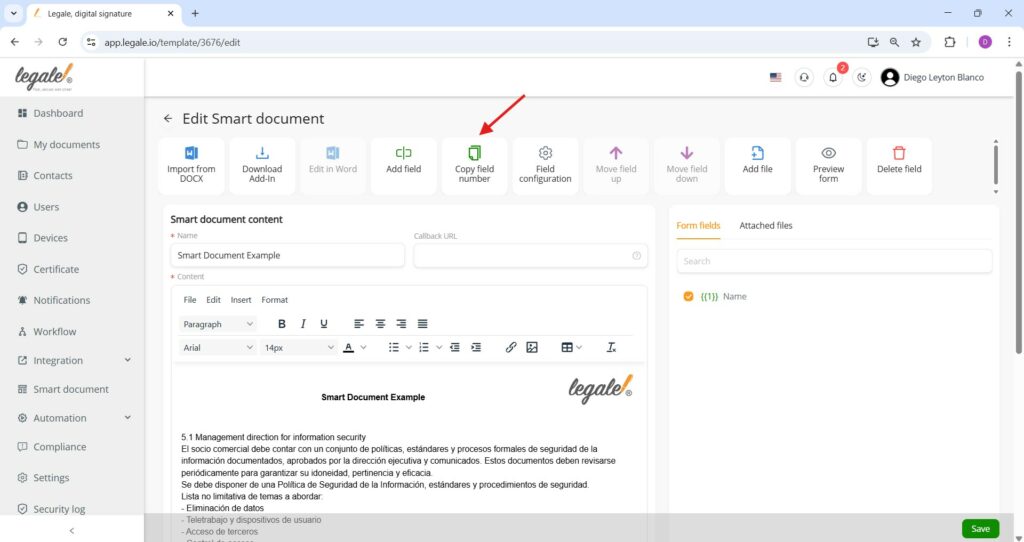
Copy the field number #
To put the field (e.g. Name{{1}}) elsewhere in the document, select it from the Form fields list and click the Copy field number button—this copies the field placeholder to your clipboard, allowing you to paste it multiple times within the Smart Document content for consistent user input references.
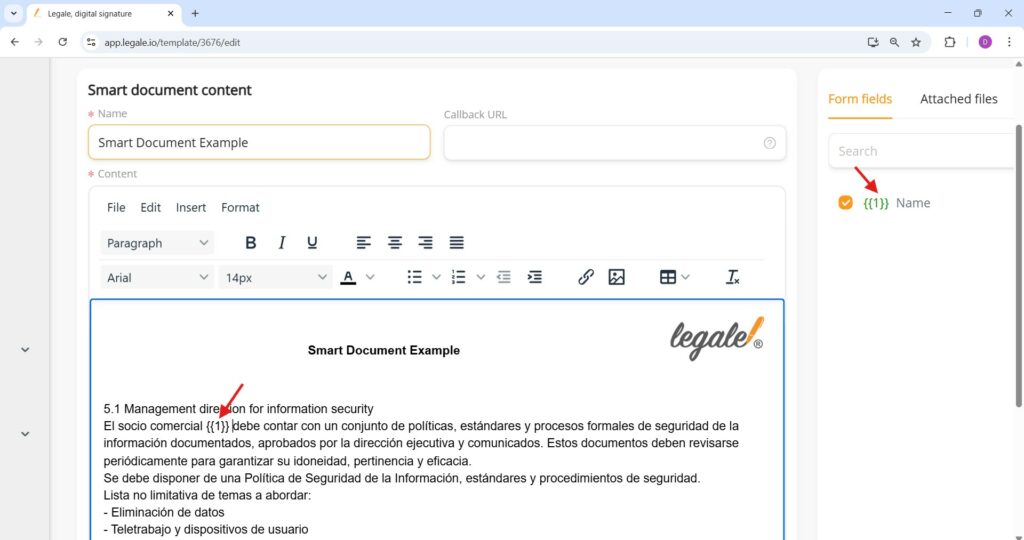
Field number reused in content #
The copied field number {{1}} has been successfully reused in the document body, as shown—this means the same user input (in this case, Name) will automatically appear in all locations where the placeholder is inserted.
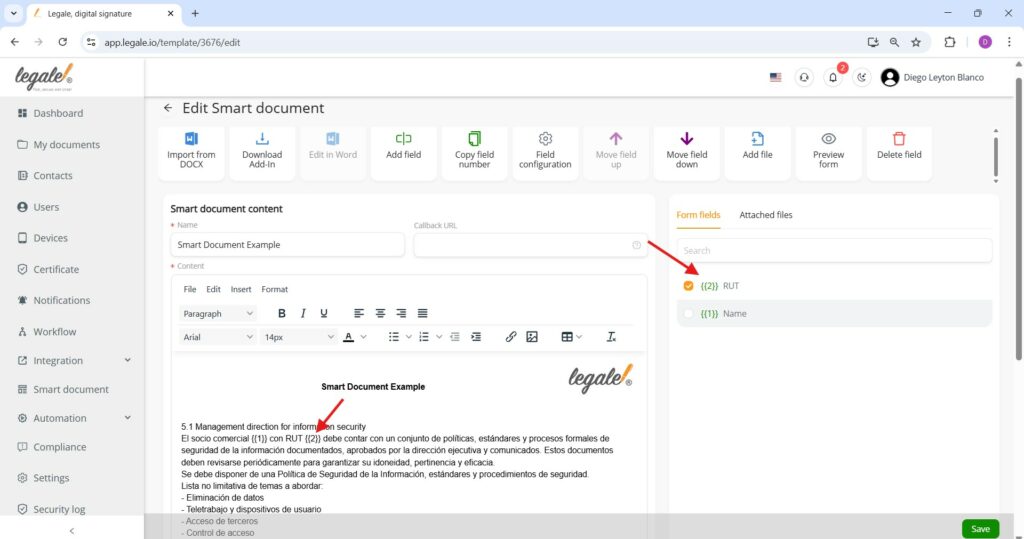
Insert additional fields with unique identifiers #
You can continue enriching your Smart Document by inserting new fields like {{2}} (e.g., RUT) using the same method—select the field from the Form fields list and place it where needed in the content.
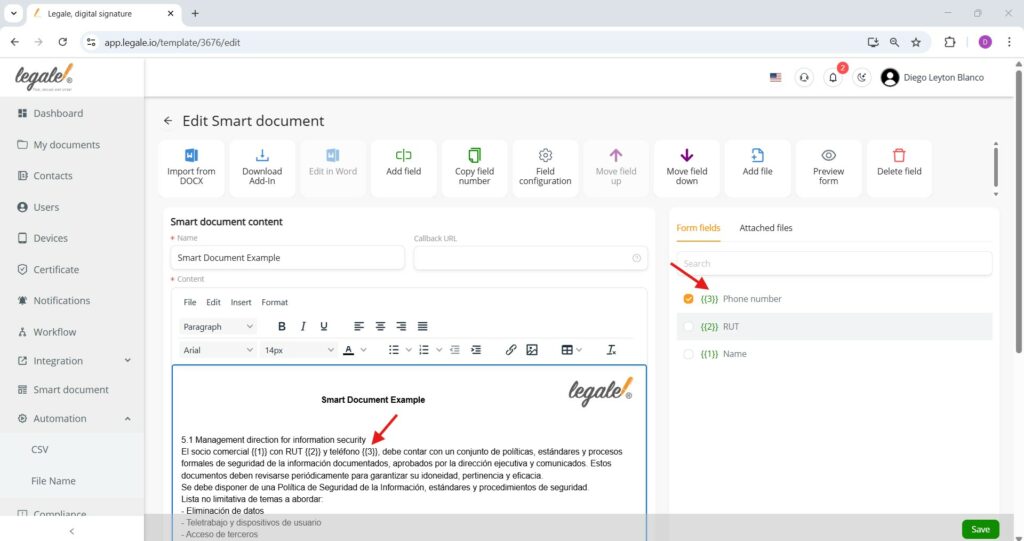
With the Phone number field ({{3}}) added alongside Name ({{1}}) and RUT ({{2}}), your Smart Document now dynamically collects personalized data—these placeholders will be replaced with user input during form completion.
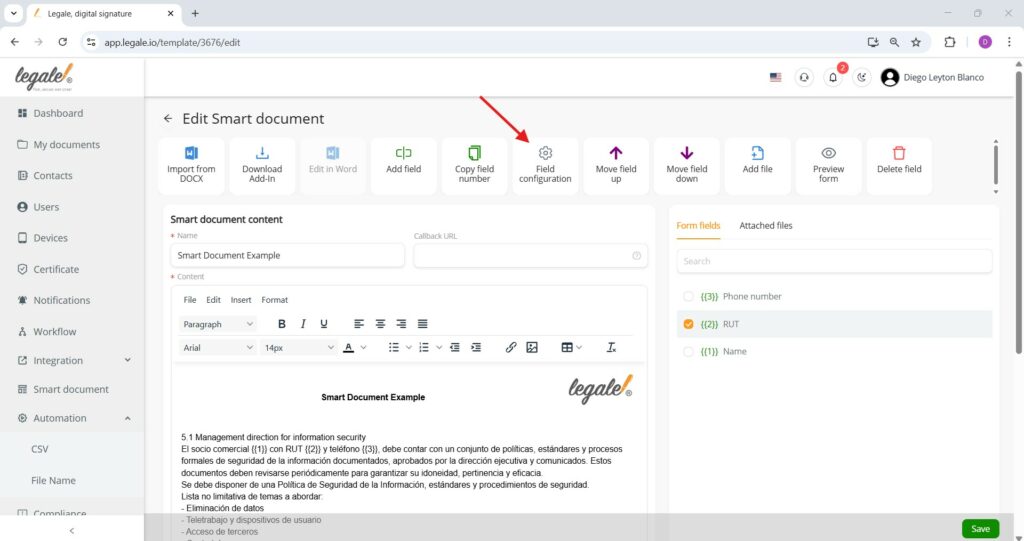
Edit field settings from the configuration menu #
To modify the properties of an existing field (such as its label or format), select the field from the Form fields panel and click the Field configuration button—this opens the same customization interface used during field creation, allowing you to make adjustments as needed.
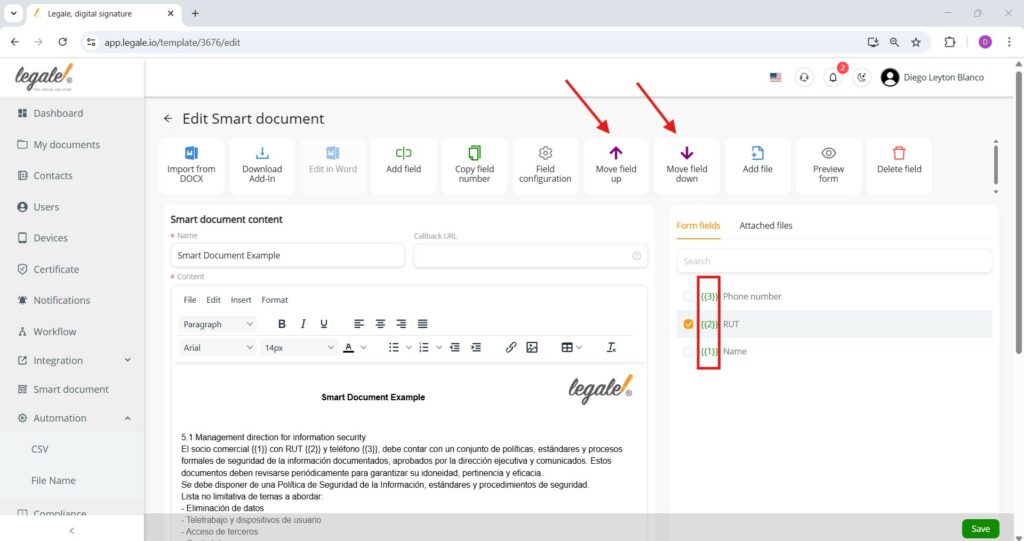
Reorder form fields #
To organize how fields appear in the form view, select a field from the Form fields list and use the Move field up or Move field down buttons—this changes its vertical position in the right-hand panel, helping control the sequence in which users will complete the form.
Add file to the Smart Document #
Apart from adding variable fields, we can require a file like the birth certificate, ID photocopy or more in the moment of the signer wants to complete the document.
 #
#
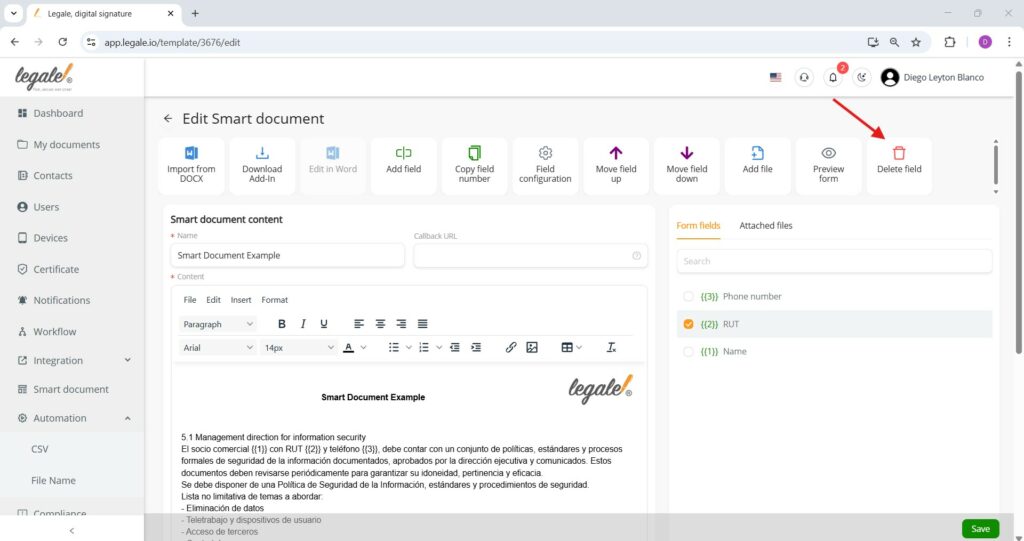
Delete a field from the smart document #
To remove a field completely, select it from the Form fields list and click the Delete field button—this will erase the field’s configuration (e.g., {{2}}) from the document content. Be sure to confirm any changes before saving.
Preview the Smart Document form #
To verify how your Smart Document will appear to users during completion, click the Preview form button—this opens a simulation of the form-filling experience, allowing you to test the field layout, input behavior, and required validations before finalizing the template.

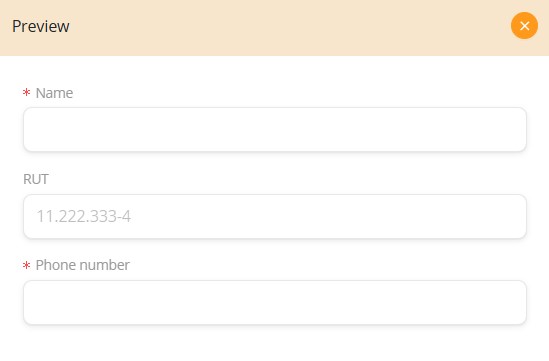
Form preview view #
The Preview window shows how end users will see and complete the form: each configured field (like Name, RUT, and Phone number) appears with its label, input type, and validation status. Required fields are marked with a red asterisk, giving you a clear way to validate the form structure before publishing.
Save the Smart Document #
Once you’ve inserted and configured all fields, and validated the layout with the preview, click the green Save button at the bottom-right corner—this finalizes your Smart Document, making it ready for use in automated workflows or for generating individual documents with dynamic input.