Document organization is key to efficient management. Sorting your documents to sign allows you to structure and classify the information according to your needs and preferences. This simplifies the search and retrieval of documents.
Through this guide, we will provide you with detailed instructions on how to use static folders and dynamic folders to organize your documents to be signed. This process is designed to be intuitive and easy to follow, giving you the control necessary to keep your documents organized and accessible at all times.
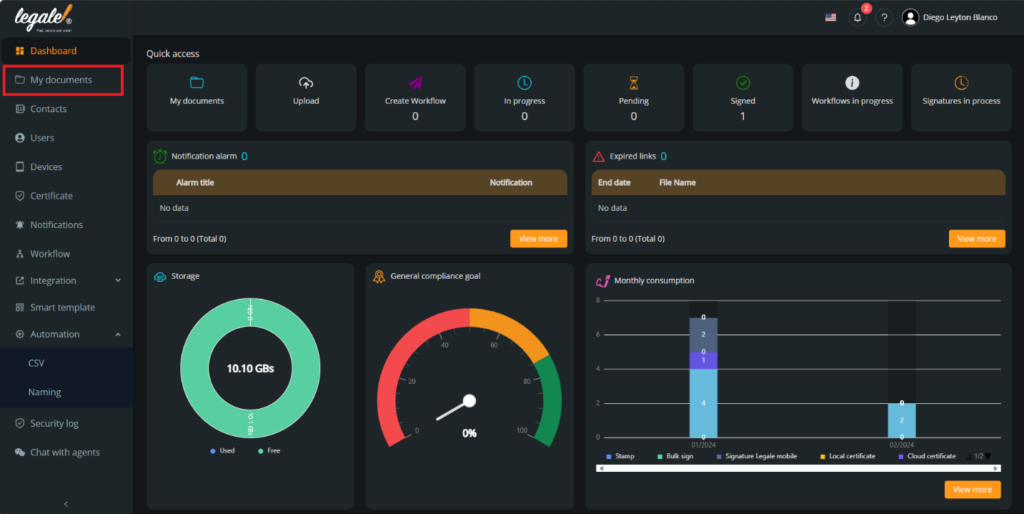
Go to your documents: In the left sidebar, you need to press “My devices“.
Static folder #
Organize the documents to be signed in a fixed structure of mother folders. Each folder is created by the user with a specific name and within it the documents are saved with the name that the user assigns.
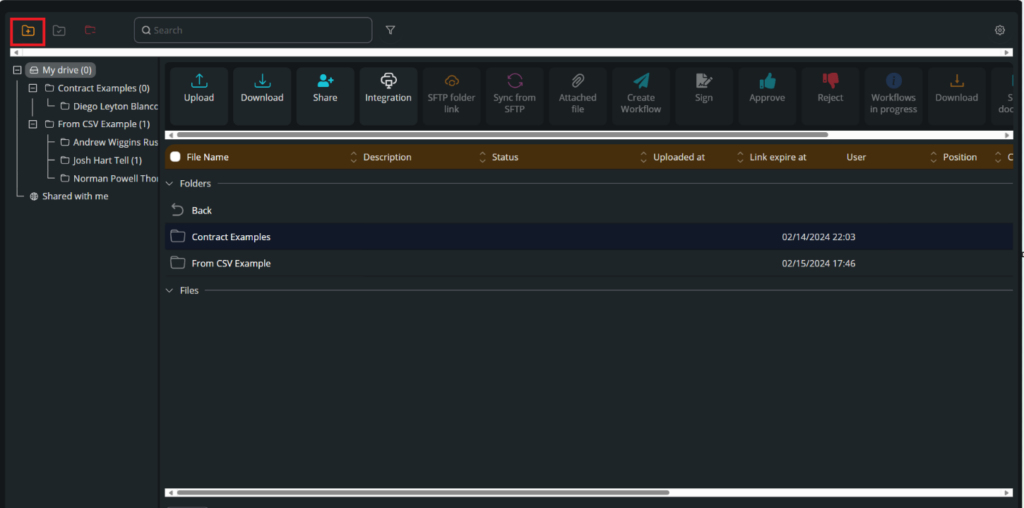
Create the mother folder: In the upper left corner you can find the icon to create a new folder.
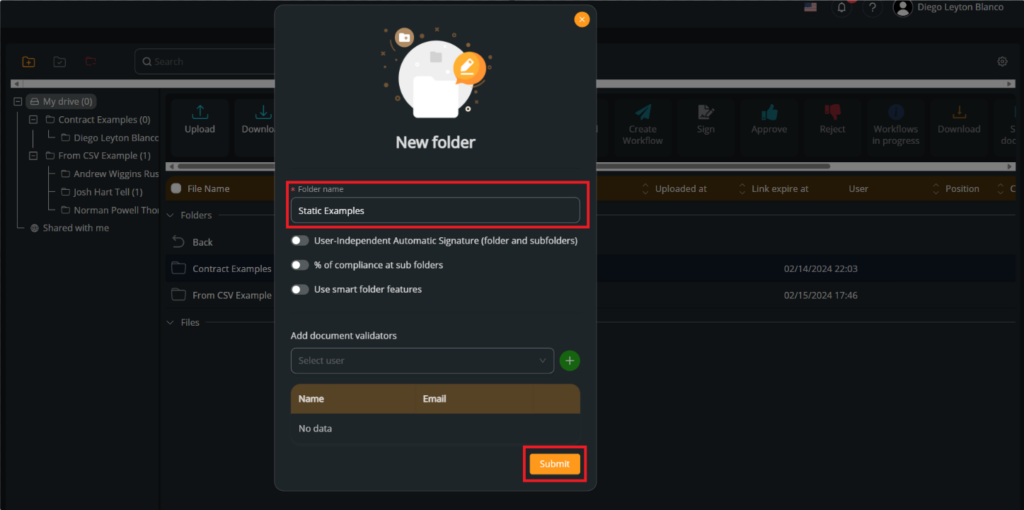
Name the new folder: Now, the next step is to name to the mother folder, in this example is going to be Static Examples, and then press “Submit”.
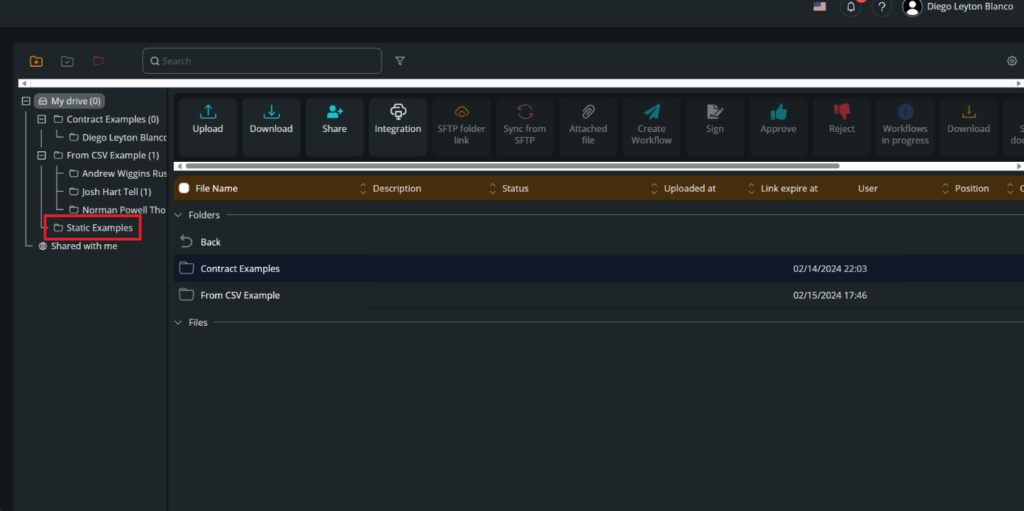
Verify the folder creation: You will be redirected to the main page of your documents, and see the creation of the folder.
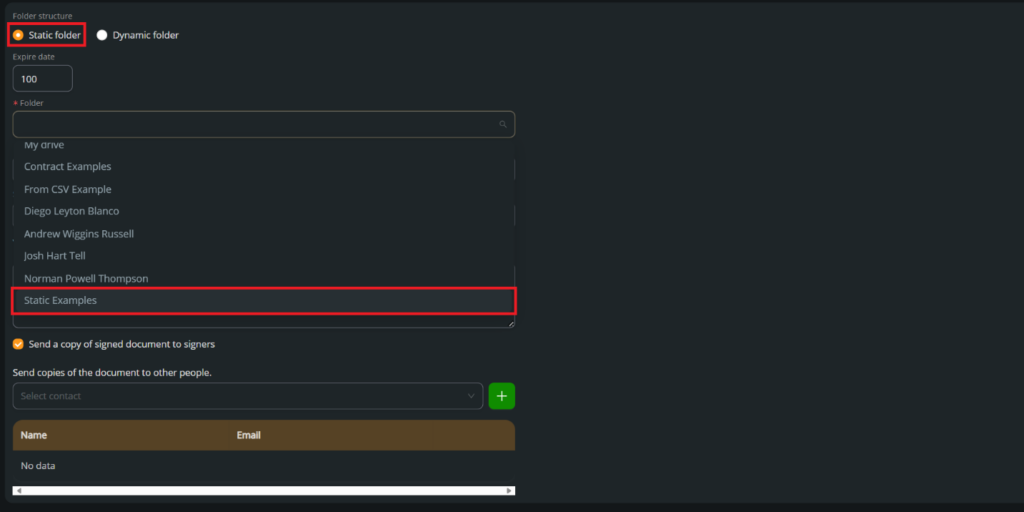
Example: Using a CSV automation for this example, we choose to save the documents in a Static folder and then choosing the Static folder that we created in the past steps called “Static Examples”, we are saying that every document in the future workflow is going to be saved in that specific folder.
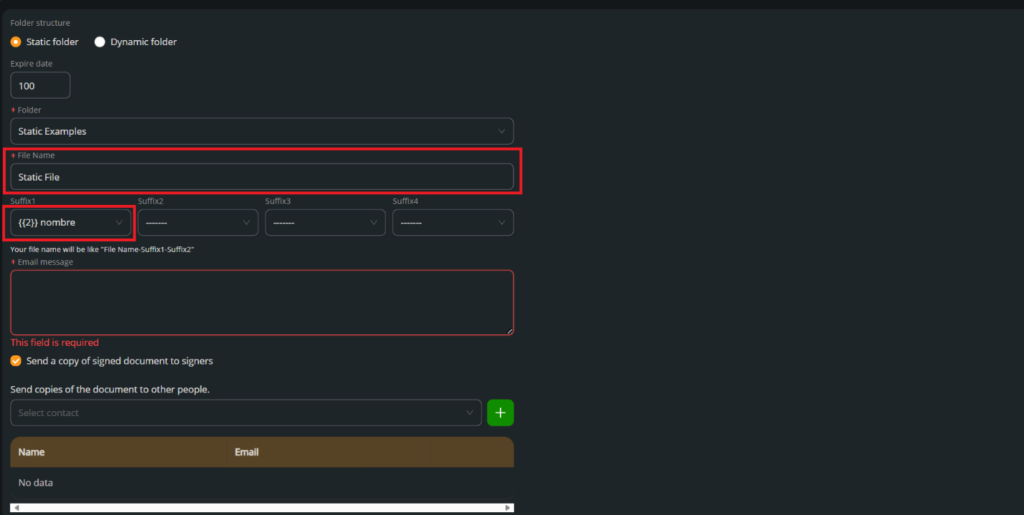
Name the document: After we choose the folder where we are going to save our documents, we need to set the configuration on how to name the documents in the workflow. For this example, we name at first Static file to the documents, followed by the suffix that we want (only the available names on the fields that we put in the smart template), in this example as a suffix we choose the name of the signer.
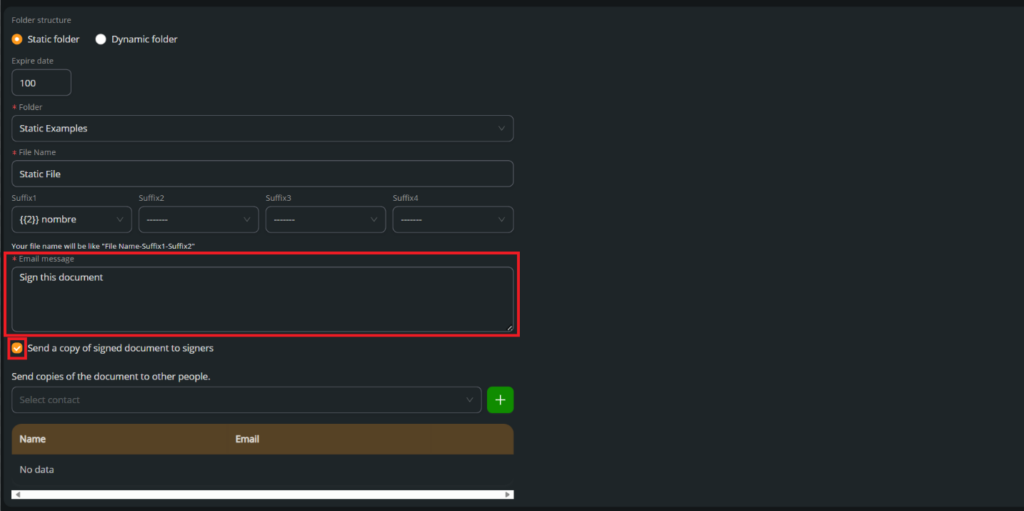
Set the message: At the end, you must write the email message that will appear on the email of the respective signer of the document. In this case we put “Sign the document”.
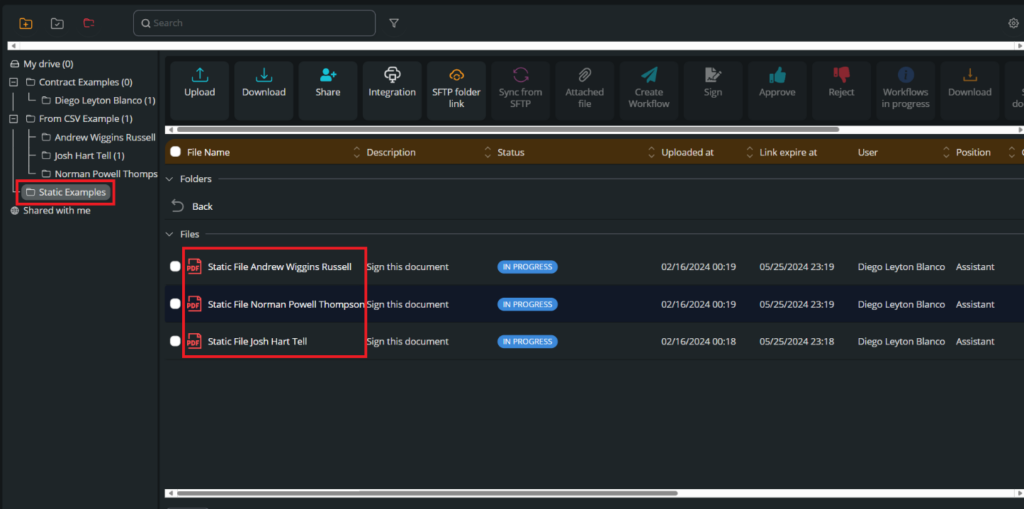
Verify your settings: After we create the workflow for the document, we can see the result of your configurations, we verified the folder name before, but now you can see the file name that we used in the past steps. We put Static file as a field name, but now we can see the names of the signers, so we confirm that the suffix is working. And all the documents that we are signing will be saved just in the mother field called Static Examples.
Dynamic folder #
These folders are generated based on the criteria defined by the user, such as the name of the mother folder and the name of the document saved within it, just like a static folder. But now each document is placed in a subfolder within the mother folder, following the name defined by the user.
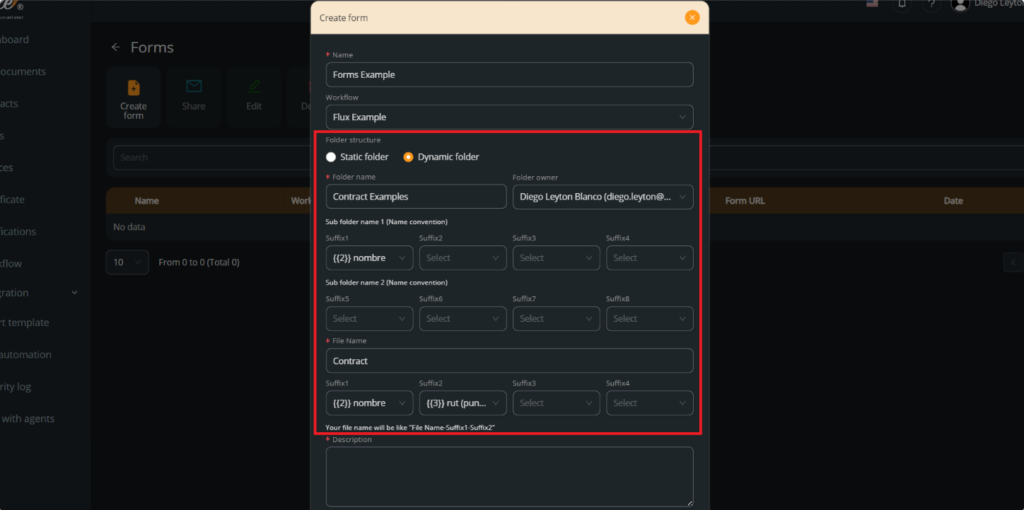
Create the mother and subfolder: For this example, we will use the forms on the Smart template. At first, we choose that we want a dynamic folder. We create the name of the mother folder (just like the static folder), in this case we called “Contract Examples”, now you need to name the subfolder using fields that we put in our templates as a suffix, for this case we use the name of the signer. An just like the static folder, we must name our file. For this example, we called “Contract” and the name and RUT(ID) as suffixes.
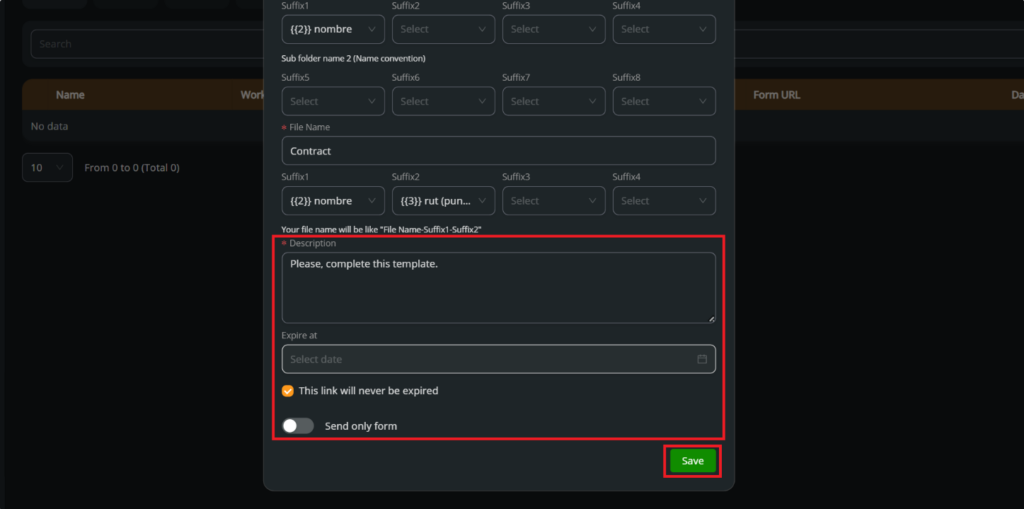
Set the message: At the end, you must write the email message that will appear on the email of the respective signer of the document. In this case we put “Please, complete this template”.
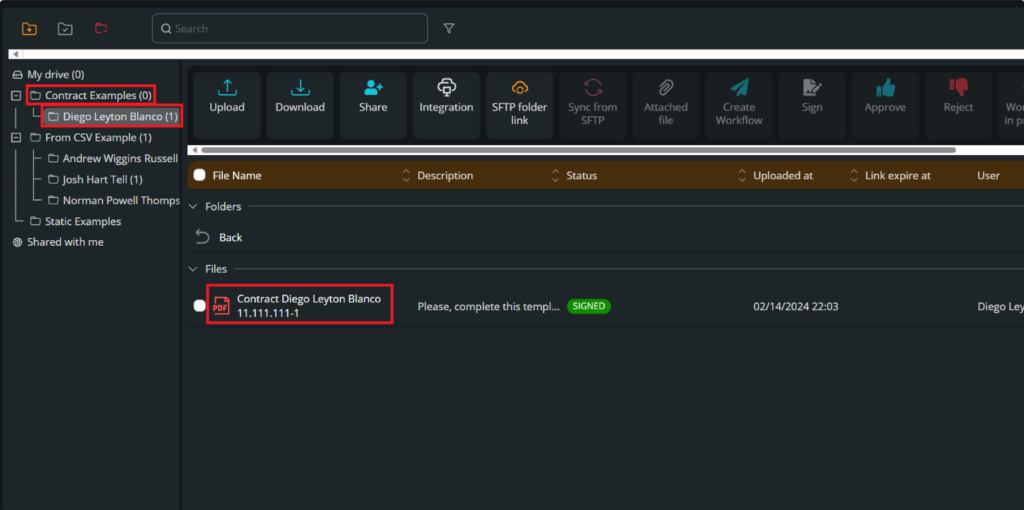
Verify your settings: After you create the workflow for the document, you can see the result of your configurations, we verify that the mother name is Contract Examples, the subfolder is the name of the signer and the folder name is the name and RUT/ID suffixes after the name(“Contract”) that we used to name our respective document.
After showing you this differences, you are now capable of choosing whatever option that you like he most, save your documents in a static folder or save your documents in a dynamic folder.


