- Setting up the file name automation
- Creating a target folder with conditional logic
- Document naming and suffix setup
- Select the file template for automation
- Configure the signature workflow
- Adding optional signers to the workflow
- Connecting the signature flow to the ADP self-service portal
- Setting up optional email notifications
- Finalizing and saving the file name automation configuration
- Syncing files from SFTP
- Folder and file created after SFTP sync
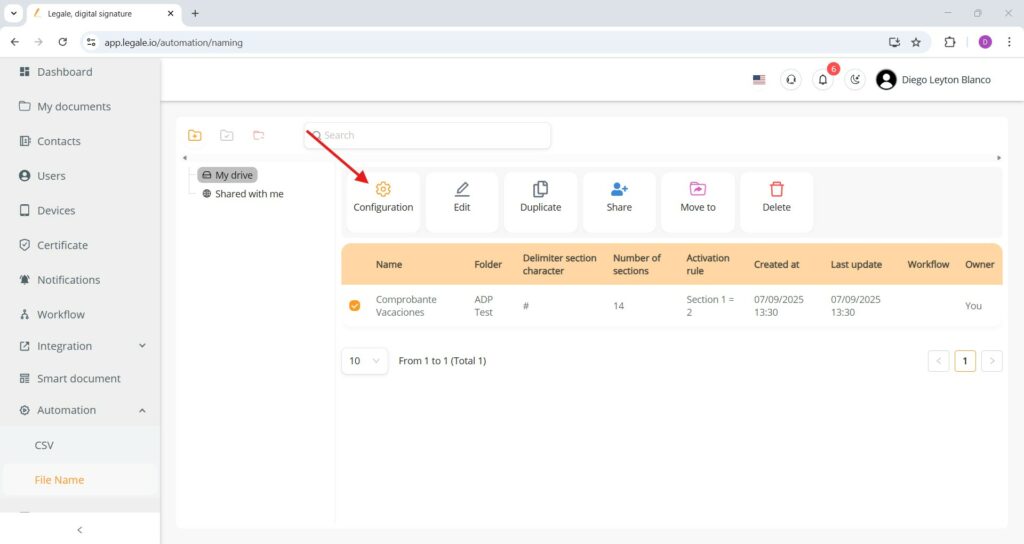
Setting up the file name automation #
Once the automation has been created—for instance, “Comprobante Vacaciones”, you must configure how the automation will behave by selecting it from the list and clicking the “Configuration” button.
Creating a target folder with conditional logic #
In the “Folder structure” tab, you define where and how documents will be sorted once the automation is triggered. In this example, the documents will be stored inside a folder named “Vacaciones” within “My drive.” The folder name is fixed, and the condition for it to be created is based on the file name structure: if Section 1 equals 2—which corresponds to the document type “Comprobante de Vacaciones”—then the automation creates the folder.

Document naming and suffix setup #
In the “Document management” tab, you define how each file generated through the automation will be named. The base file name is set as Comprobante de vacaciones, and it’s followed by suffixes that dynamically incorporate details extracted from the file. In this case, Section 10 (representing the employee’s name) and Section 3 (the ID or RUT) are used to personalize the document title. The email message is preset as “Please sign,” and there’s also an option enabled to automatically send a signed copy to the signer.

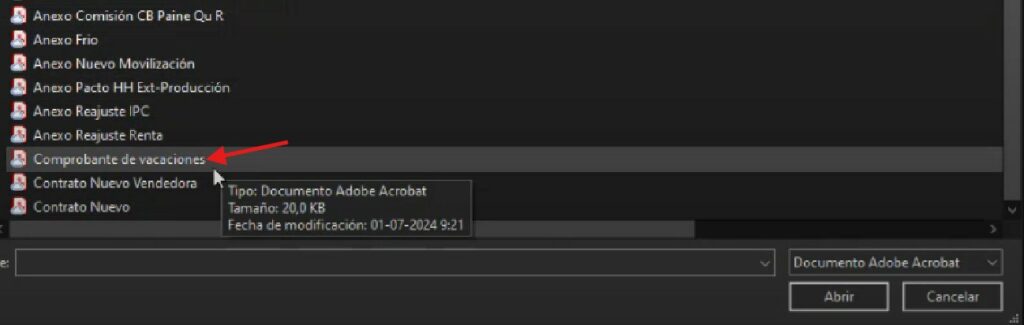
Select the file template for automation #
Before executing the automation, it’s essential to have the document template ready—in this case, a Comprobante de vacaciones.
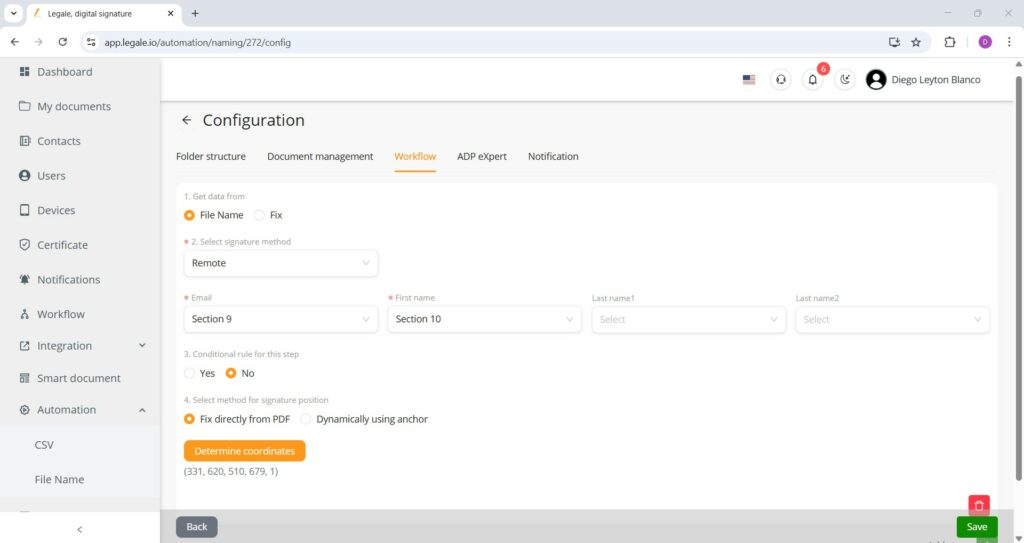
Configure the signature workflow #
In the workflow configuration step, you must define how the platform extracts data for the signing process. Select “File Name” as the data source, then choose “Remote” as the signature method. The signer’s email will be extracted from Section 9, and the first name from Section 10. The signature box must be manually positioned by determining specific PDF coordinates, which ensures consistent and precise placement of the signature on the document.
Adding optional signers to the workflow #
The platform allows for additional signing steps by configuring extra workflow entries. For example, a legal representative can be added as a signer using a fixed signature method such as a cloud certificate. Their email, name, and signature coordinates must be set manually to ensure proper placement.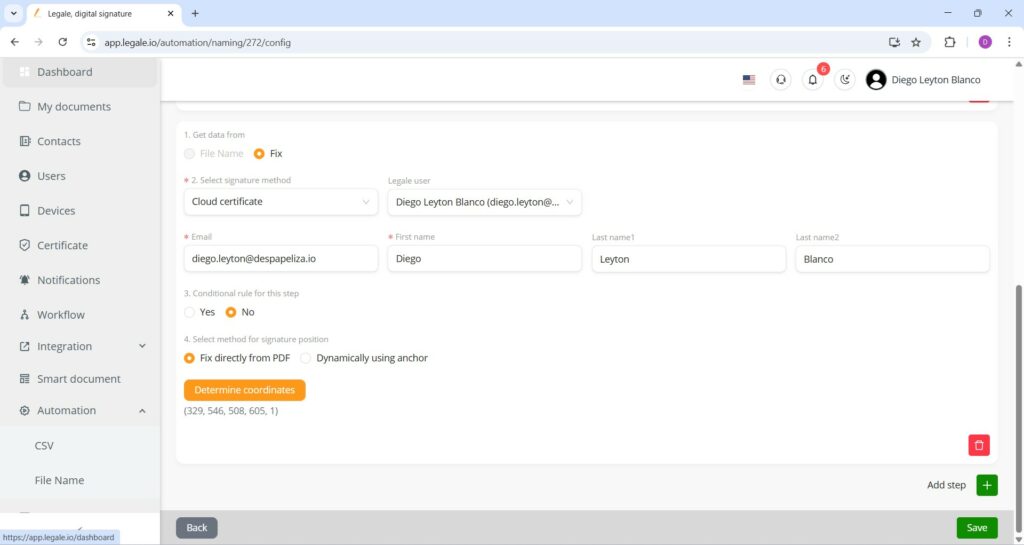
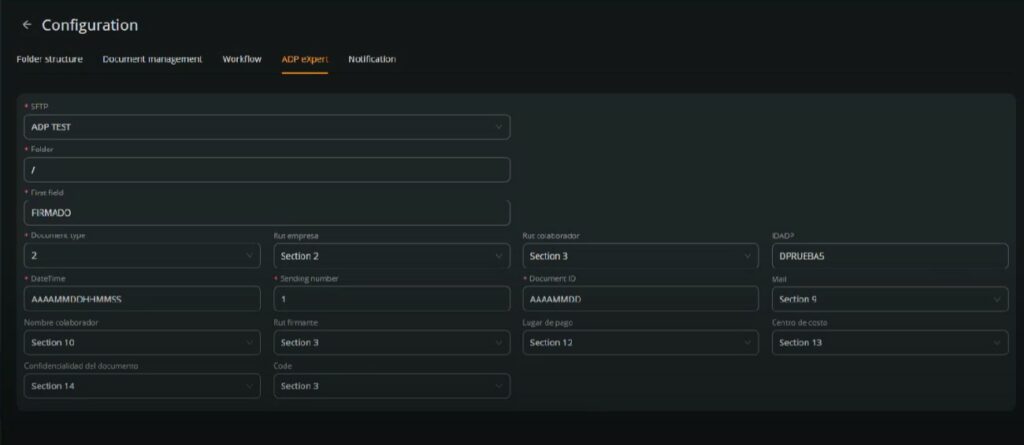
Connecting the signature flow to the ADP self-service portal #
The finals steps involve configuring the “ADP eXpert” tab, which ensures that once the signer completes the signature, the document is automatically routed to the ADP self-service portal for centralized employee access. This configuration uses the SFTP folder “ADP TEST” and maps the 14 sections to corresponding ADP fields such as document type, employee RUT, signer RUT, email, cost center, and confidentiality level.
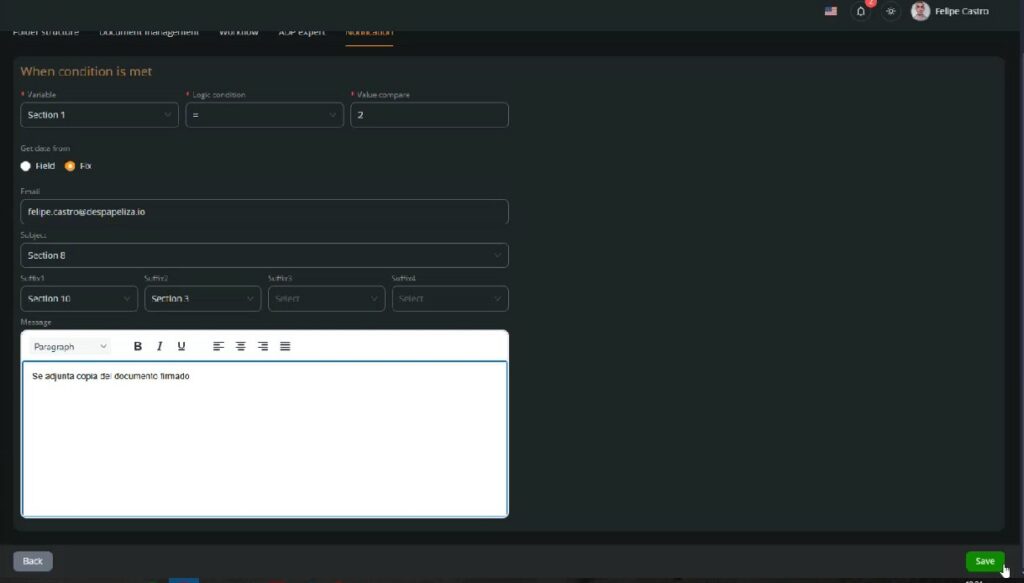
Setting up optional email notifications #
As an optional but useful feature, the “Notification” tab allows you to configure automated email alerts once a condition is met—in this case, when the document type (Section 1) equals 2, indicating a vacation slip. You can define the recipient email address, dynamic subject (linked to Section 8), and file name suffixes for better identification. The message body can include custom text, such as confirmation that the signed document is attached.
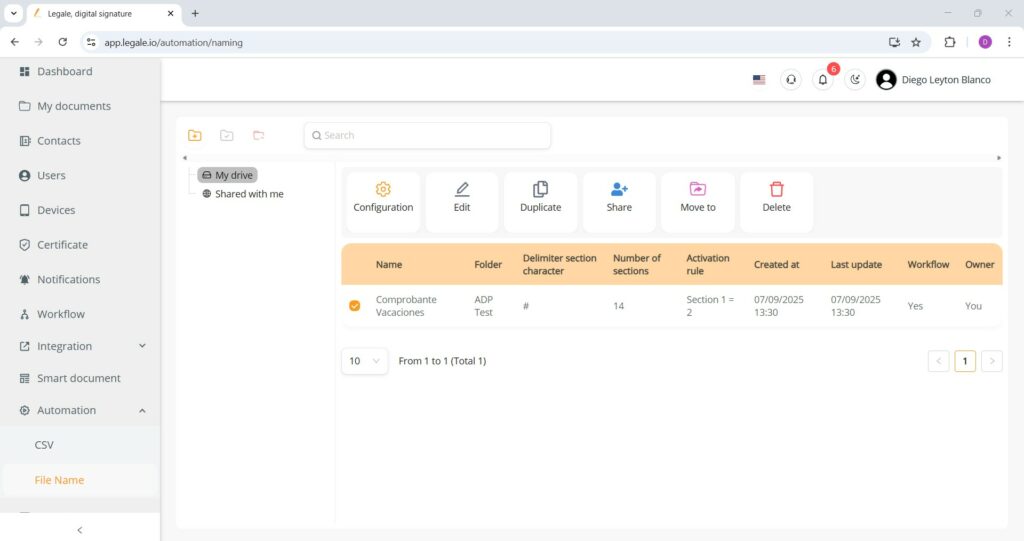
Finalizing and saving the file name automation configuration #
After setting all parameters—folder structure, document naming, signature workflow, ADP export, and optional notifications—you simply click “Save” to finalize the configuration. The configured rule will now appear listed under “File Name Automation” with its name (“Comprobante Vacaciones”), linked folder (“ADP Test”), delimiter (“#”), number of sections (14), and activation rule (Section 1 = 2). This confirms the automation is ready to activate when the defined condition is met.
Syncing files from SFTP #
Once the file is triggered, navigate to the specific sync folder inside “My Drive” (in this case, “ADP Prueba”). Once inside, click the “Sync from SFTP” button in the top menu to import documents from the linked SFTP source. After initiating the sync, refresh the page to see the newly pulled files appear.

Folder and file created after SFTP sync #
Once the document is pulled from the SFTP source and the automation conditions are met, a new folder (e.g. “Vacaciones”) is automatically created within “My Drive,” reflecting the naming rule defined in the configuration. Inside this folder, the file appears with the exact name and suffixes specified earlier—for instance, the document titled “Comprobante de vacaciones Felipe Castro 18059372-1” shows both the document type and signer identity extracted from the defined sections. The status of the document (“IN PROGRESS”) confirms that the signing workflow has been successfully initiated.


