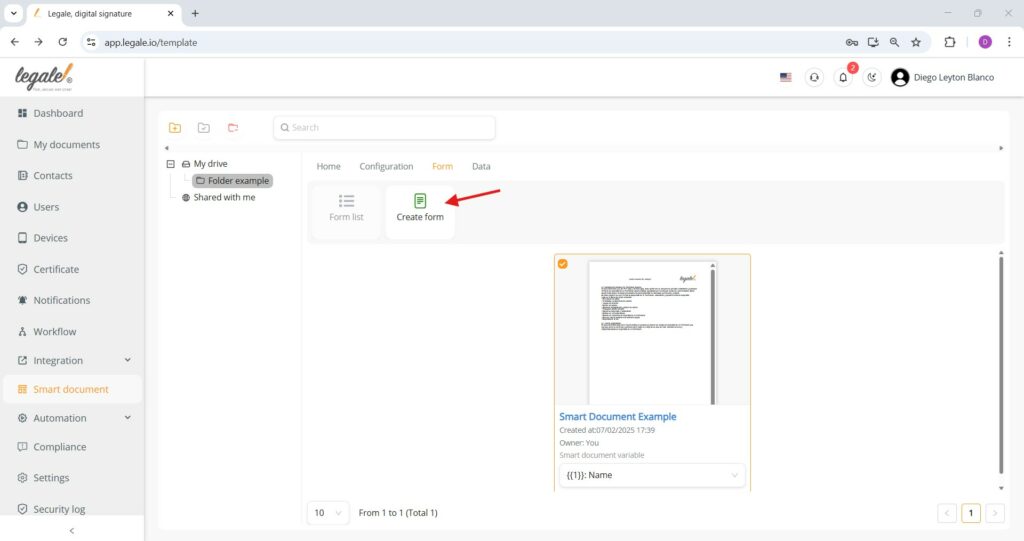
- Create a form for a Smart Document
- Access form management
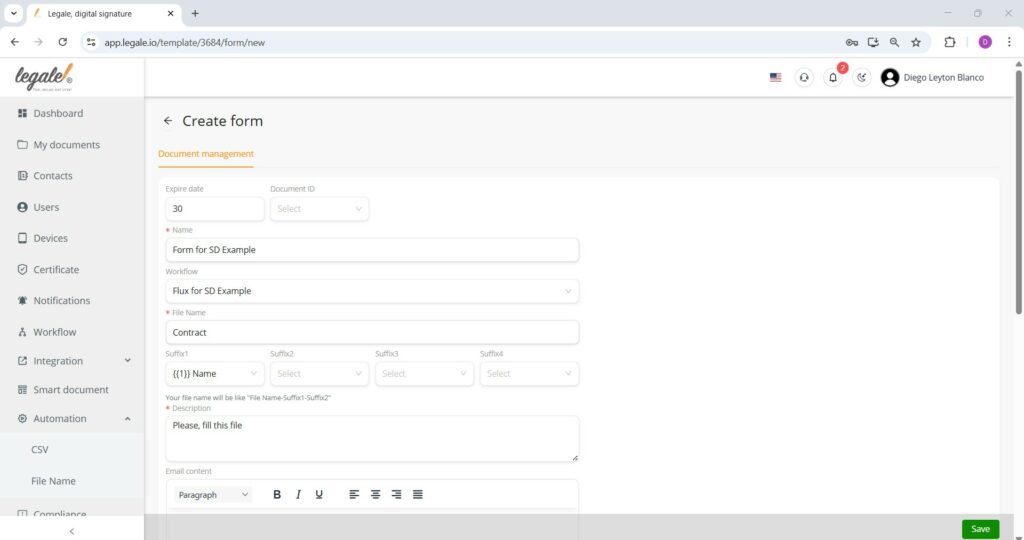
- Create form – Document management
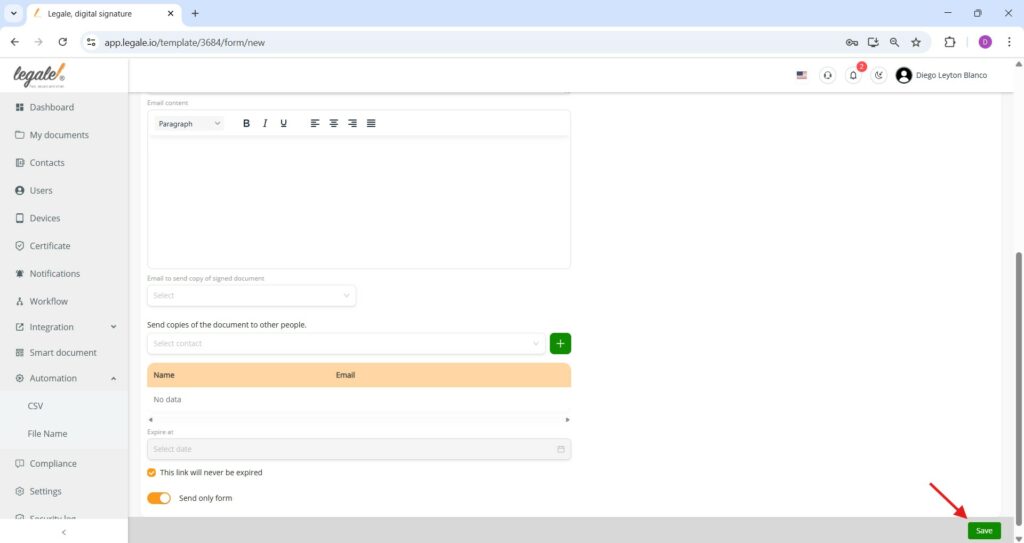
- Create form – Email configuration and access control
- Create form – Folder structure configuration
- Create form – Finalizing folder structure
- Access form list
- Form list overview
- Filling the Smart Document via form URL
- Sign notification email
- Attached file confirmation
- Variable substitution verification
- Smart Document signed and saved with dynamic naming
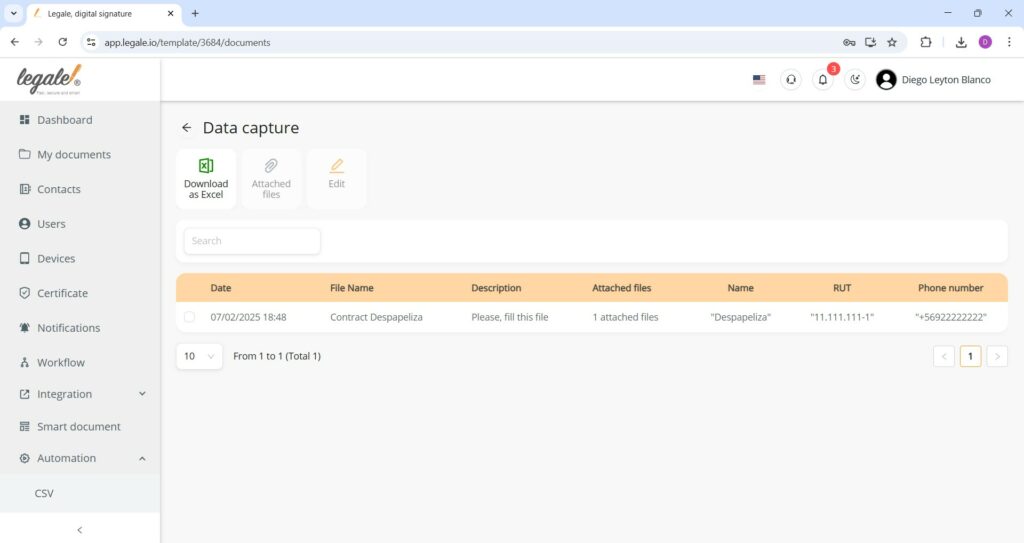
- Captured data overview
- Captured data details
Create a form for a Smart Document #
In the Form tab of the Smart Document section, clicking the Create form button allows you to generate a new form associated with the selected Smart Document.
Access form management #
In the Forms section of a Smart Document, you can manage existing forms or create new ones using the Create form button. This view also shows a table listing form name, associated workflow, file name, form URL, and creation date once forms have been added.

Create form – Document management #
To create a form, the Smart Document must already have an associated signature workflow Prepare workflow for your Smart Document
Configure the form by entering its name, selecting the corresponding workflow, and defining the file name, which can include suffixes using variables inserted in the Smart Document (e.g., {{1}} Name), allowing each generated document to be personalized—additional fields like expiration date and description must be completed before saving.
Create form – Email configuration and access control #
In this final section of form creation, you can customize the email content that will accompany the form, optionally define recipients to receive a copy of the signed document, and designate additional contacts to receive a copy of the completed file—plus, you can configure the expiration date of the form link or activate the option for it to never expire, and choose whether to send only the form content without the attached document before clicking Save to finalize.
Create form – Folder structure configuration #
This step allows selecting a destination folder where the signed documents will be saved, defining whether the folder name will be fixed, dynamically generated using smart document variables, or a combination of both Difference between static and dynamic folder
Also, you can specify suffixes to construct the folder name accordingly.
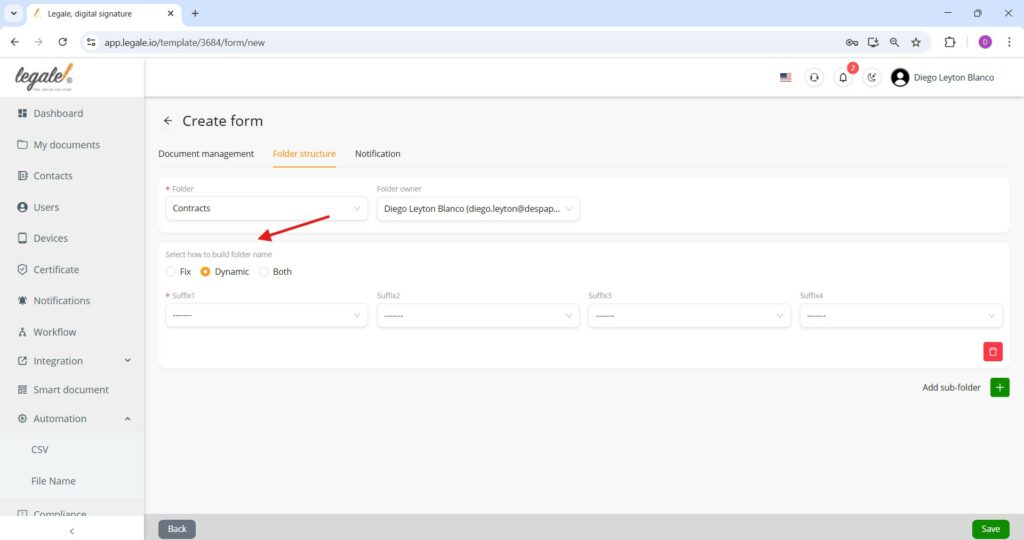
Create form – Finalizing folder structure #
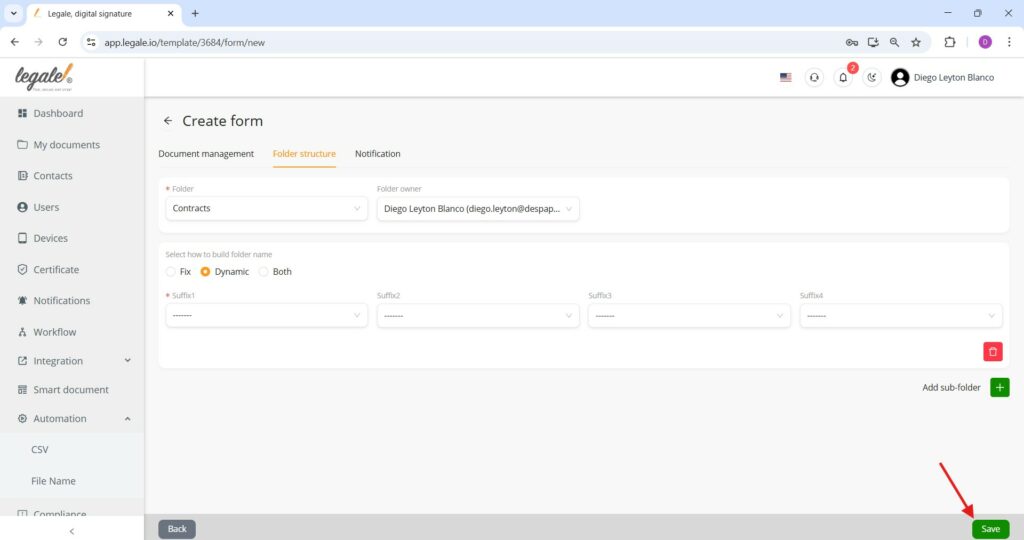
The folder where the signed document will be stored is confirmed, the folder owner is selected, the method for generating the folder name is defined—whether fixed, dynamic, or a combination—and suffixes can be applied using smart document variables before saving the configuration.
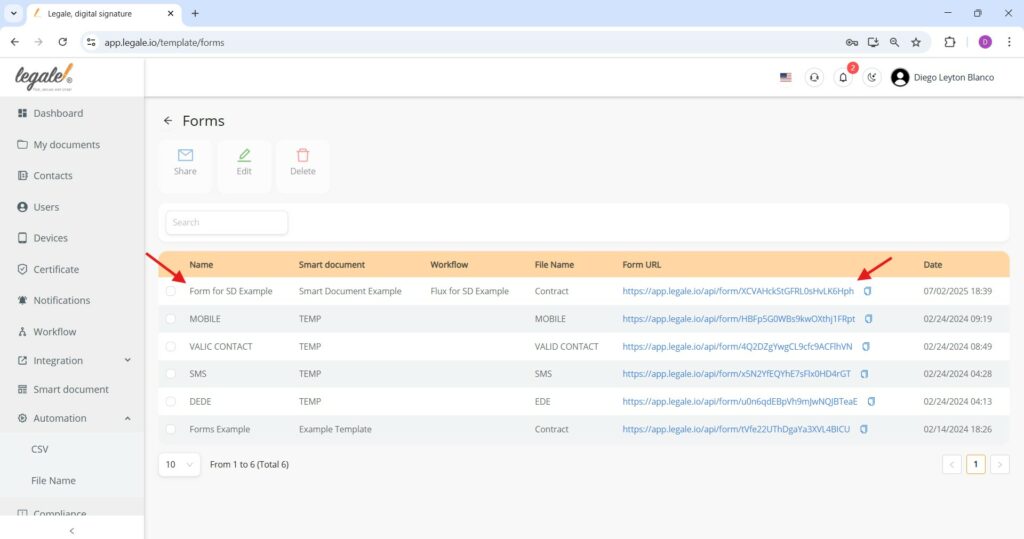
Access form list #
To access the list of forms associated with a smart document, select the smart document from the drive, go to the Form tab, and click the Form list button.

Form list overview #
The form list displays all created forms along with their associated smart document, workflow, file name, form URL (which can be copied using the icon), and creation date. Each form can be selected for sharing, editing, or deletion from the top menu.
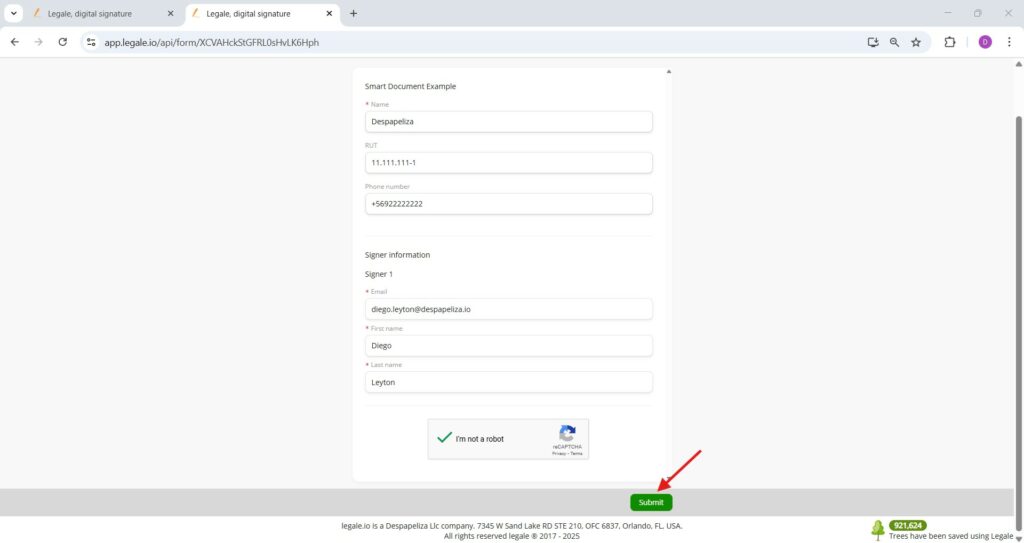
Filling the Smart Document via form URL #
By opening the URL of the created form, the user can fill out the Smart Document using the previously configured variables such as {{1}}, {{2}}, and {{3}}, entering the required data for each, including signer details, and then submitting the form to initiate the signature process.
Sign notification email #
Once the form is submitted and the Smart Document is generated, the assigned signer receives a notification email with a link labeled “View and Sign”, allowing direct access to the document for signature.
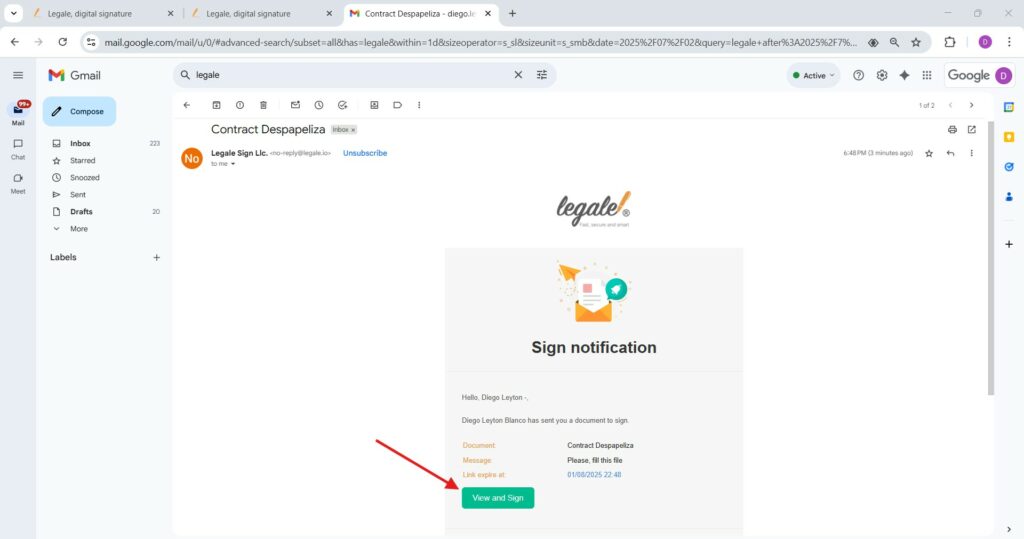
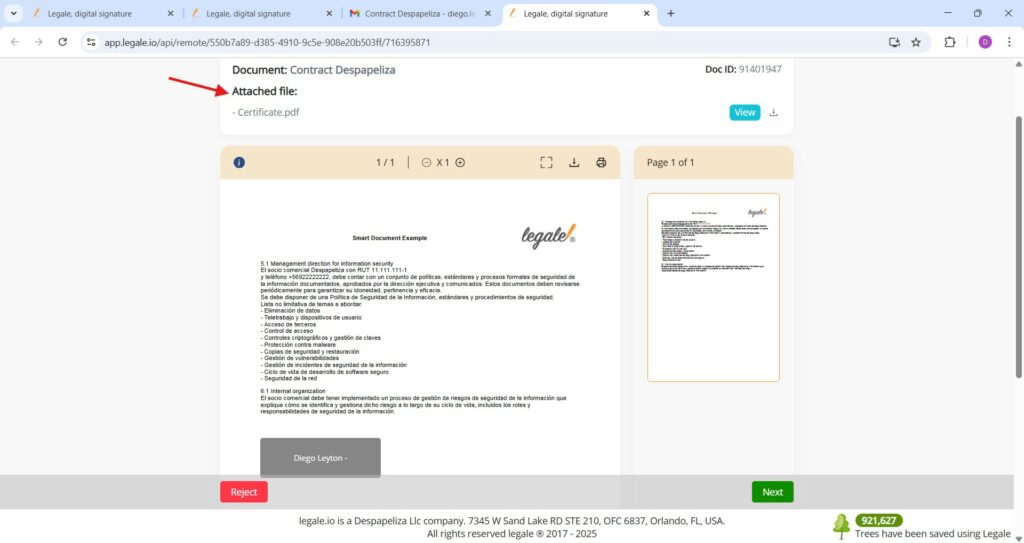
Attached file confirmation #
We can confirm that the attached files feature works correctly because the document view displays a section labeled “Attached file:” showing the file name (e.g., Certificate.pdf), verifying that it has been successfully linked to the Smart Document.
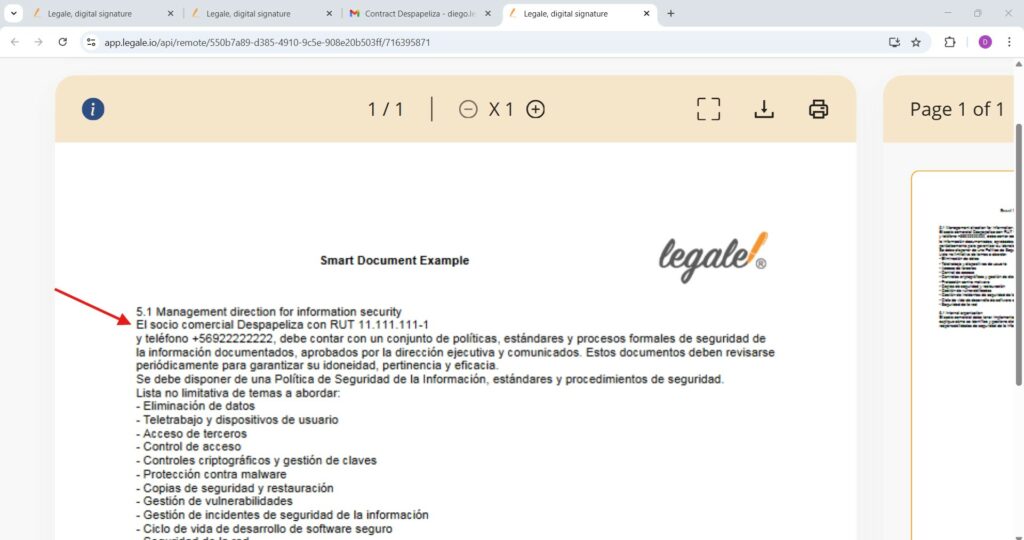
Variable substitution verification #
We confirm that the values entered through the form have correctly replaced the predefined variables in the Smart Document, as shown by the inserted data (e.g., “Despapeliza”, RUT “11.111.111-1”, and phone number “+56922222222”) matching the placeholders {{1}}, {{2}}, and {{3}} configured during document creation.
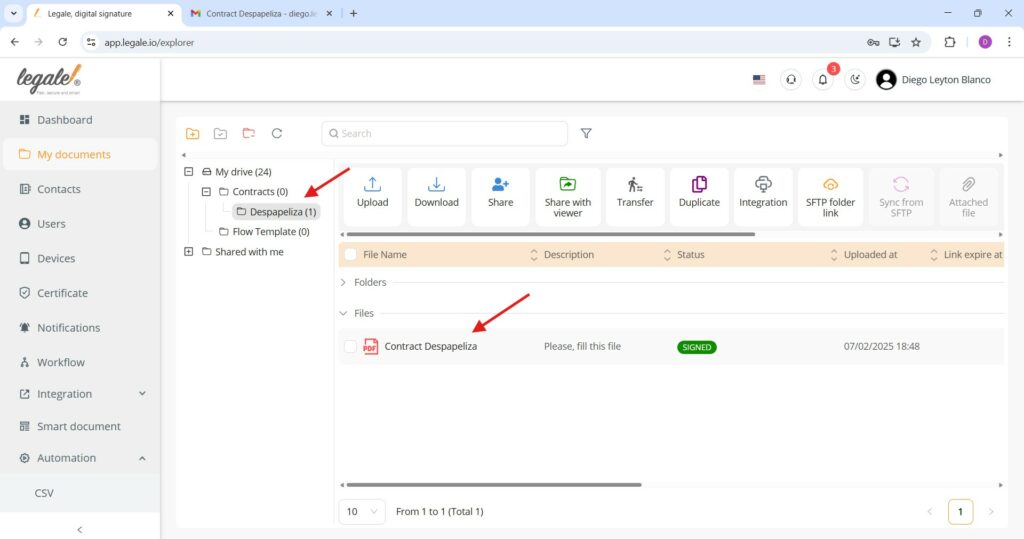
Smart Document signed and saved with dynamic naming #
After the Smart Document is signed, both the document and its containing folder are automatically created and named based on the dynamic variables previously configured during the form setup. In this example, the document “Contract Despapeliza” is saved inside the dynamically generated folder “Despapeliza”, confirming that the system uses the user-provided input values ({{1}} Name) as naming suffixes. The document also shows a “SIGNED” status, indicating successful signature completion.
Captured data overview #
By accessing the Data capture option under the Data tab of a selected Smart Document, you can view the data entries that have been submitted through its associated forms. This feature allows you to monitor and retrieve the filled values (from variables like {{1}}, {{2}}, etc.) submitted by users as they complete the document, providing real-time visibility into the information being collected.

Captured data details #
Within the Data Capture view, the system displays a summary of all completed forms linked to the Smart Document, showing detailed values entered for each configured variable (e.g. Name, RUT, Phone number). The table includes the date of completion, the final file name, any message or description added, the number of attached files, and the values provided by the signer. Additionally, the data can be downloaded in Excel format for further processing or archival purposes.