The method of saving documents is crucial to keeping your information organized and accessible. Choosing between a static or dynamic folder determines how your signed documents will be structured and stored on our platform, which will affect the ease of access and management of them in the future.
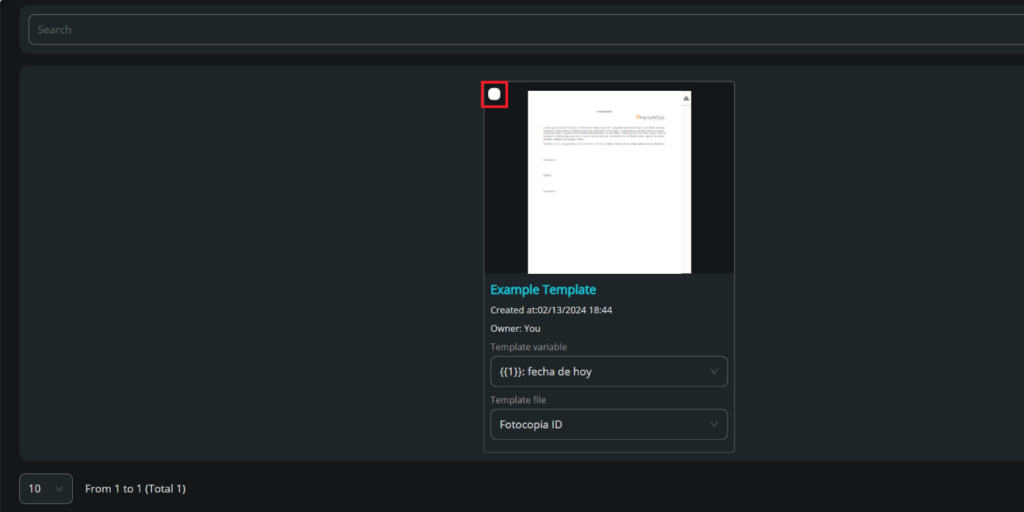
Select the template: The first step is to select the template from “Smart template“.
You can see how to create a template in Creating a basic template(*) – legale.io and how to add fields in Adding fields to your template(*) – legale.io
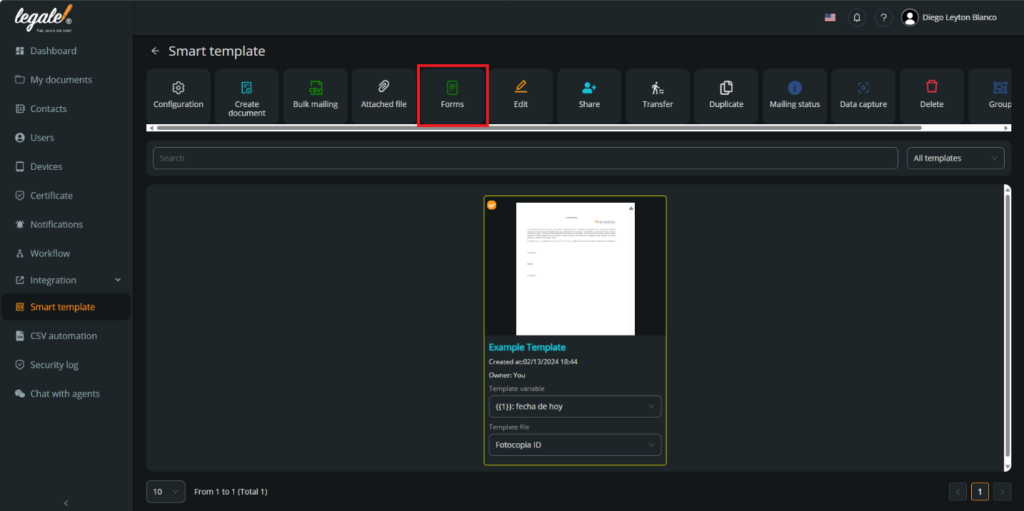
Select forms: Press “Forms” if you want to fill in the template using the forms method.
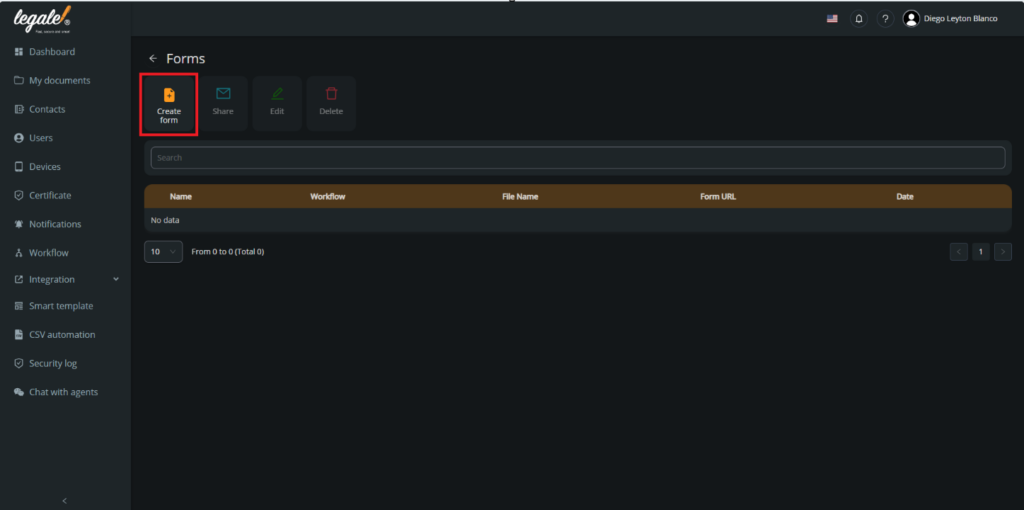
Create the form: Press “Create forms” to start the process of the creation of the form.
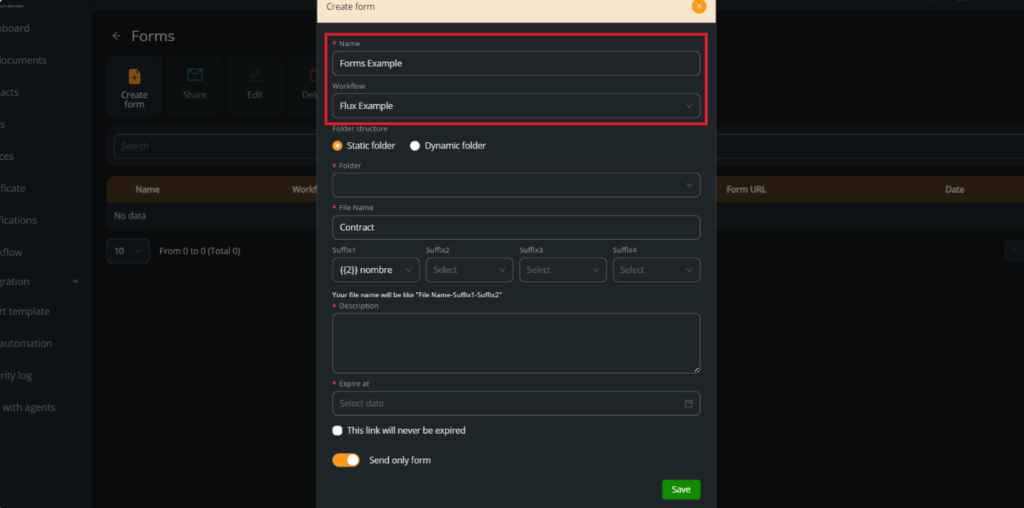
Form settings: You need to put a name to the form. In this case it will be “Forms Example” and select a workflow that you have created before. We choose “Flux Example”
You can see how to create a workflow in Creating a new workflow(*) – legale.io
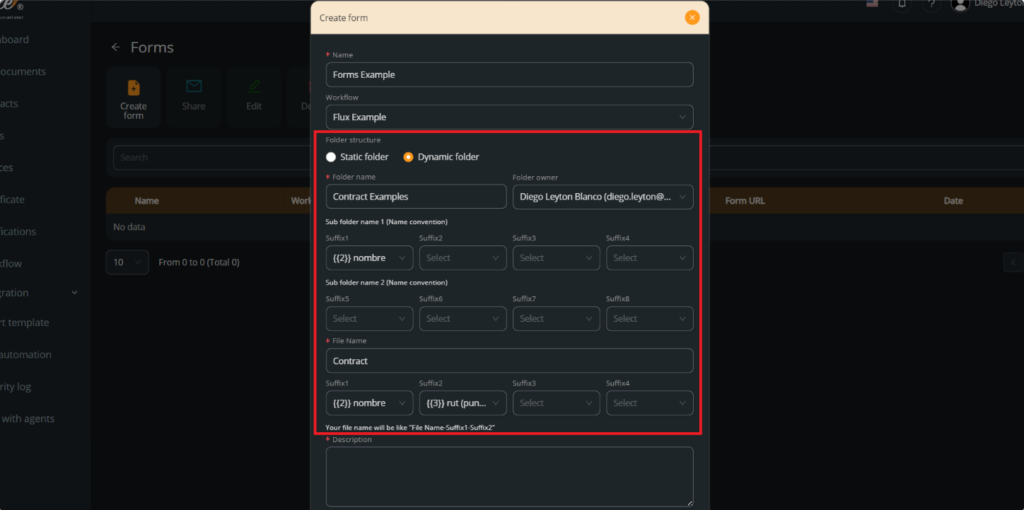
Choose the folder: You must choose between a static or dynamic folder where the signed document will be saved. In this case, we choose “Dynamic folder” and the name of the mother folder it will be “Contract Examples” and the subfolder it will be the {{2}} variable field. The single file name it will be named “Contact“and {{2}} and {{3}} variable fields as a suffixes.
You can see the difference between static and dynamic folder in Difference between static and dynamic folder(*) – legale.io
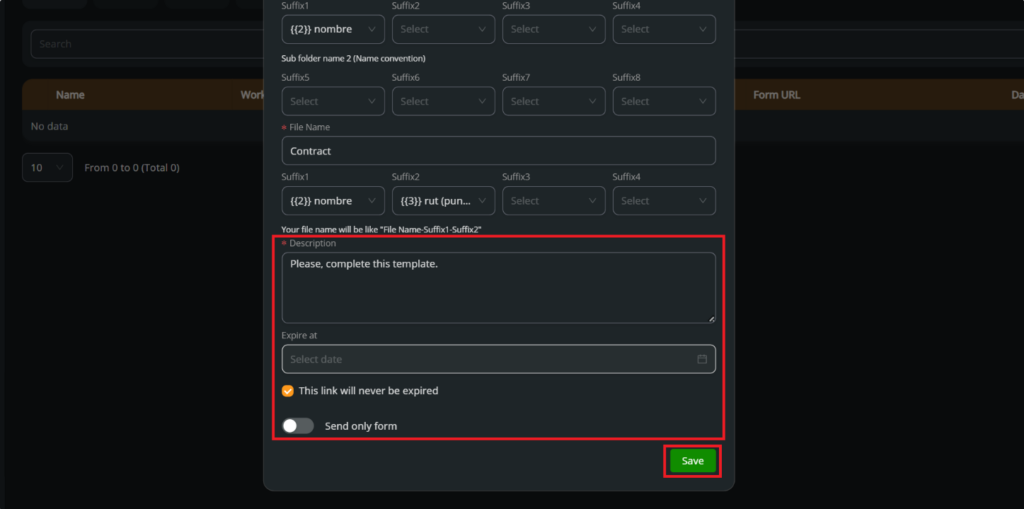
Finish the settings: In the description sections, you need to put the message that will appear in the mail signing invitation. Also choose if you want to put a expiring date or if the link will never expired. The last setting is if you want to send only the form, if you activate that option, the signer will see only the variable fields to complete. If you do not active it, the signer will see the full document. Press “Save” to confirm the settings.
